Category Archives: kids

Guitar pillowcase, version 2

To ease back into a sewing groove for the new year, I made a pillowcase for our son, Ross.

A couple years ago, he brought out the guitar pillowcase I made for him when he was a high school junior to show that it was cratering fast, hinting that a replacement would be nice.

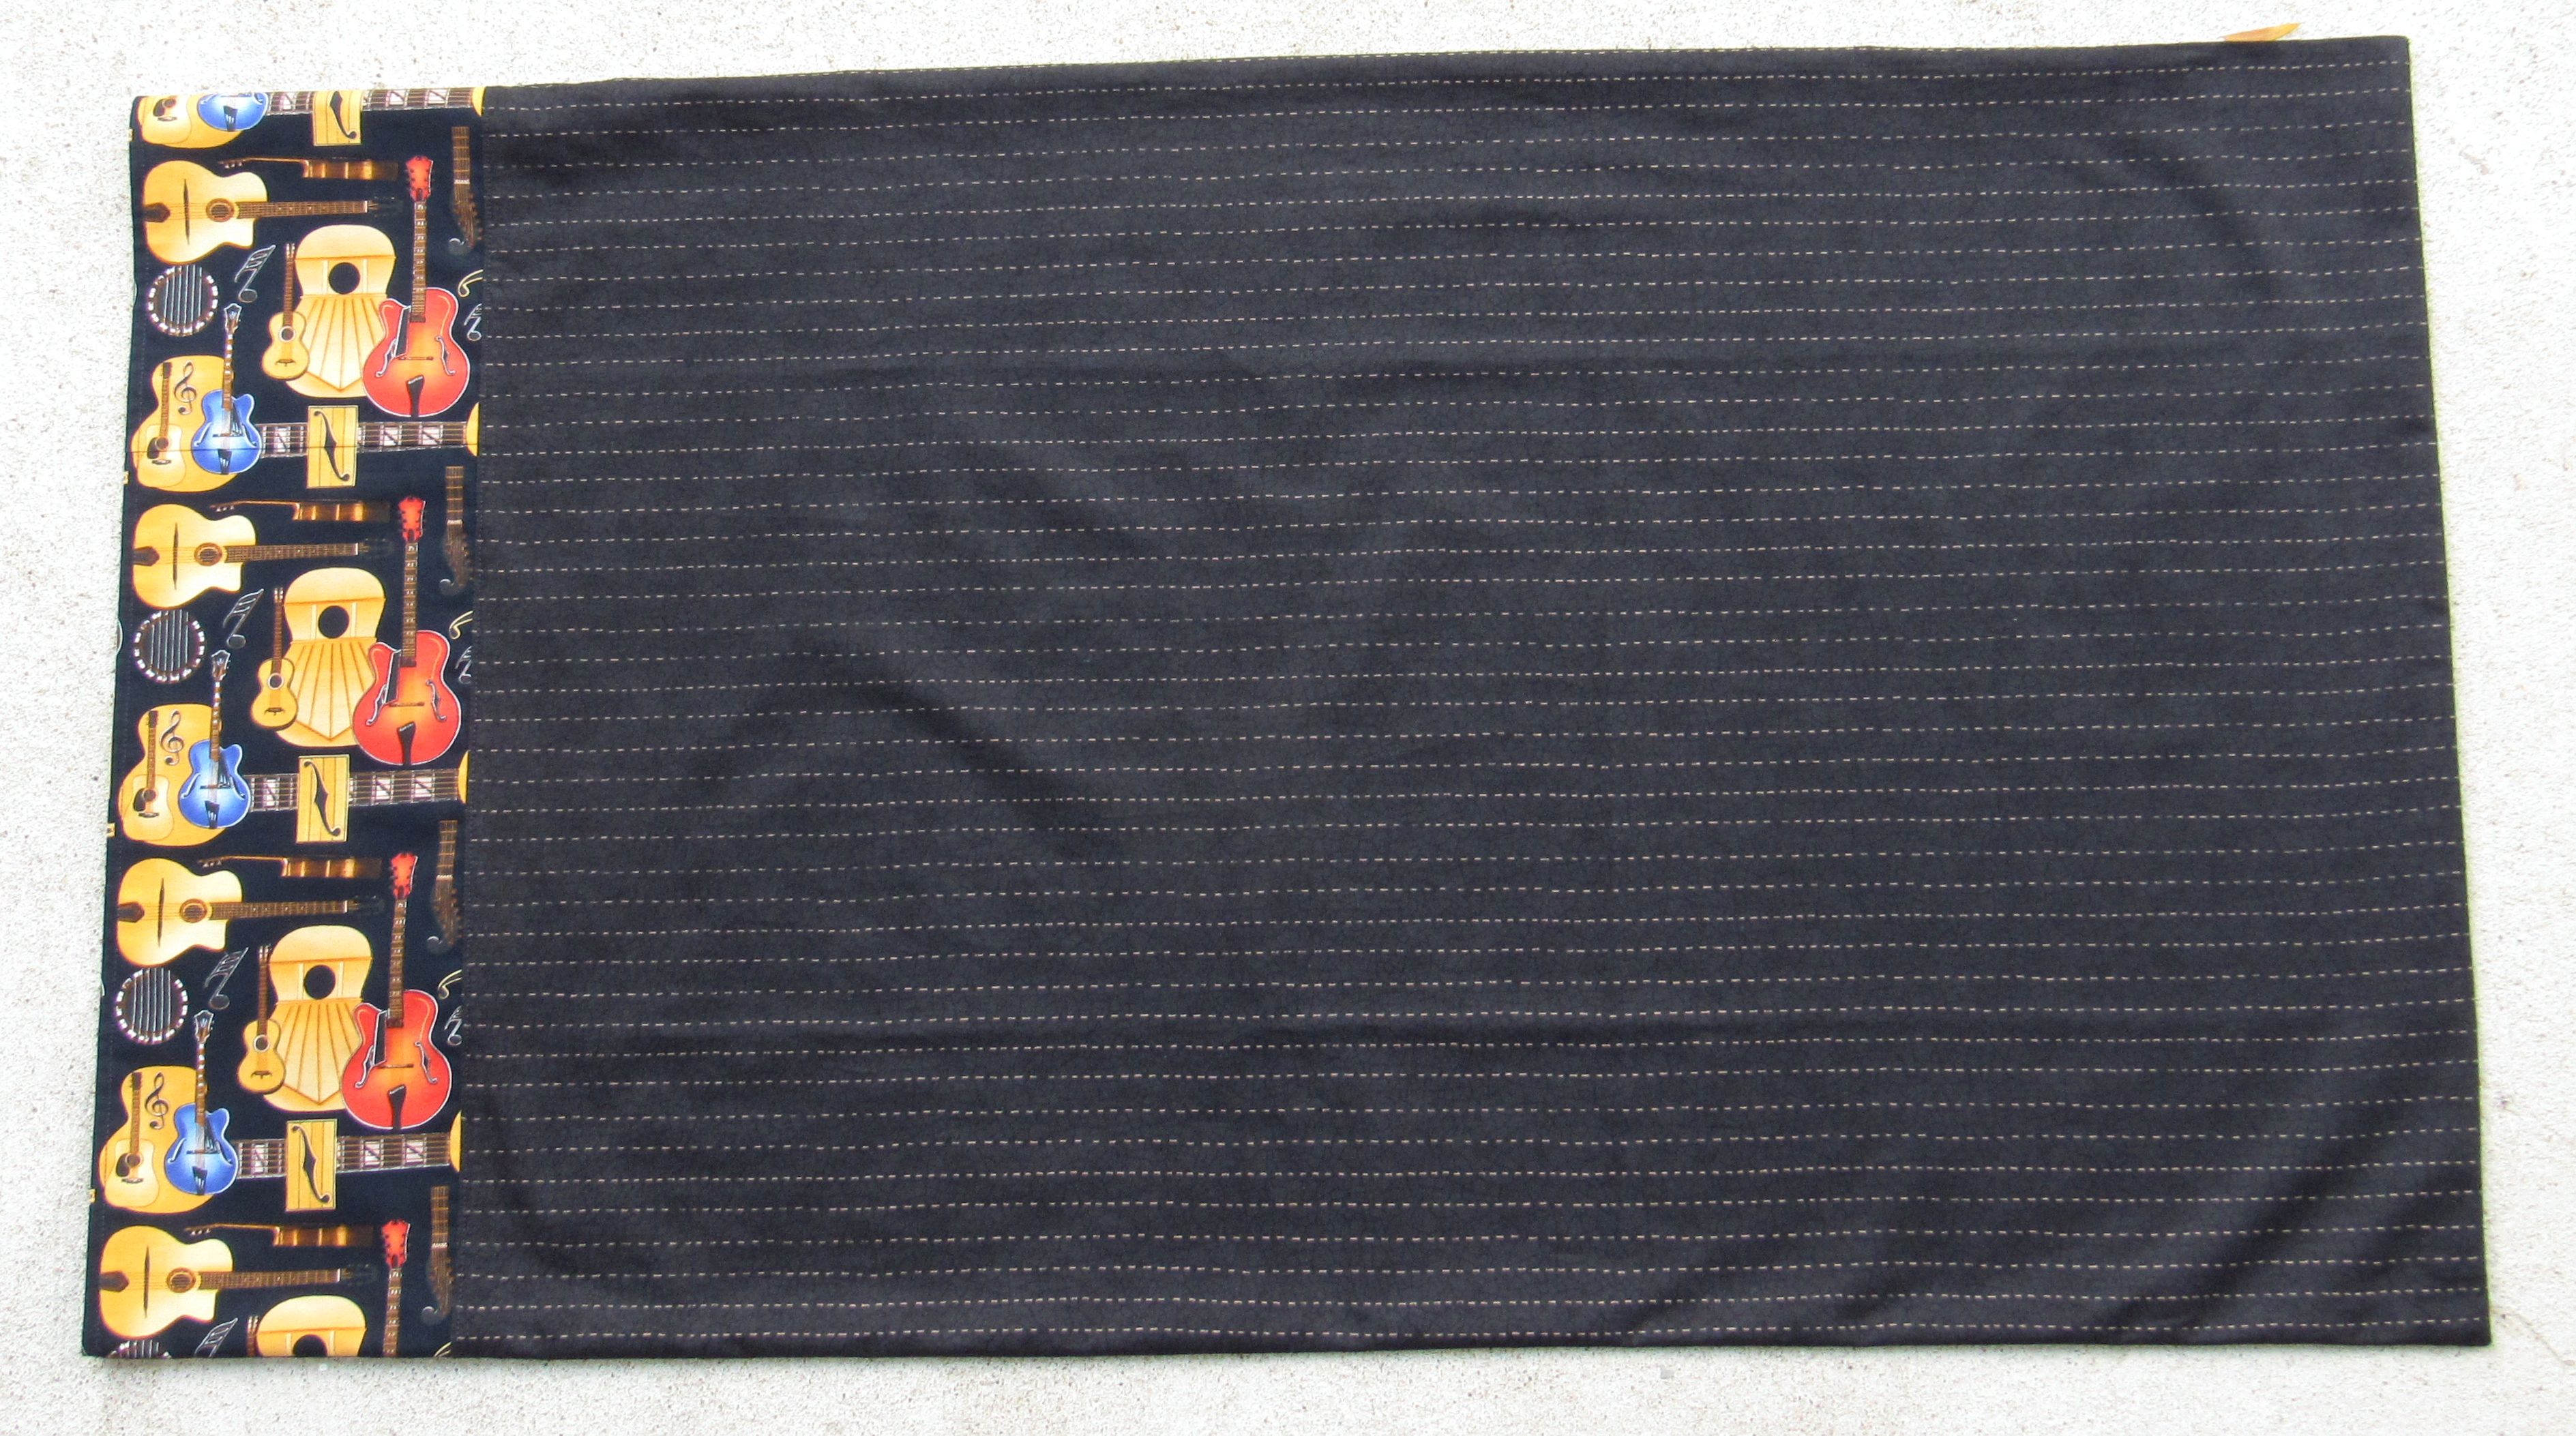
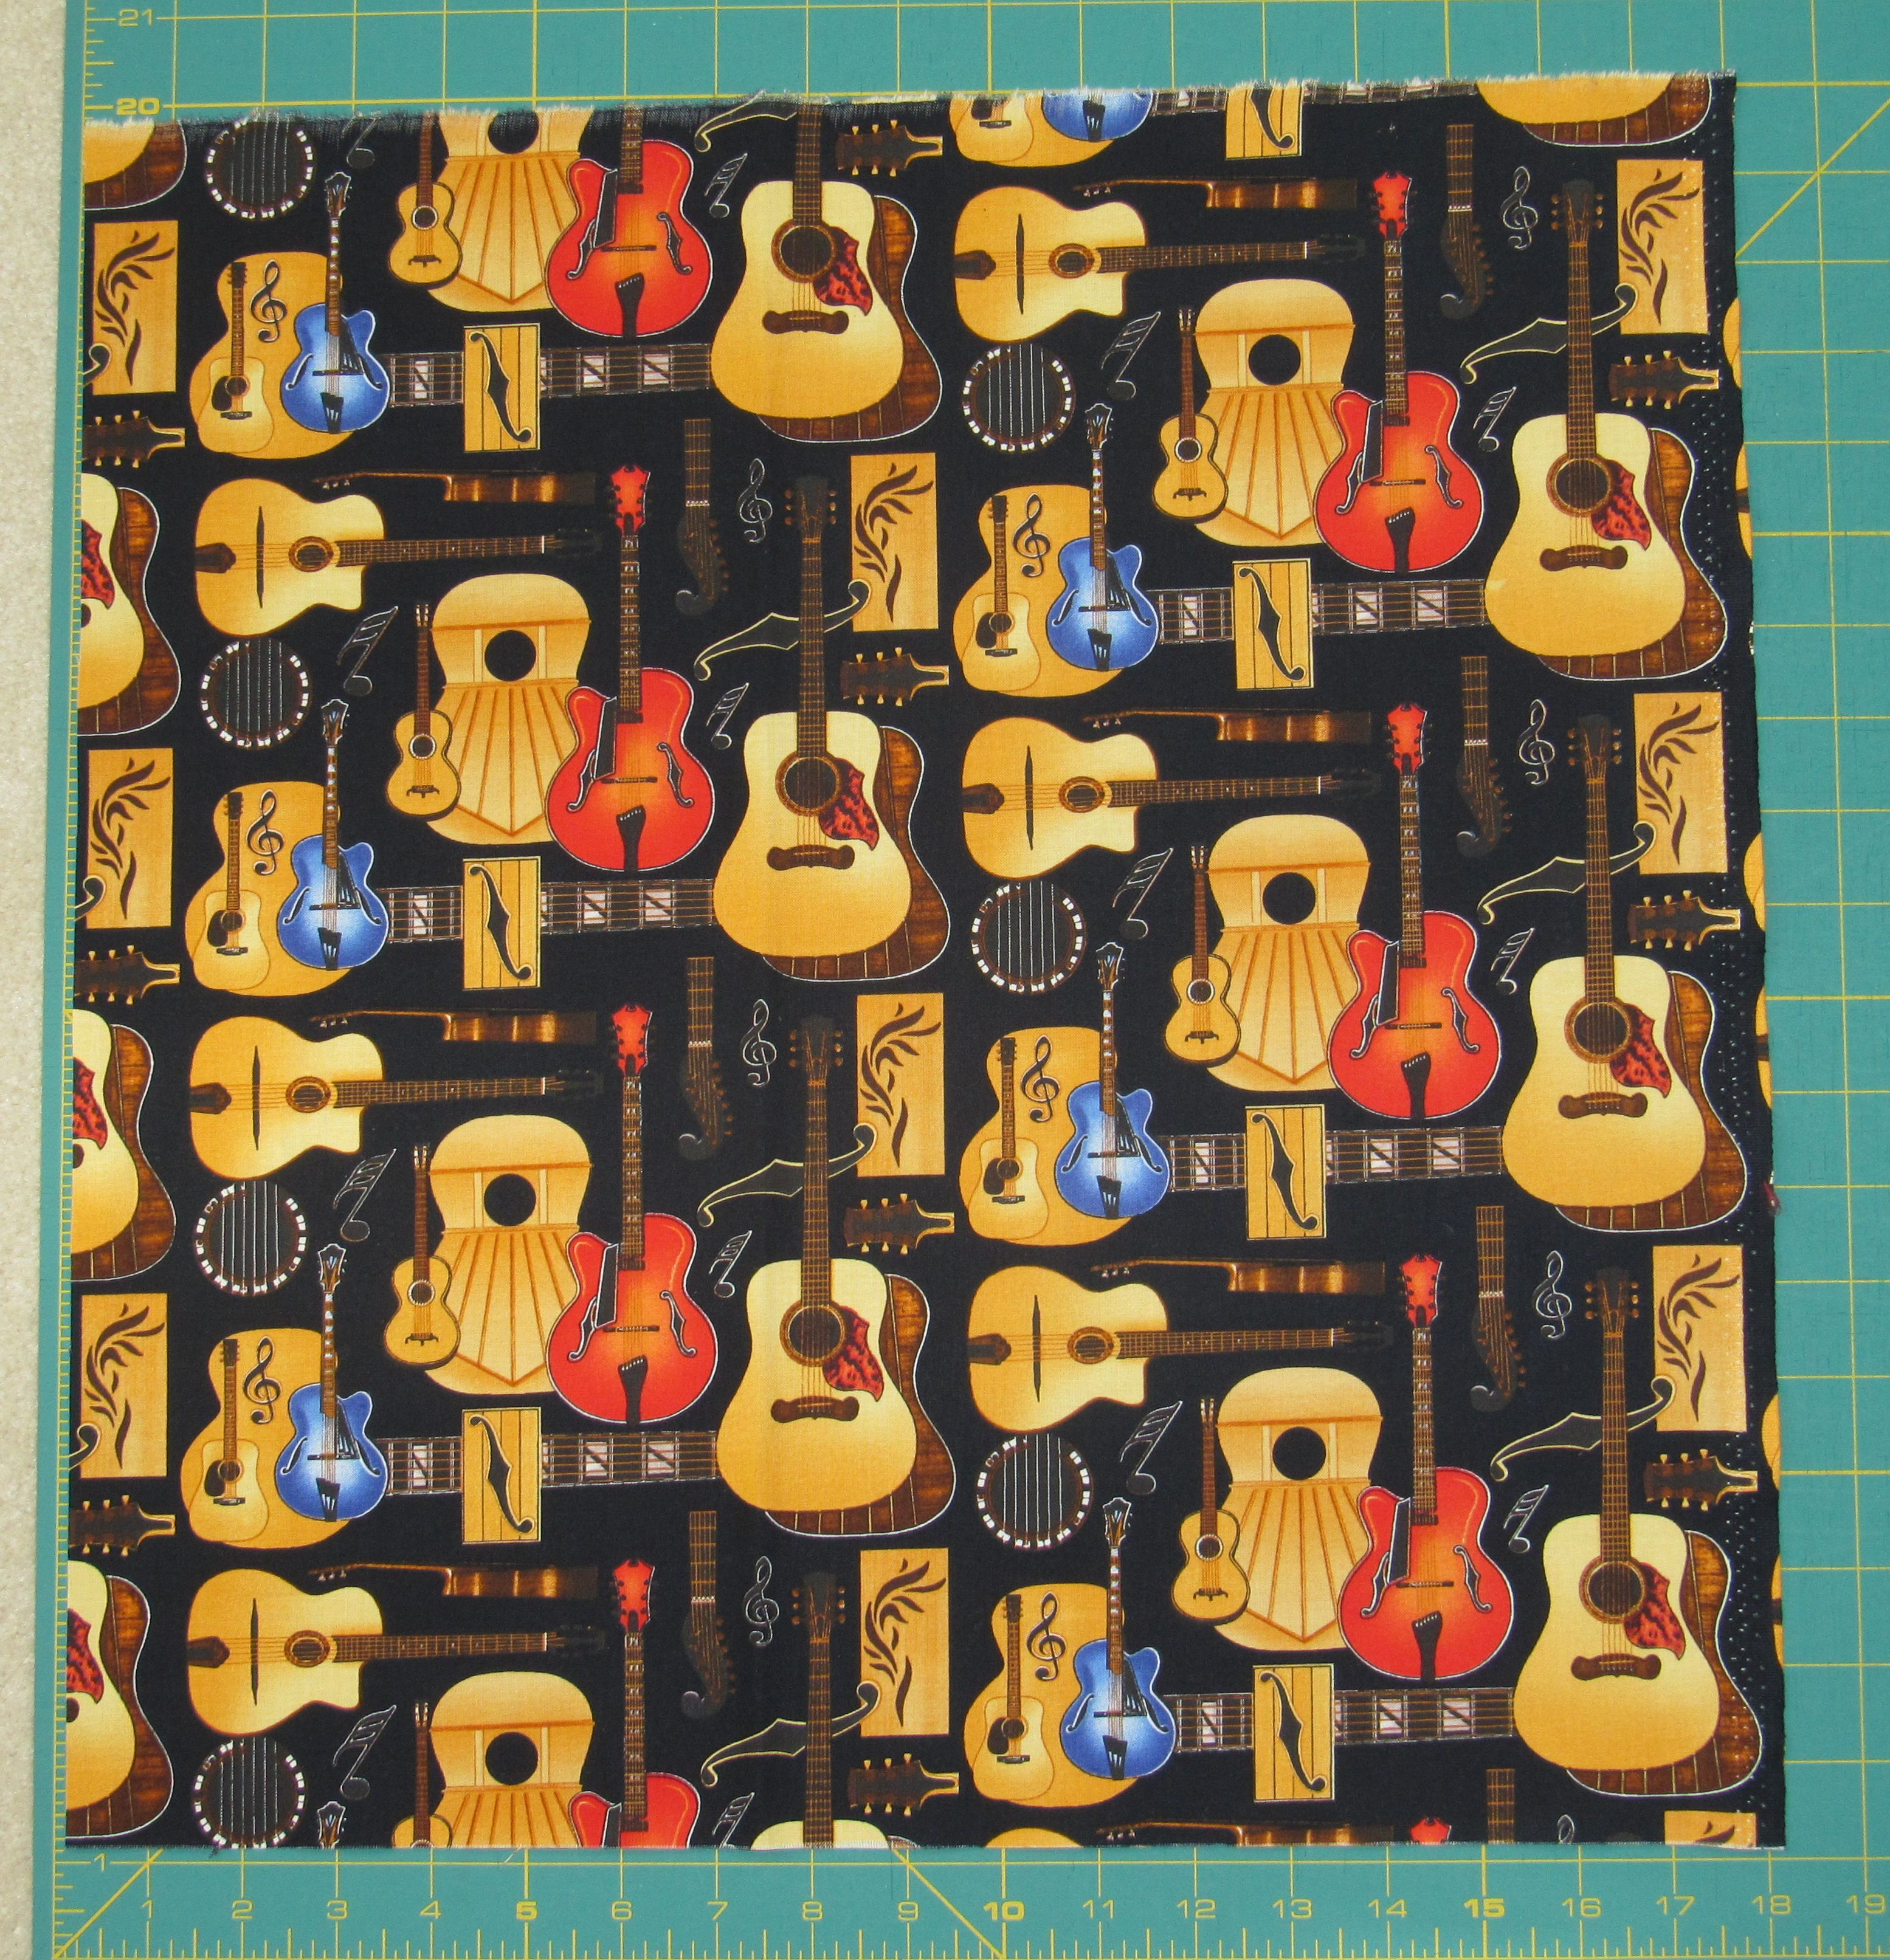
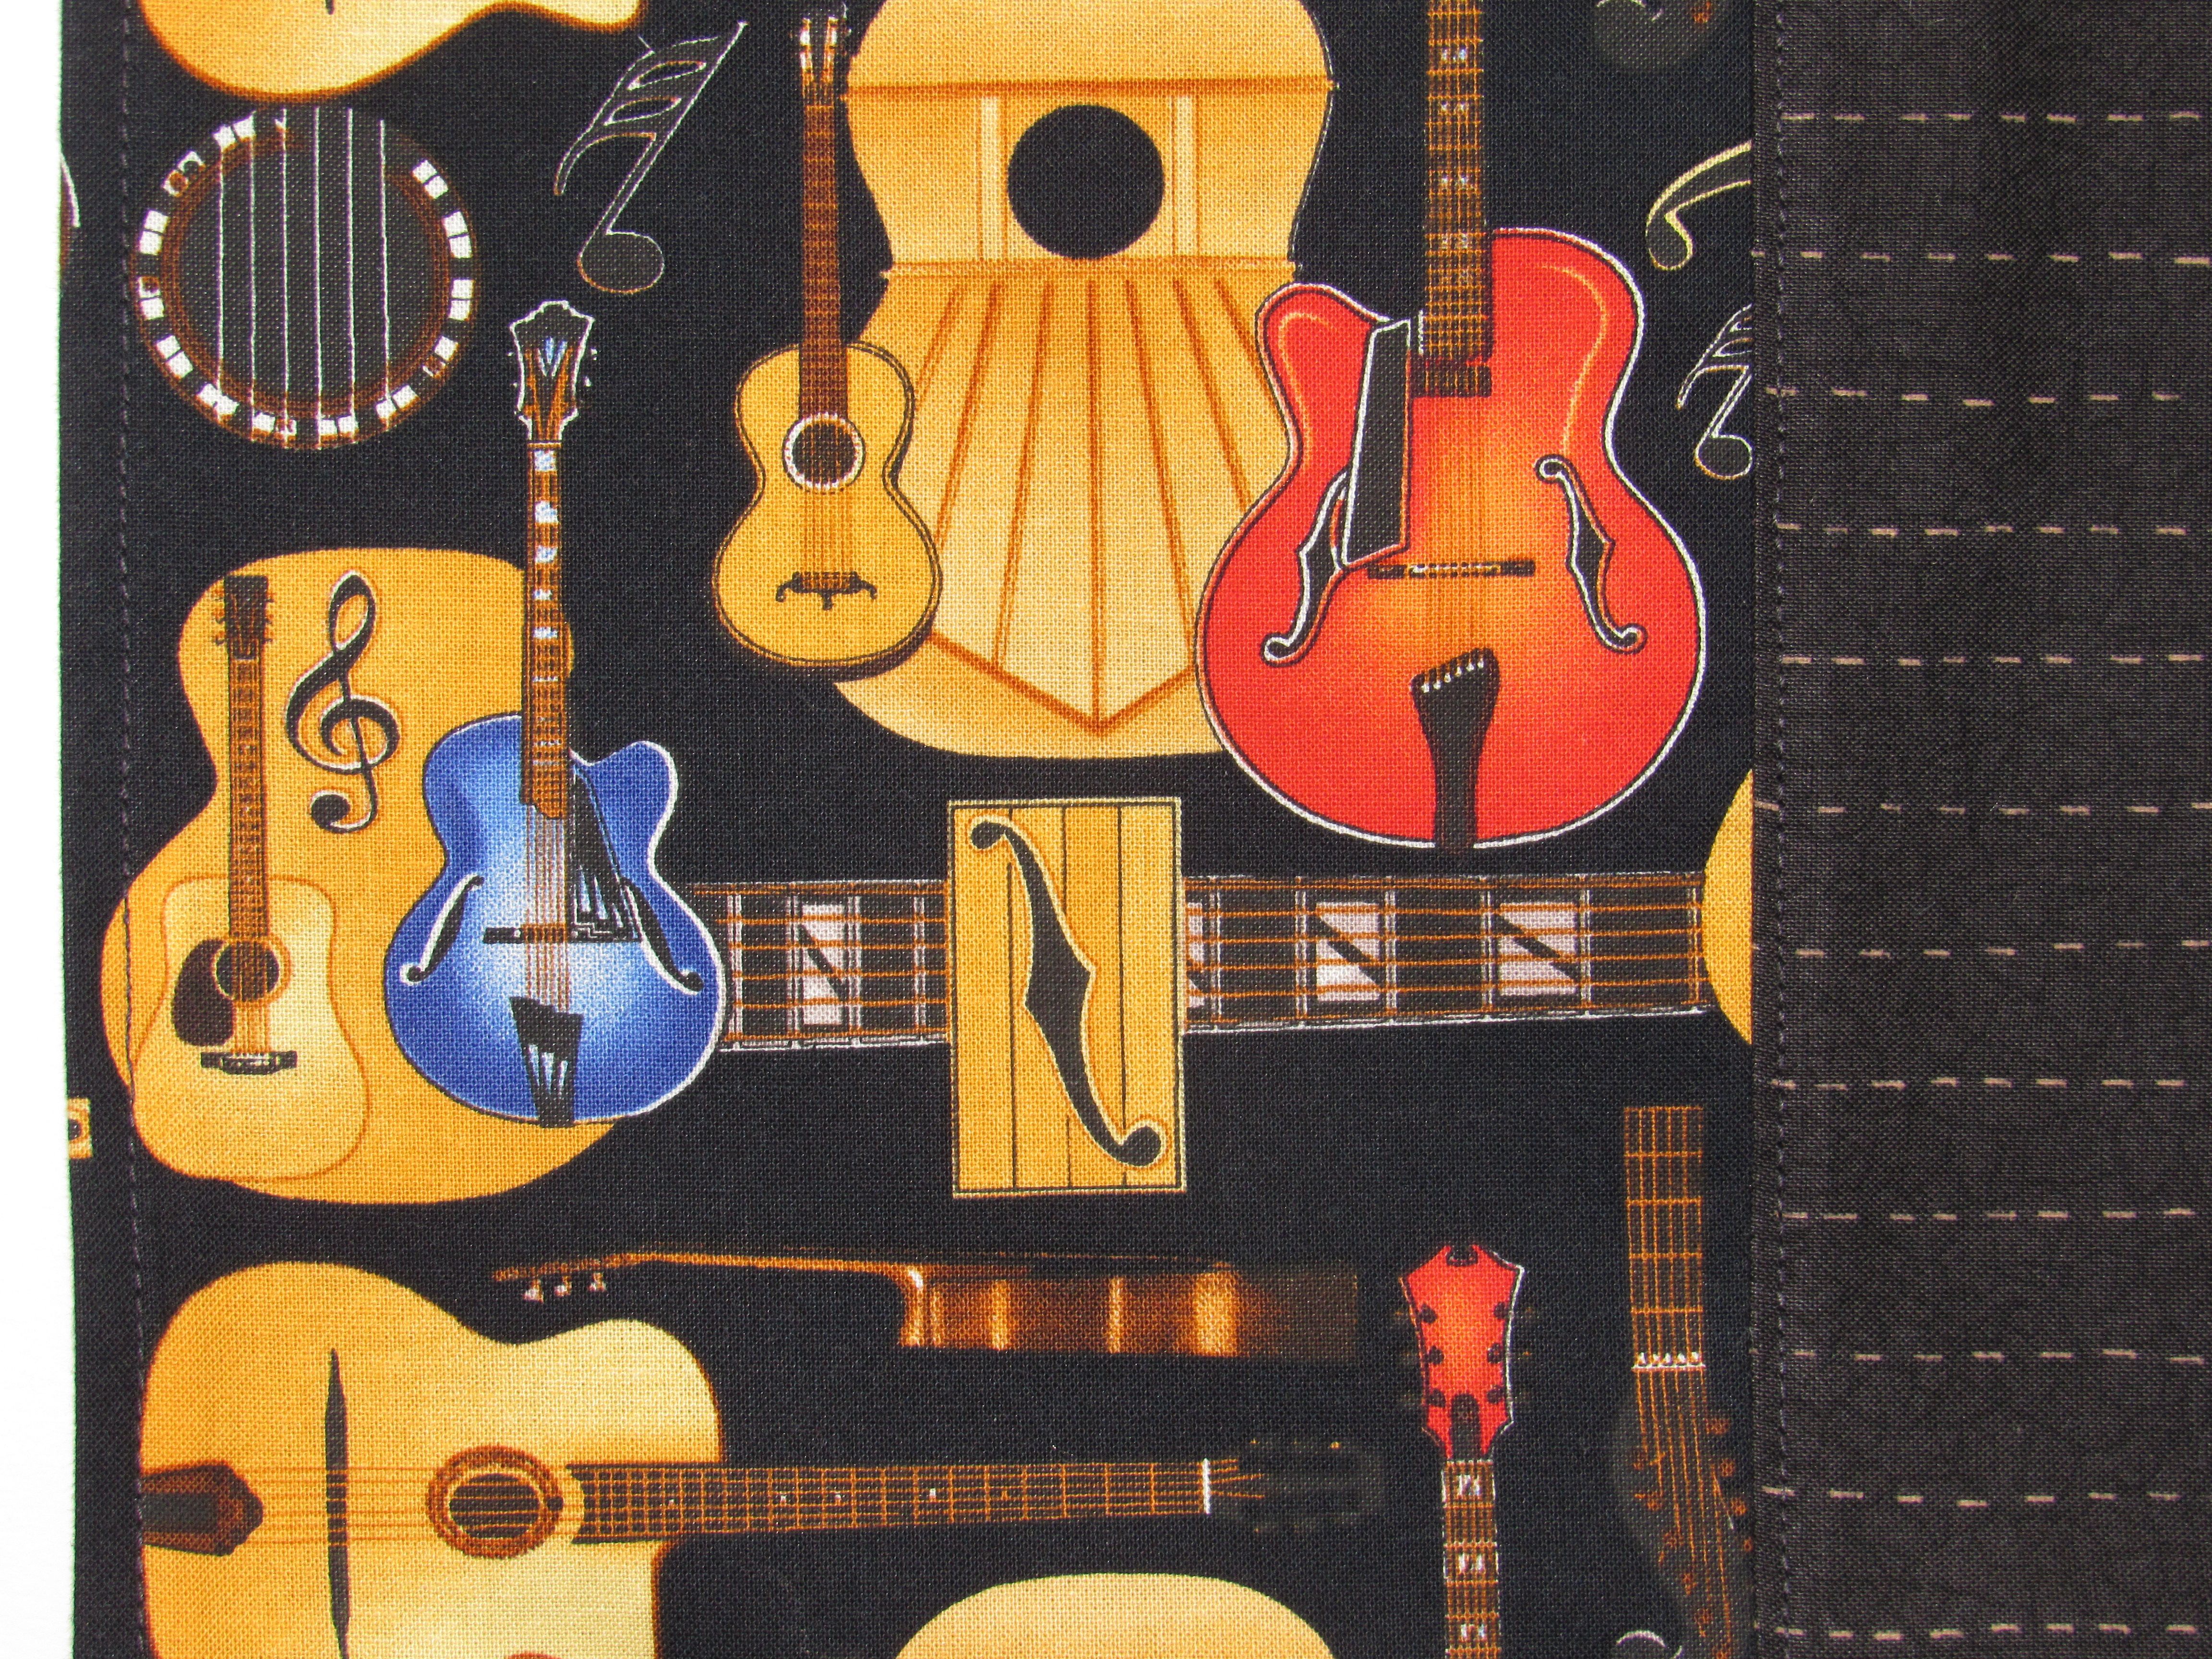
This was the novelty fabric used for the pillowcase, and there was only a half yard of it.

I decided on a six-inch width for the cuff and no trim piece because I didn’t have any coordinating fabric for one. I cut a window in a sheet of copy paper to determine the best way to center and show off the images in the print.

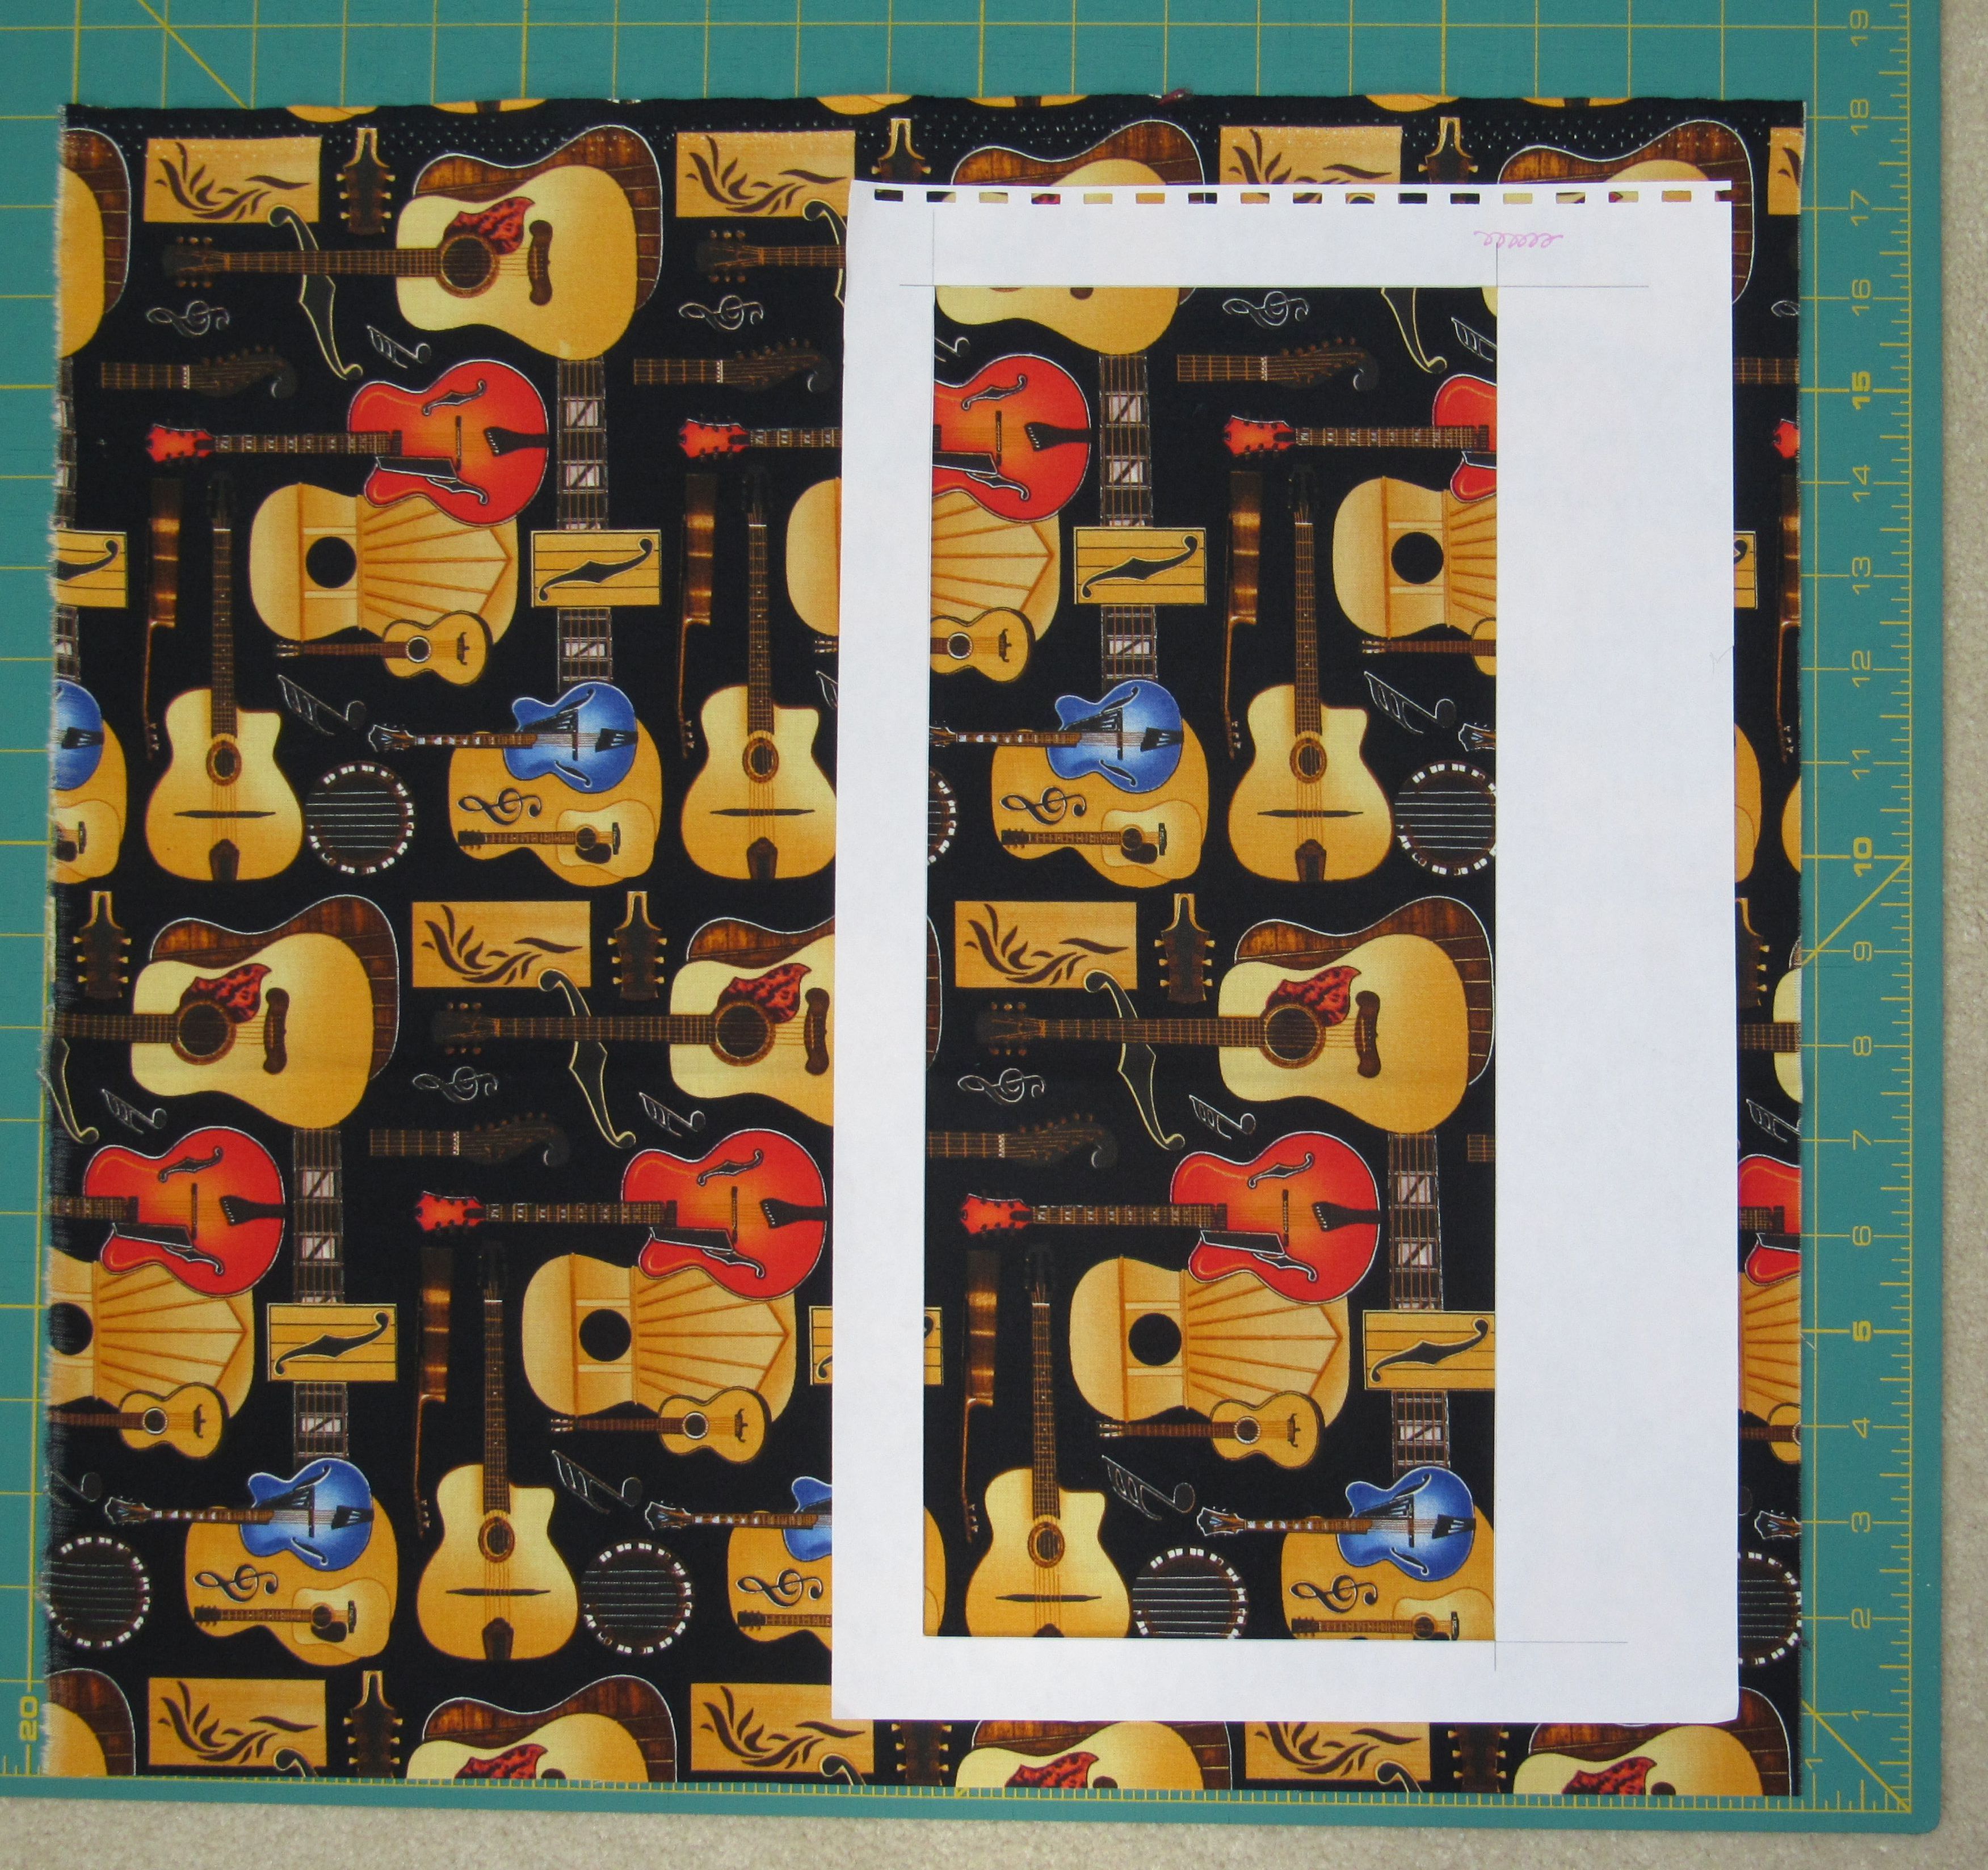
Cutting a width-of-fabric strip would have been the easiest way to go, but then most of the guitars would be oriented horizontally, which looked bad.

I shifted the template 90 degrees and played.

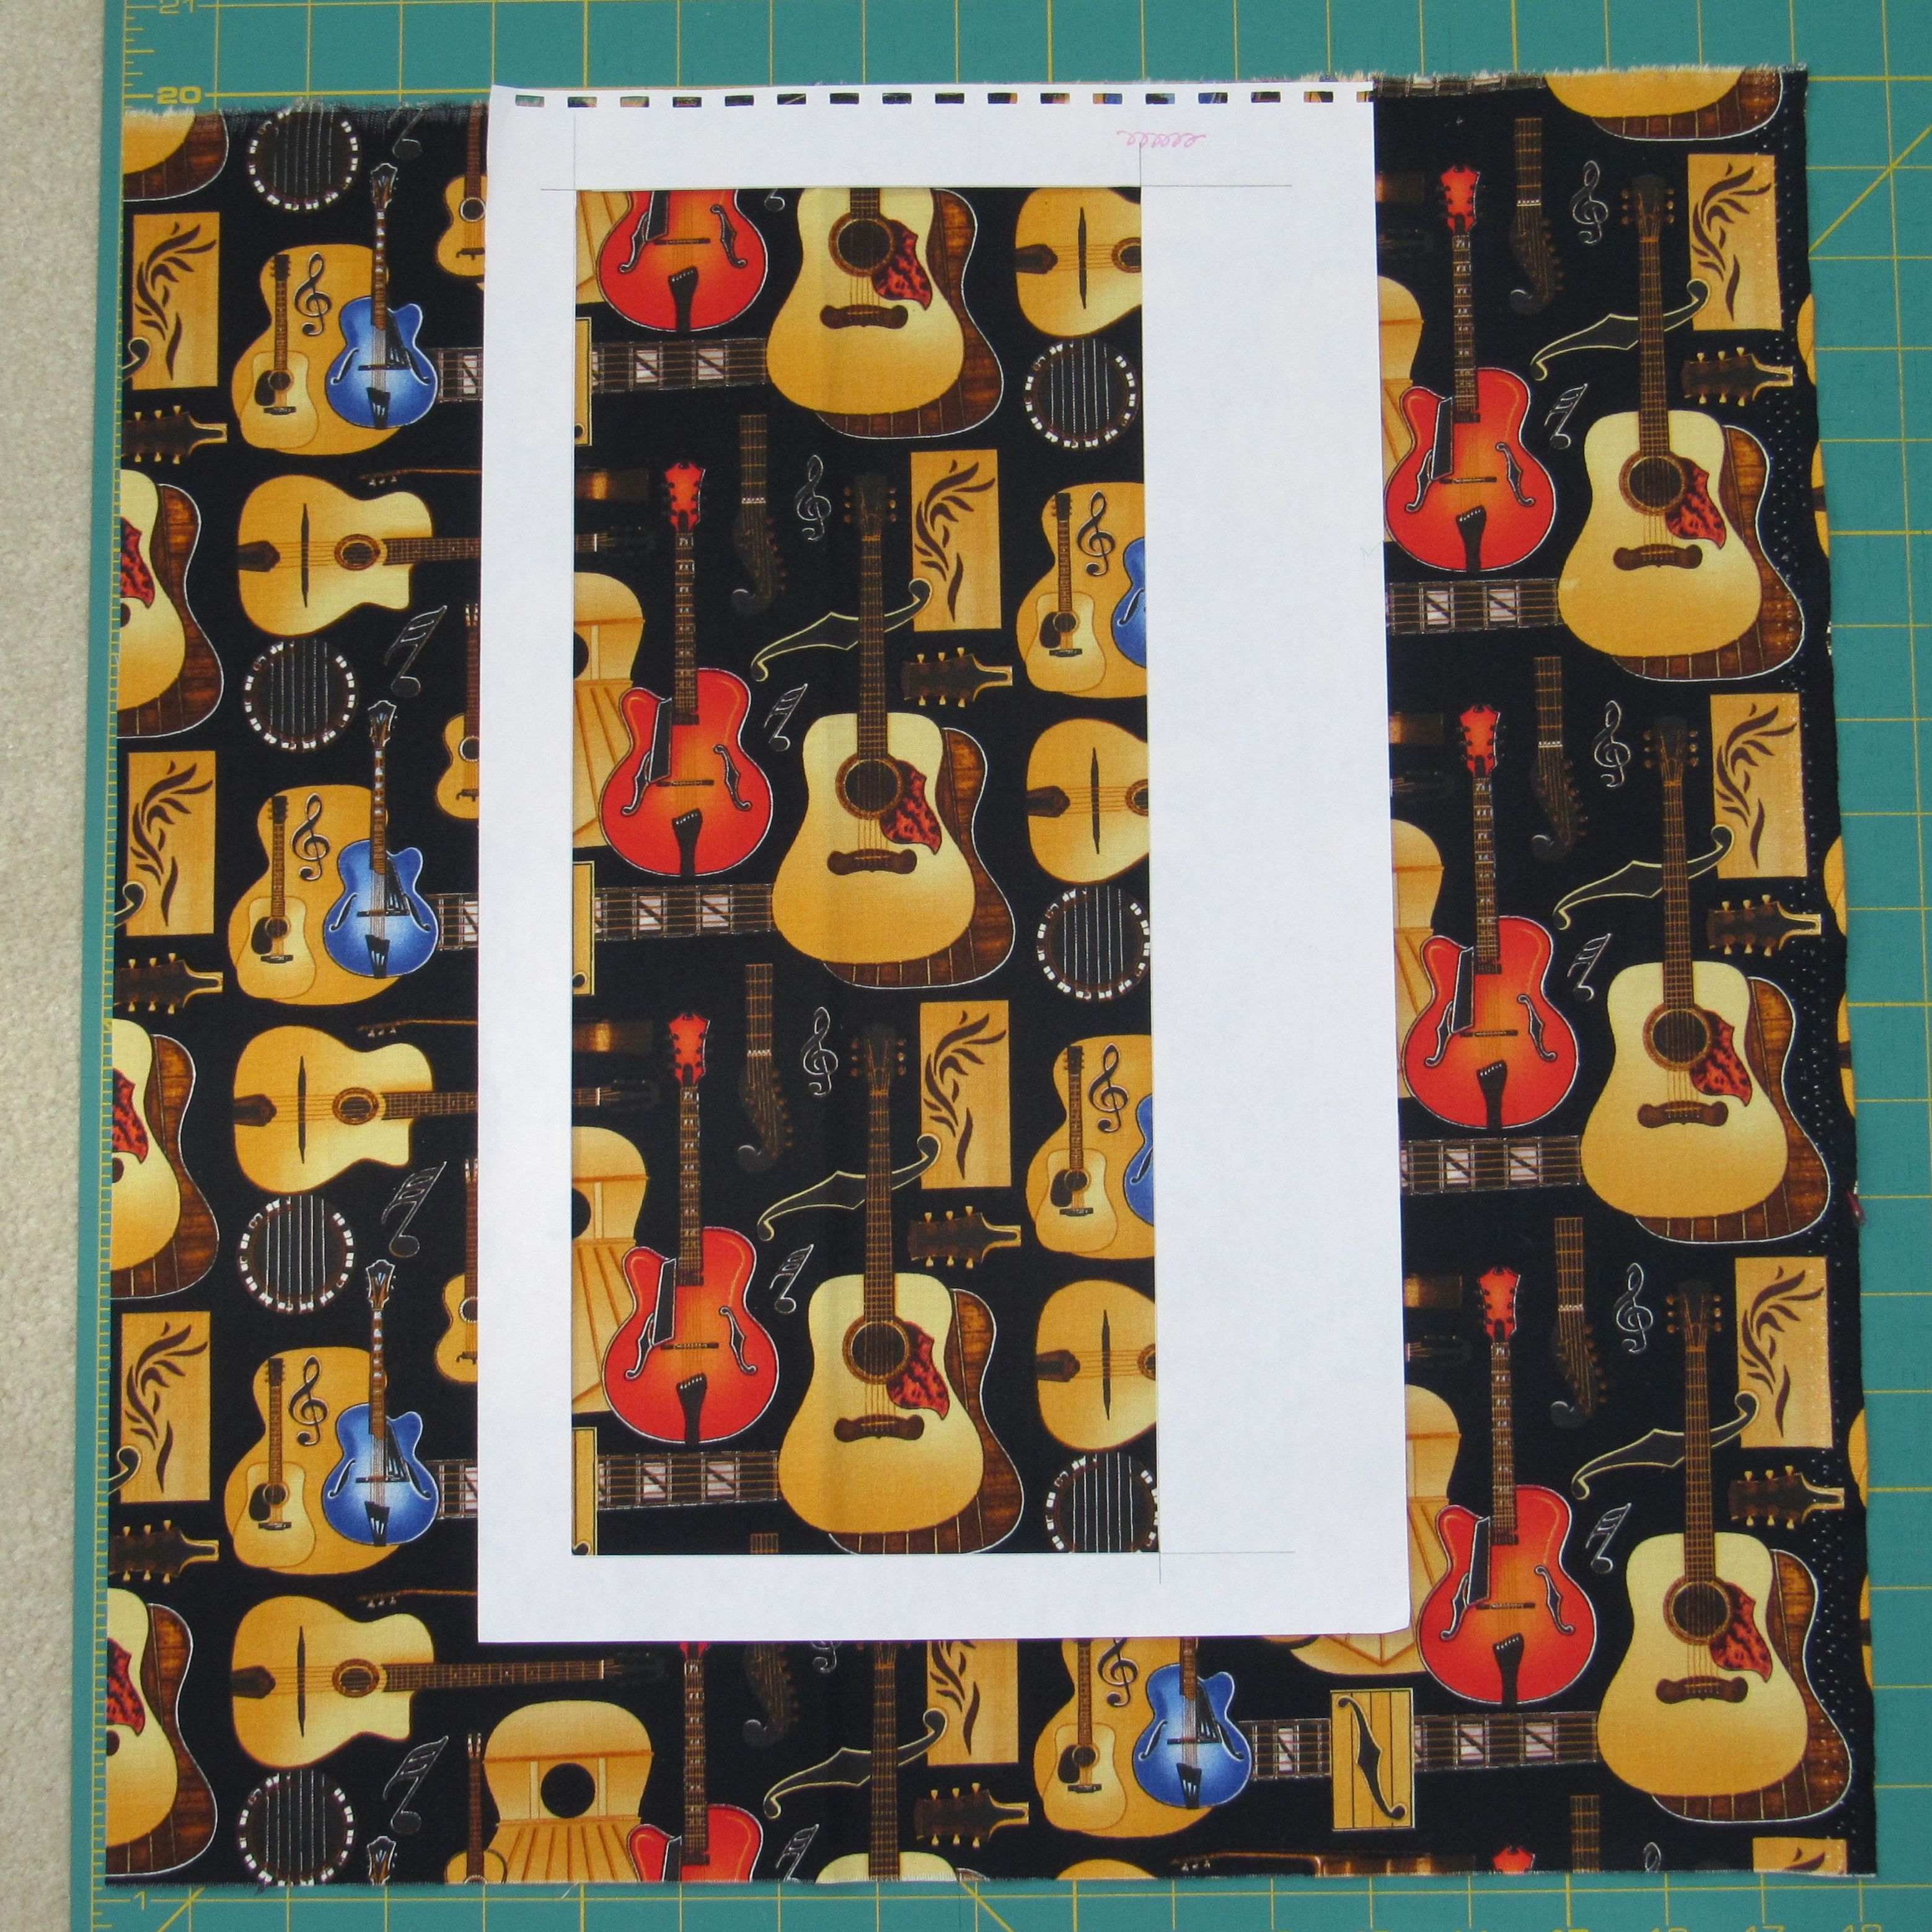
The cropping shown below looked the best. It would have been a mistake not to include the bright blue and orange colors in the design. Those pops of color would offer some needed contrast to an overall dark color scheme.

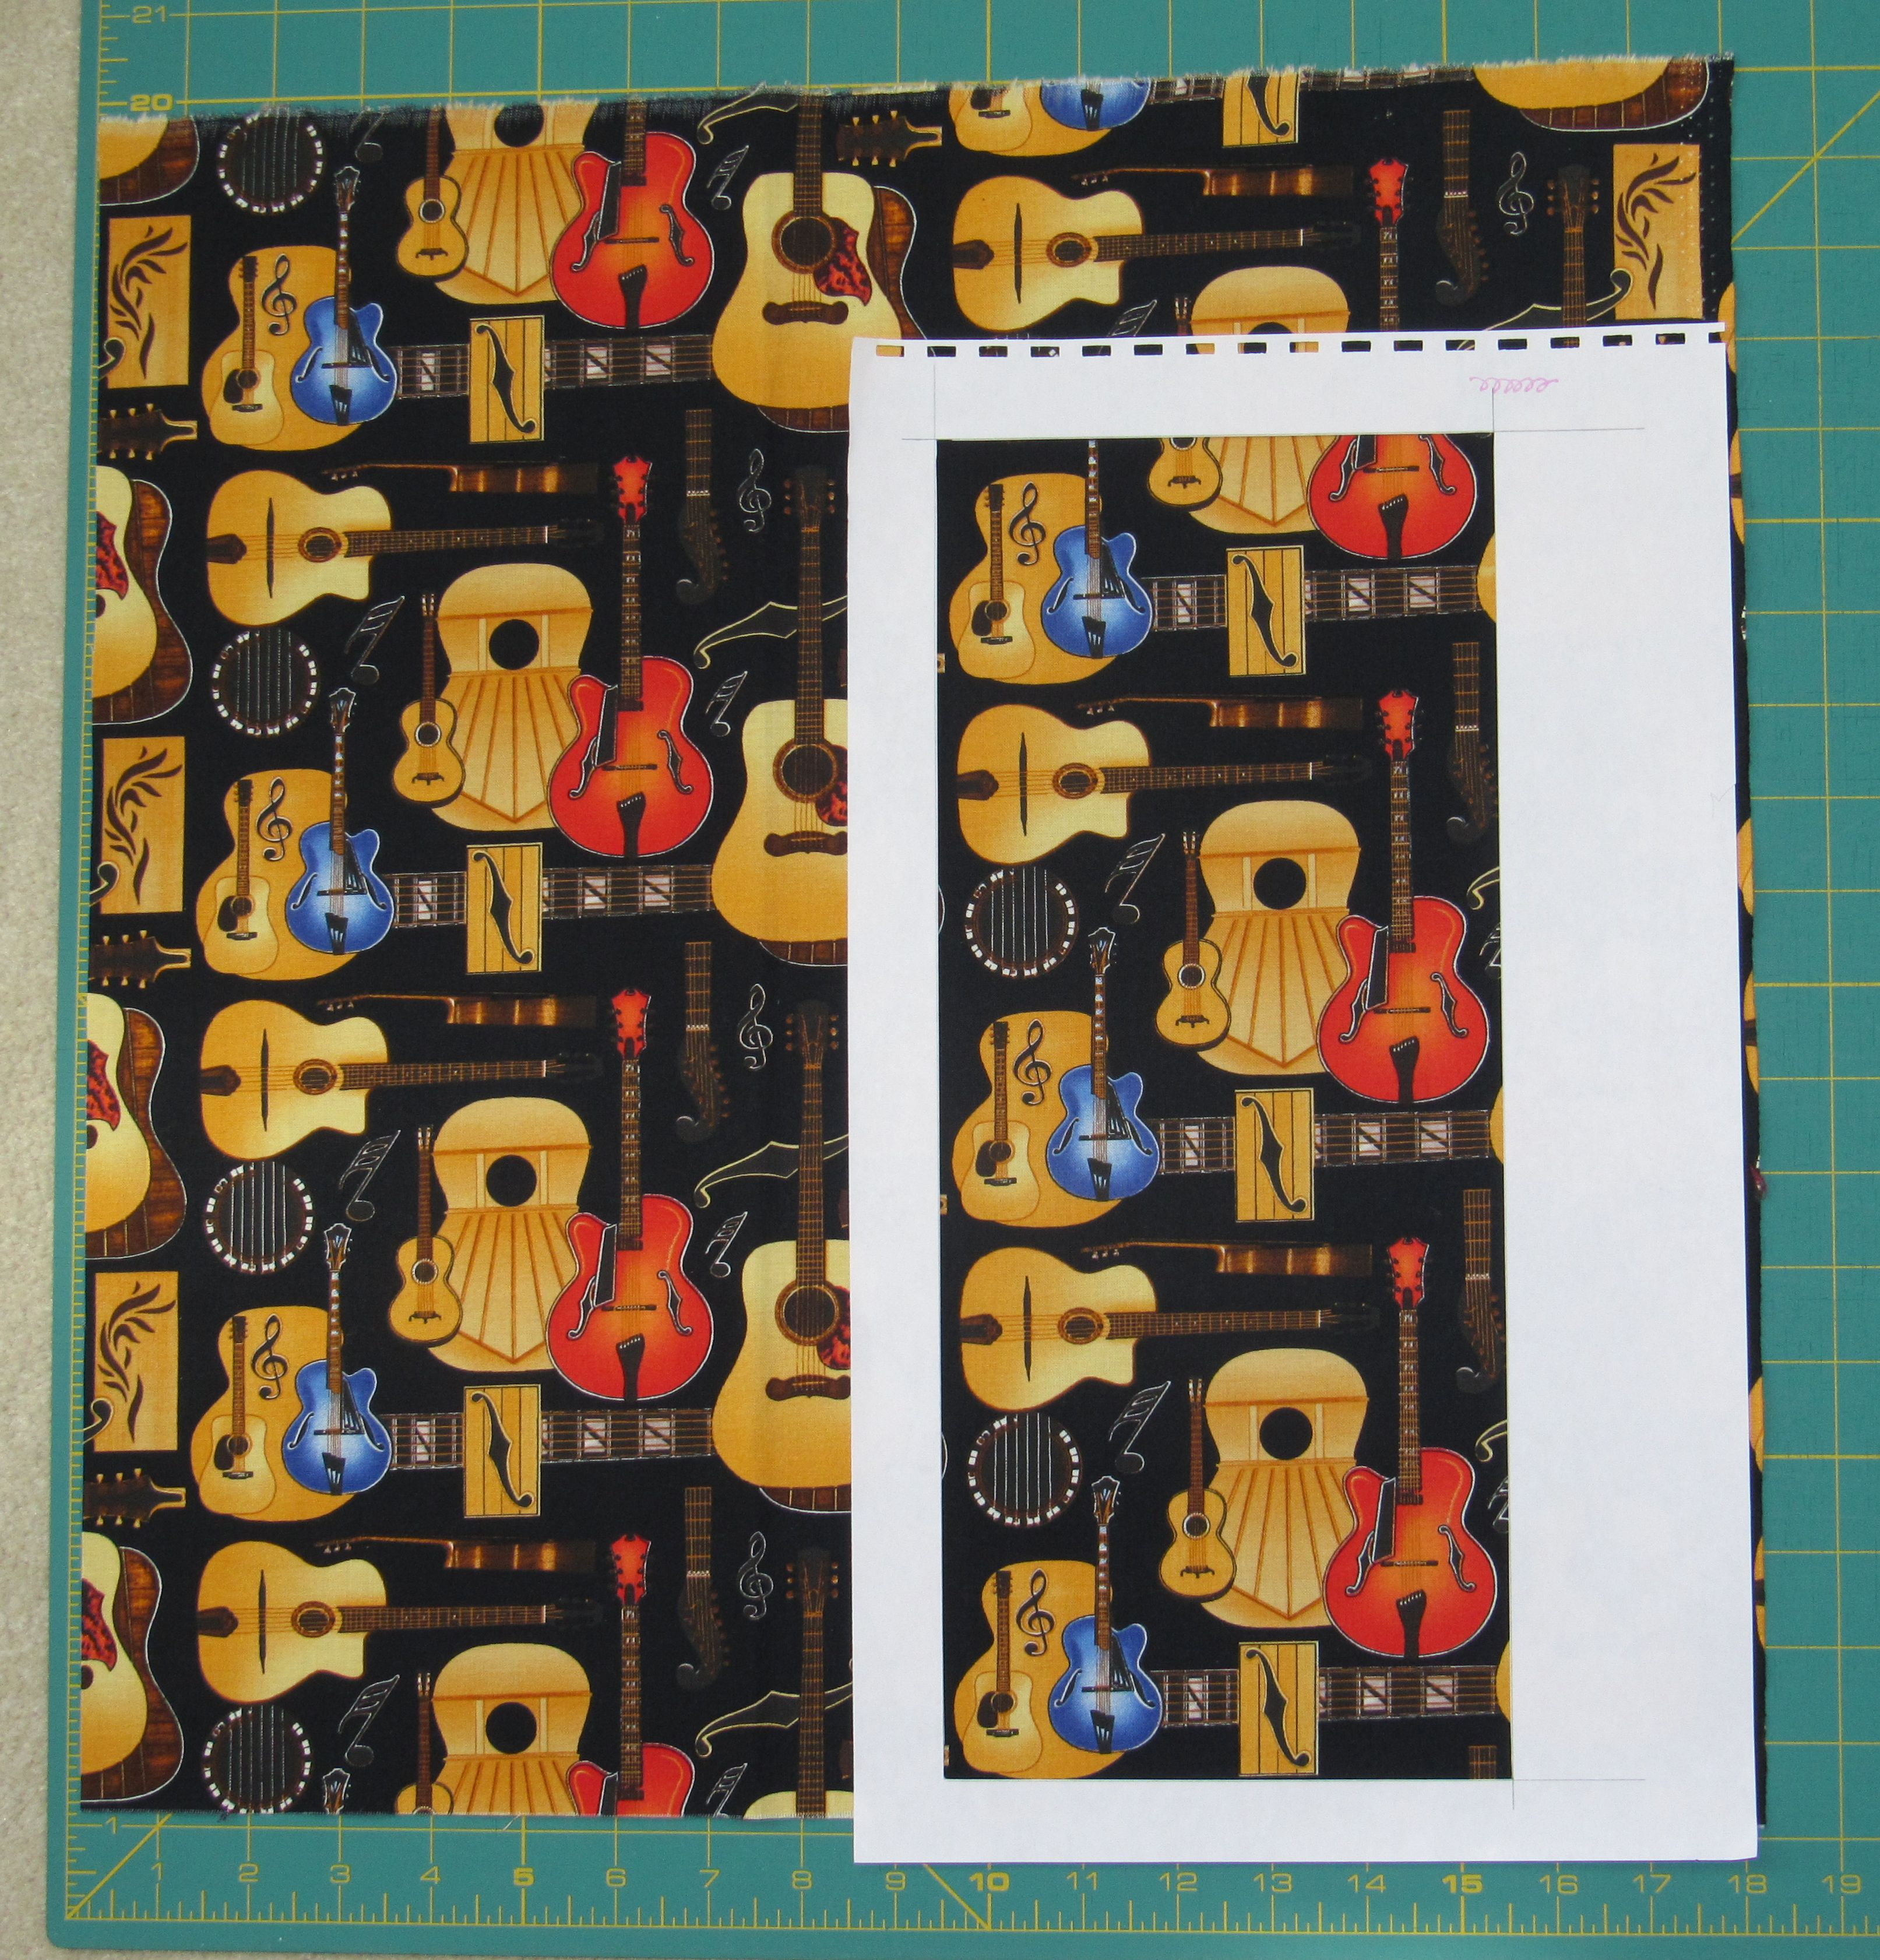
I cut three eight-inch wide sections from the leftover fabric to give myself plenty of breathing room and turned to the internet for guidance on print matching.

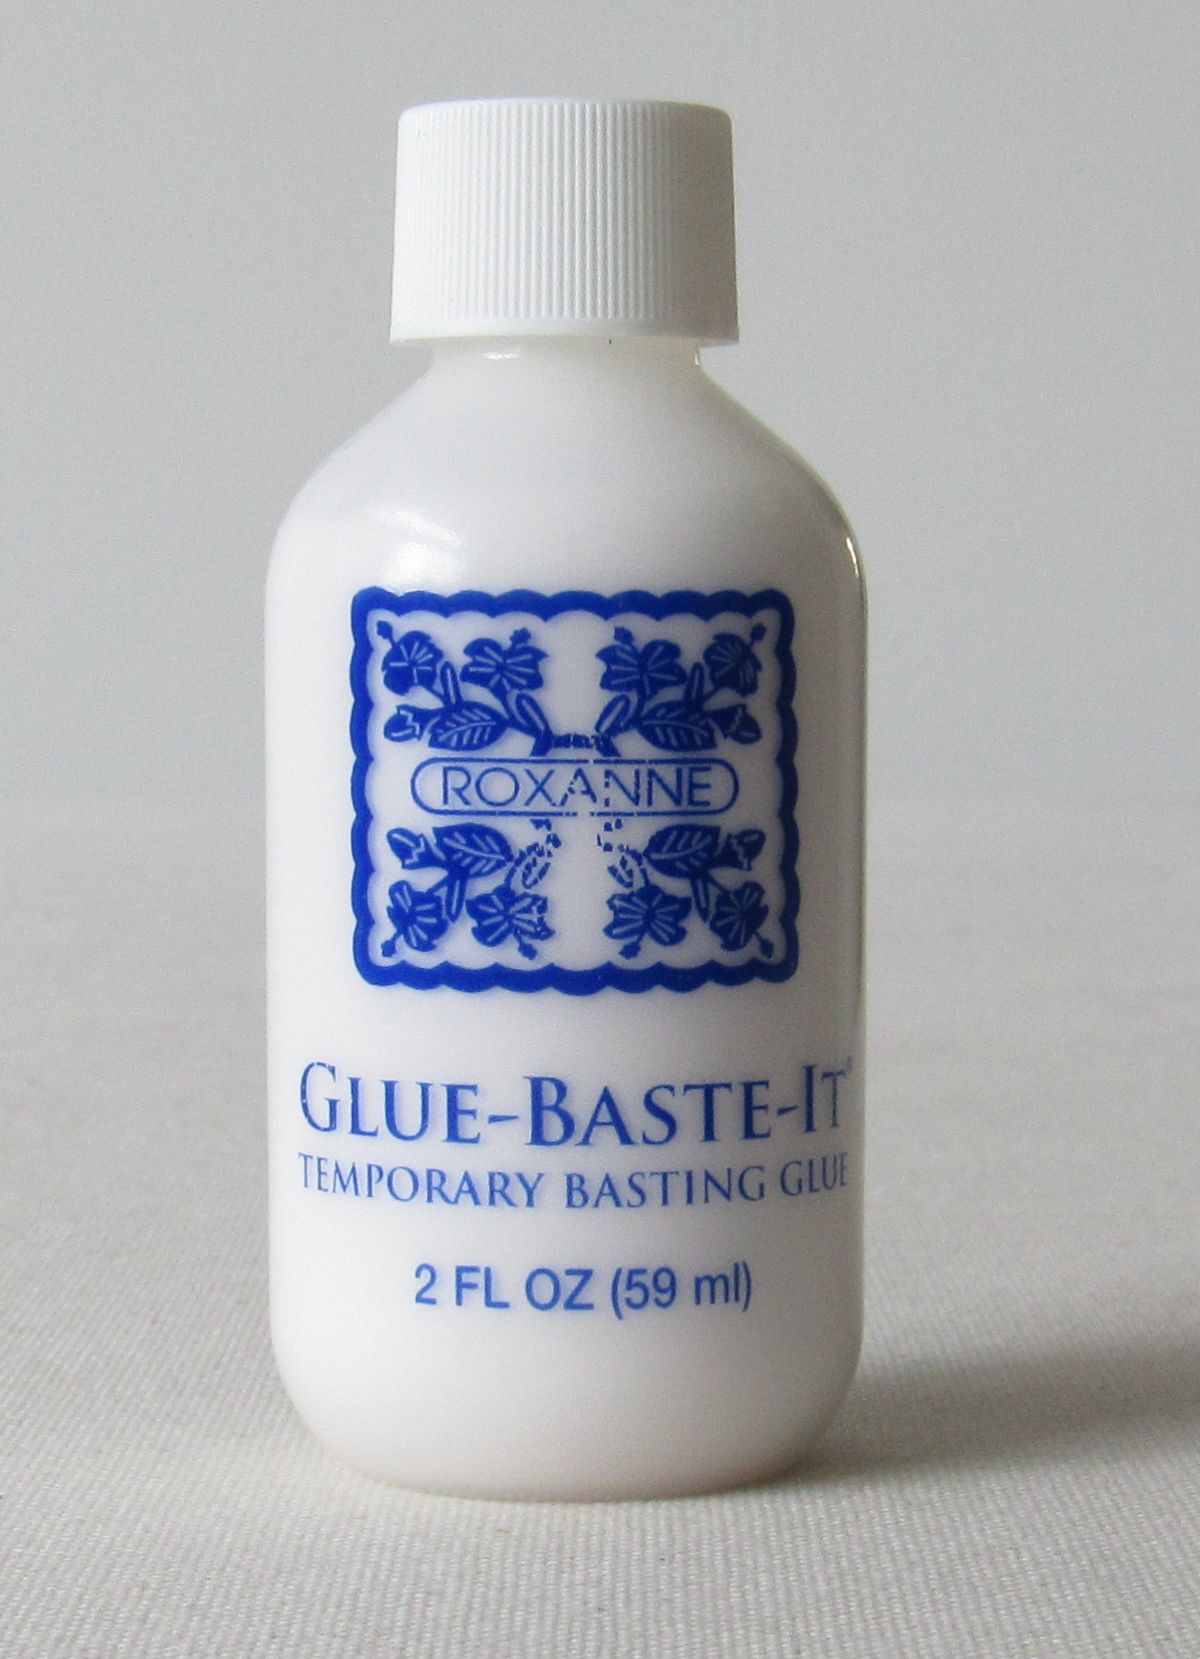
Fortunately, I still had some fabric glue from making The Bias Tape quilt.

Before turning under and pressing a crease into the fabric edge in preparation for gluing it to the other piece, I drew a pencil line one-quarter inch from the edge on the wrong side so I would have a precise, visible sewing line. I’ve never had much confidence sewing on a fabric crease, so this helped a lot.

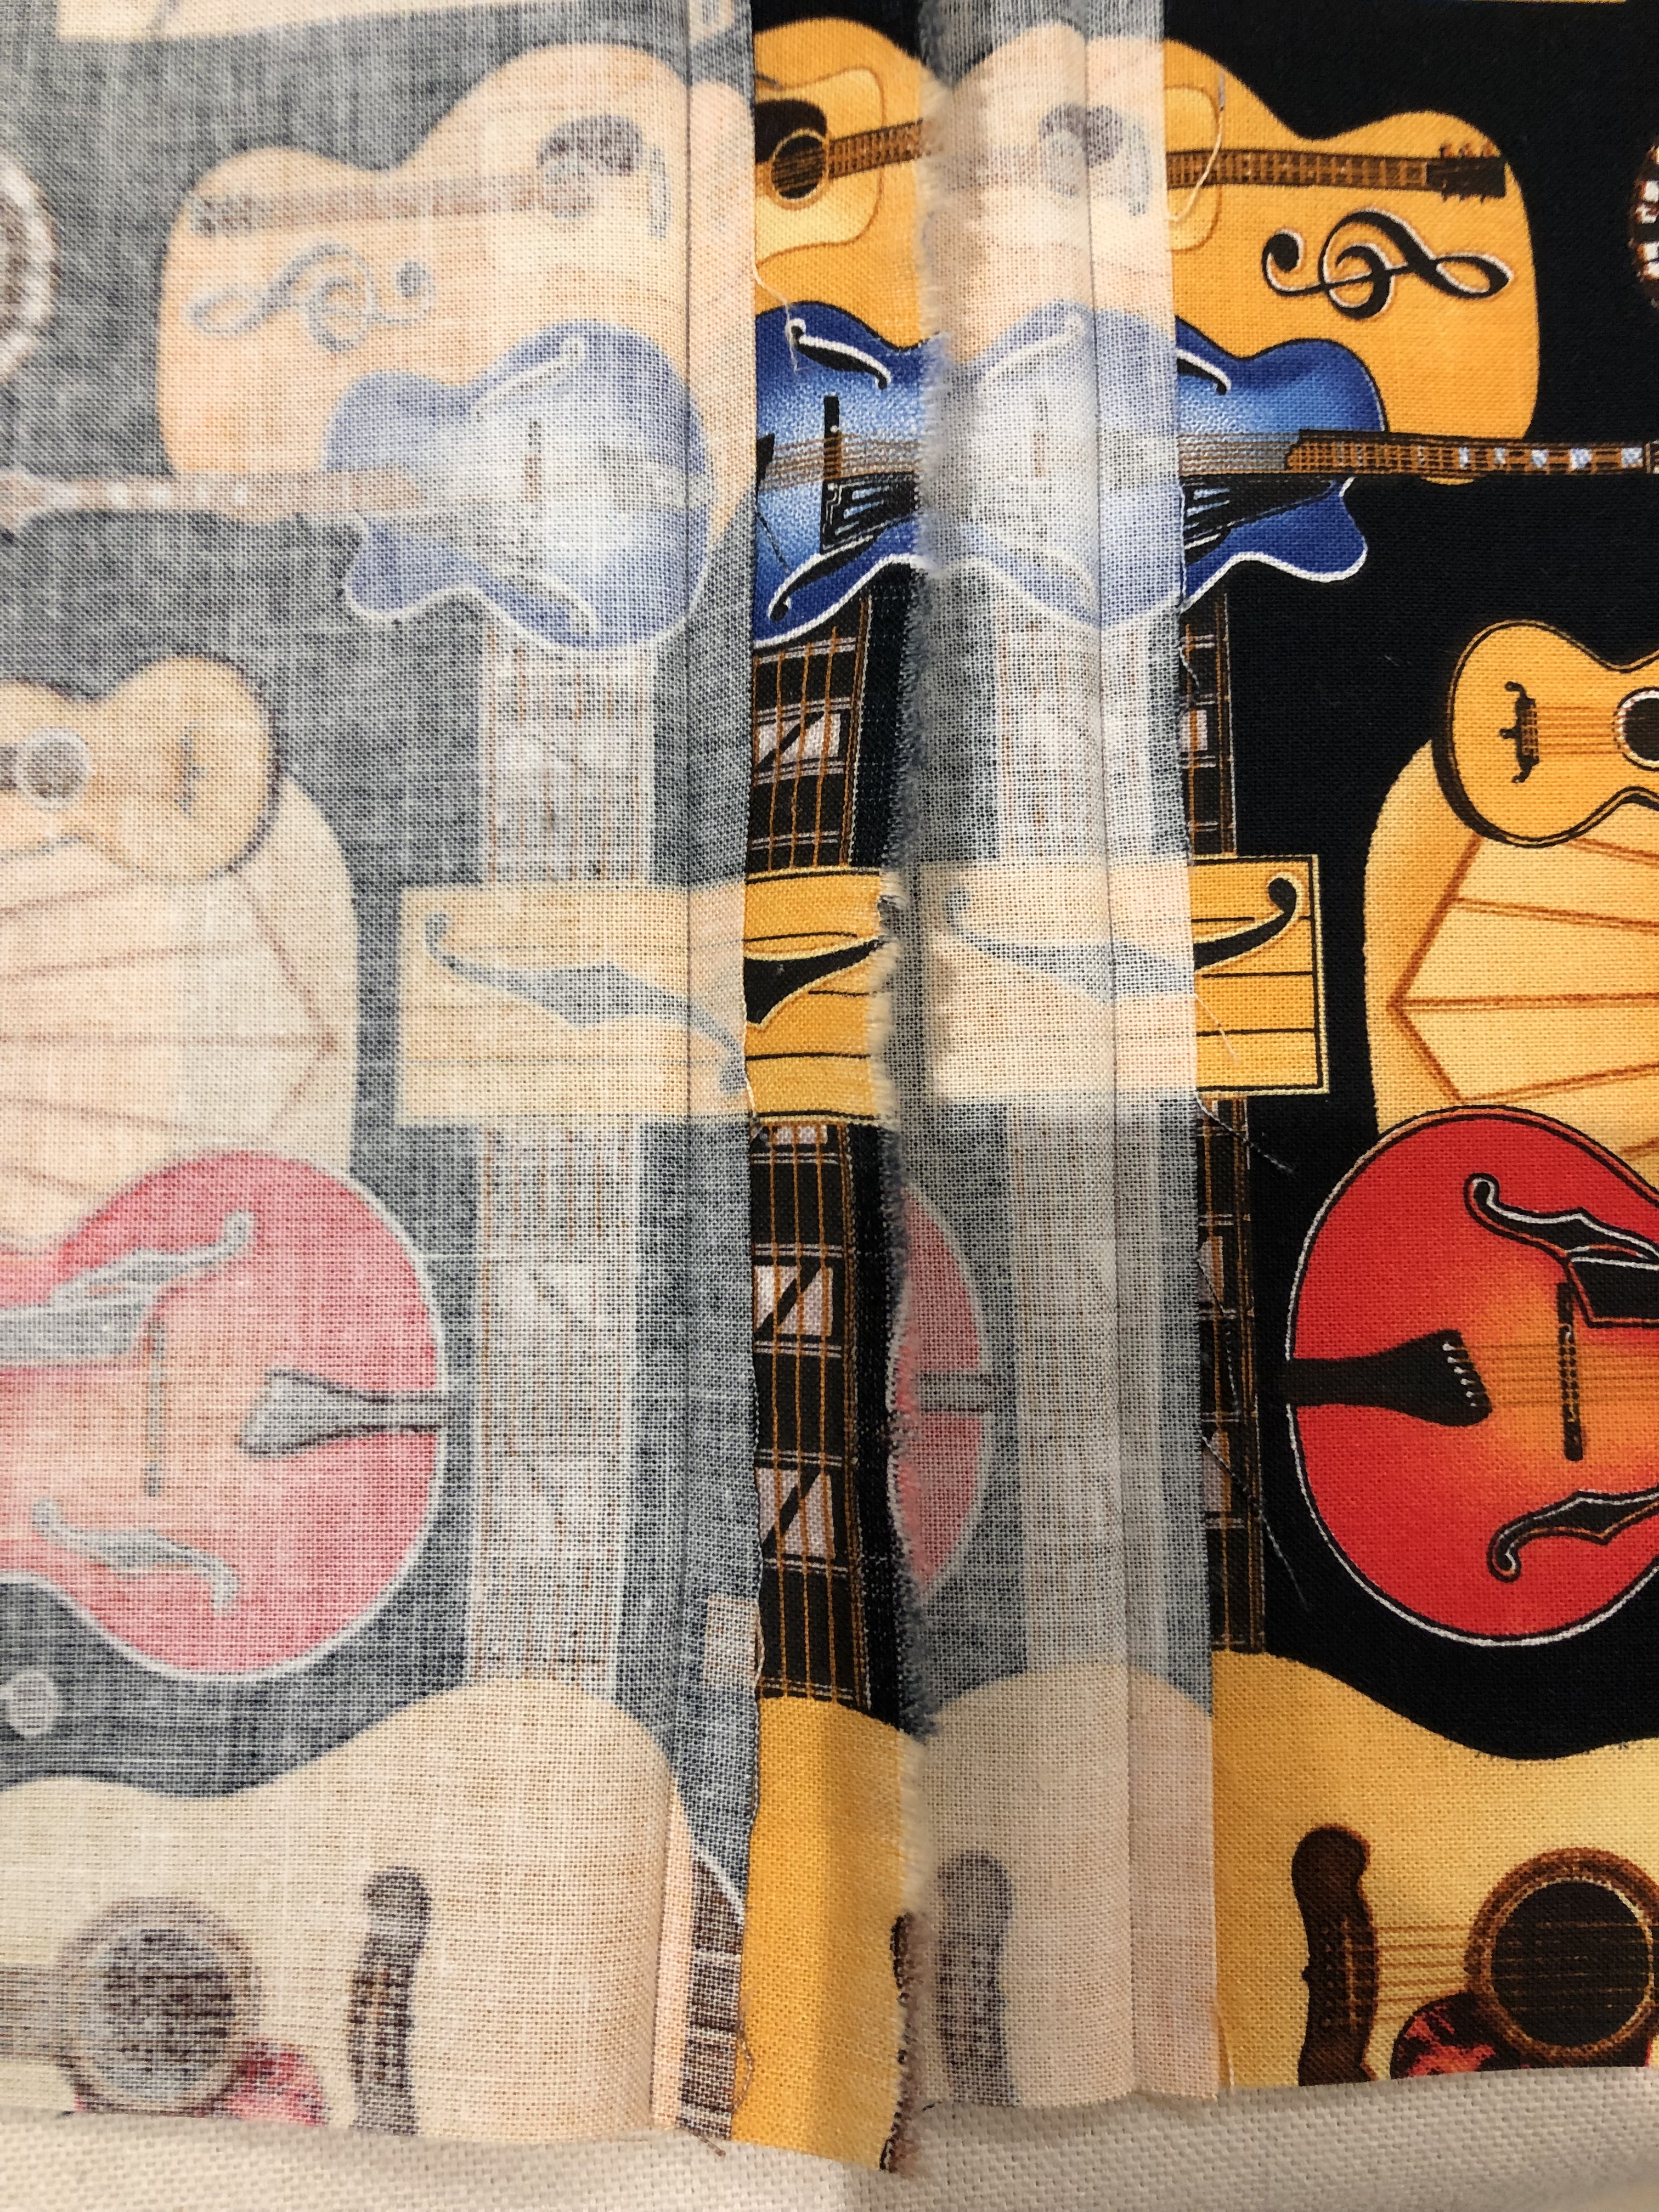
It was a relief to see that this technique worked as well as it did, particularly since it was my first attempt.

Since there was plenty of it, the main fabric for the pillowcase was used to back the cuff.

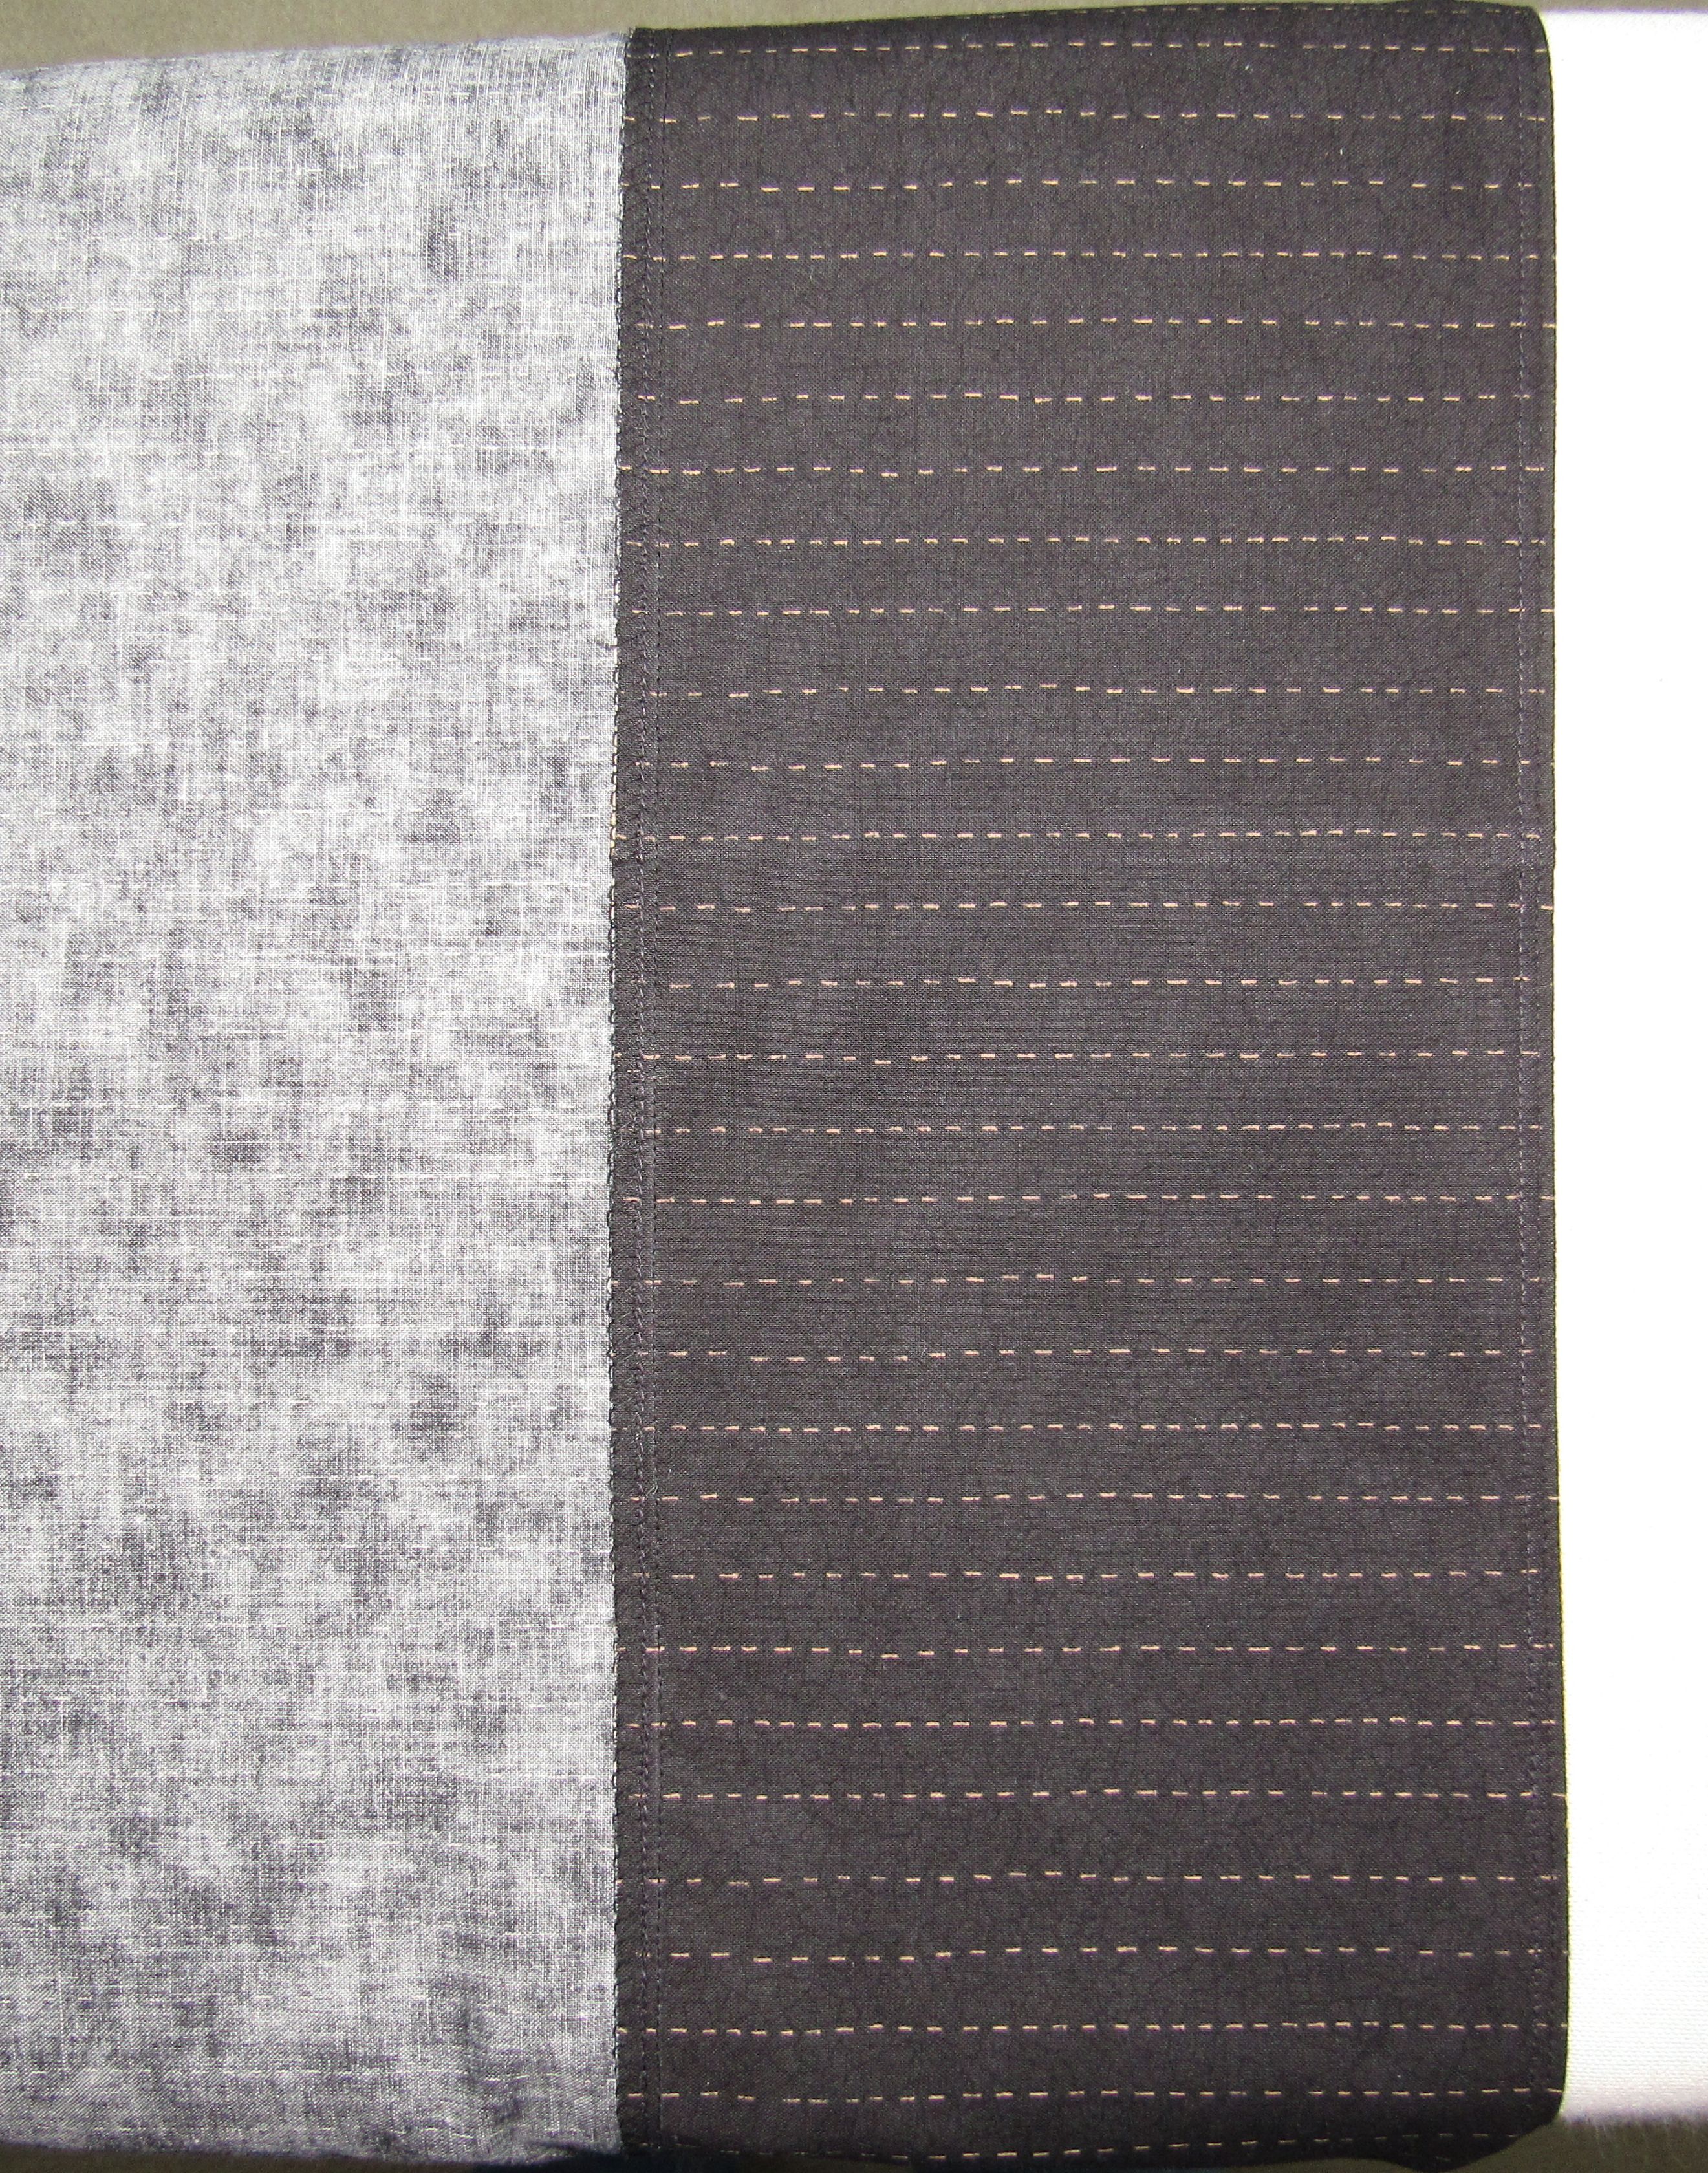
I trimmed and finished the seam allowance with an overcast stitch and top stitched on both sides of the cuff.

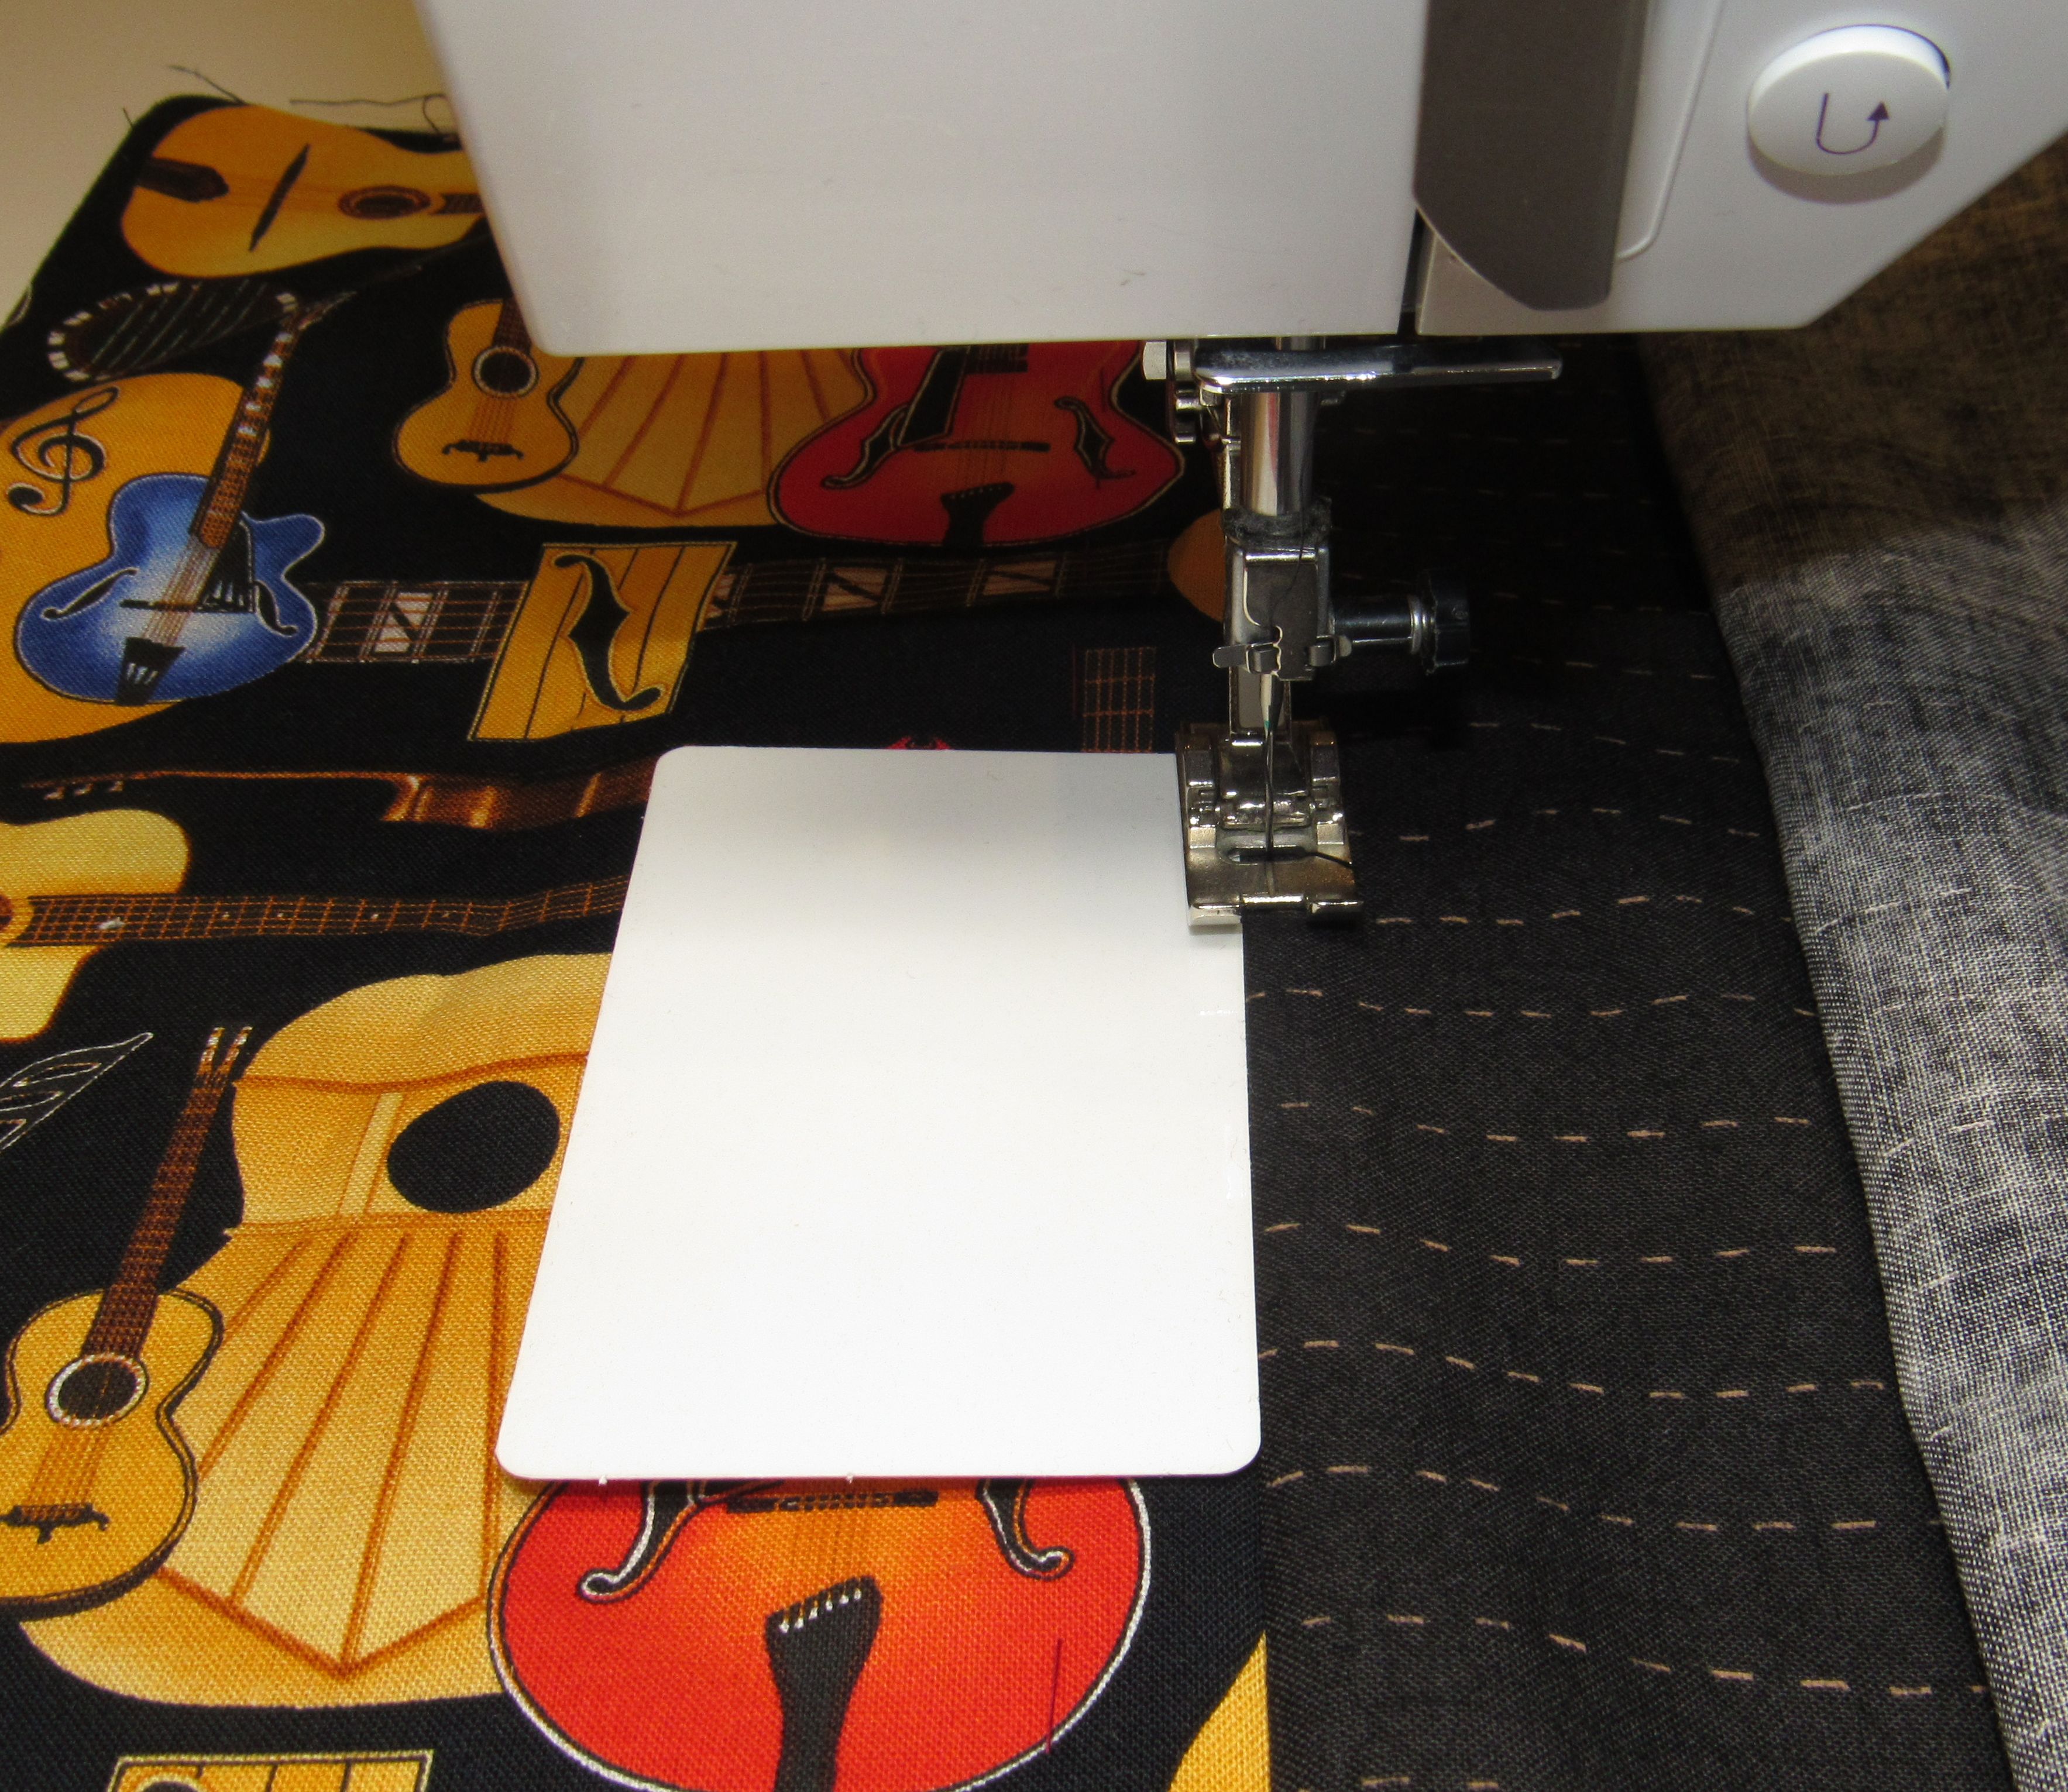
The lack of contrast between the cuff and case fabrics made it difficult to keep the edge of the presser foot aligned while top stitching. Gently pressing this thin, white plastic card against the ditch of the seam provided the necessary contrast and worked perfectly.

I hope Ross likes it.

Leave a comment

Filed under fabric, kids, piecing

Odds and Ends

Part of this week was devoted to repairing two quilts, labeling one, and creating a hanging sleeve for another.

I made this I-spy-ish quilt in 2001 for our younger son,

who, deviously took a pair of scissors to the binding, resulting in this:

My exasperation upon discovering it soared to 11 and resulted in a flood of tears. After 20-plus years, I finally pulled the quilt out of storage to make the repair.

I applied some Fray Check to both sides of the cut on the border and then the back.

Next, I pulled thread to match the border and backing fabrics and set the sewing machine for a zig zag stitch.

The stitch width was set to the maximum allowed while the stitch length was shortened to around .5 – close to settings needed to create a satin stitch, but not quite.

With fingers crossed, I pulled out my box of scraps and found two pieces of leftover binding fabric way down at the bottom.

I trimmed the section of binding that had been damaged by the cut, inserted the new section, joined the ends, and reattached the binding to the quilt.

That tiny cut, which measured just 3/16″ x 3/8″ and took all of one second to do, required the un-sewing and resewing of 21 inches of binding and about three hours of time. Thinking about it in that context probably explains why I’ve avoided repairing it all these years.

I made this quilt 10 years ago

and for whatever reason, never made a label, so I got busy and checked that task off the list.

The little tulip wall hanging I made during Covid needed a hanging sleeve.

It’s basted into place in preparation for stitching it down while watching Casablanca or another Humphrey Bogart movie we have saved on the DVR.

And finally, there’s this lap quilt, Bricks and Blocks, which was my first finished quilt.

Some of the quilting stitches were coming out so I pulled out the walking foot and fixed them. The only task remaining is to cross stitch and attach a label for it, after which I can turn my attention back to creating new quilts. Thanks for stopping by!

Leave a comment

Filed under binding, kids

Crib sheet, pieced version

There were two cuts of the A-B-C blocks fabric left in my nursery collection stash, and I was determined to use them to make one more crib sheet.

Unfortunately, the larger of the two was only 1½ yards (54 inches), so panels would have to be added to each end to get to a working size of 68 inches. Fortunately, the other cut was 36 inches, which meant that there was plenty of extra fabric.

The challenge was to make sure that the corner square cutouts used to create the pockets would not interfere with or be located too close to the seams joining the panels to the main piece of fabric.

Had I followed the math, the addition of 7-inch panels would have been needed for each side to get to the starting length of 68 inches.

Under this scenario, the panel seams would have been compromised when cutting out the 8-inch corner squares, likely creating a lot of bulk and other sewing issues with those two things interfering with each other.

The solution was to reduce the 54-inch piece of fabric to a finished size of 50 inches and add wider, 9-inch panels to each side. This would provide a 1-inch clearance between the panel seam and the seam creating the corner pockets.

It was also important to pay attention to print direction when sewing the panels to each end.

I finished the seams the same way I did for the corner pockets, overcasting the raw edge of the seam allowance

and then securing the seam allowance with an anchor stitch a scant ⅛-inch from the edge.

At one point, I thought I might try print matching the panels to the main length of fabric, but after seeing that a straight seam would in no way be possible, it was a no-brainer to abandon the idea.

The finished pieced sheet turned out fine, with sufficient space between the corner pocket seam and the panel seam.

One other positive is that the position of the two seams needed to lengthen the fabric are close enough to the top and bottom edges of the mattress where they will be covered by the bumper pads.

Sleep well, baby boy.

Leave a comment

Filed under kids, piecing

Crib sheets

1 king-sized sheet set yields 4 crib sheets.

There comes a time in the life span of bed sheets when the hems split

and the elastic on the fitted one craters.

In our case, the timing of their demise was perfect. Voilà! Crib sheets!

I hate to throw away stuff that still has a lot of life left in it, and our recently expired sheets were no exception. I don’t recall when the idea popped into my head to repurpose them into crib sheets, but having followed through on it, I think it was worth the effort – and a comfort knowing that those perfectly good textiles are not rotting in a landfill – yet.

I made two additional sheets out of fabric from the nursery collection, one from this print

and one from this print.

I turned to the internet for guidance on making crib sheets, and it did not disappoint, particularly with respect to what NOT to do. I was amazed at the volume of sources who eyeball every measurement, don’t bother to iron their pre-washed fabric before cutting, don’t try to cut or sew straight, and in general, advance the notion that good enough is the new standard. I’m not asking for perfection here because only my mom could come that close; however, if you are putting yourself forward as an expert on how to do something, for goodness’ sake, have some pride in what you’re demonstrating.

Once my research was over, I extracted all the usable fabric from both sheets by snipping and then tearing off all the elastic and hems.

Then I snipped and tore each sheet in half to get four fabric pieces, each of which was large enough to make one crib sheet.

I tore the fabric to make it easier to find the straight of grain when it was time to rotary cut the pieces to the working / starting size of 68″ x 45″.

I made a couple of sample corner pockets with big box fabric to figure out how I wanted to tackle the sewing and ended up adding a couple steps to the process.

The first step was straight forward: cut an 8-inch square from each of the four corners of the fabric rectangle.

For each corner, match the two cut edges, right sides together and sew a ¼-inch seam from top to bottom.

Most tutorials went from this step to the casing, but I added two steps.

First, I used the overlock foot/stitch on my machine to enclose the raw edge and then pressed the seam allowance in the direction that it naturally wanted to go. In this case the direction was outward, toward the long side of the sheet.

Second, I anchored the seam allowance into place with a line of stitching slightly less than ⅛-inch from the edge.

It helped to use the edge of the presser foot as a guide and also to move the needle position.

I figured that these extra steps would help keep the sheet from falling apart too quickly since it would be washed a lot, although it’ll be a couple of years before I know if my instincts are correct.

The other advantage is that it gives a nice clean, professional finish to the corner pockets.

I experimented with three different types and widths of elastic: ¼-inch braided, ½-inch woven and ⅜-inch knitted. The woven elastic behaved the best, but I wish it had been available in a narrower width.

I made two sheets with the ½-inch elastic. Because it would require a larger casing, I increased the starting rectangle size to 47″ x 70″ and cut a 9-inch square from each corner. I also added an extra row of stitching to reinforce those casings.

Next: Crib sheet, pieced version

Leave a comment

Filed under kids, Mom

Legacy and heirlooms

Thirty years ago when I was pregnant with our first baby, I asked my mom if she would make bumper pads and a skirt for the crib and she said yes. I was so happy that she agreed, as I had already been to the fabric store and found an ultra-cute nursery collection, but more importantly, because I knew if Mom made them, they would be perfect – and they were.

I liked all the coordinating prints, but the main / focus print with the toys was what sold me on the collection because it wasn’t too infantile – no cows jumping over moons for this mom; no sleepy lambs floating among clouds in soft pastels that the baby would outgrow in less than a year. I wanted more colorful, defined images and this fabric fit the bill.

I mailed the fabric and two patterns to Mom, and she went to work. I recall a note from my aunt that summer in which she said that Mom relayed to her that she was “fighting with bumper pads.”

It wasn’t until after Eric was born that I realized just what my aunt meant. When Mom delivered the bumper pads and skirt, she also returned all the unused fabric and the multiple samples she made to determine the amount of cushioning for the pads. As I examined the samples and compared them to the final product, I saw the depth of her planning, thought, and consideration and was overwhelmed with appreciation.

All the samples included a top, middle, and back: one with two layers of cotton batting,

two with polyester batting,

and the fourth with a generous amount of polyester fiberfill.

One of them also incorporated a layer of medium weight fusible interfacing.

Mom outline quilted around the image of each sample.

In the end, I think she incorporated some upholstery foam into the pads because they are bulky and squish like there’s foam inside. True to her form, they are perfect.

The crib skirt was equally so: beautiful workmanship and impeccable attention to detail, including the enclosure of the seam allowances where the skirt / ruffle is attached to the deck. This step wasn’t called for in the pattern, so Mom forged ahead on her own, making it up as she went along, something at which she excelled when she sewed.

And, while I would have been completely happy with a machine-stitched skirt hem, Mom hand stitched it.

The real memory jolt came about six weeks ago when I pulled both items from storage to wash and iron in anticipation of handing them down. As I was ironing the skirt, I noticed that Mom had twice turned under the raw edge of every seam allowance and hand stitched it down.

As I stood over the ironing board pressing the wrinkles from her beautiful work, the tears flowed, and I so wished I could hug her again and tell her how much I love and appreciate her and the effort she put into making these things for her grandson.

She used the main print in the collection to create a valance for the window in the baby’s room, complete with a generously sized rod pocket on the back so it would not sag or flap around.

As I packed everything in preparation for the hand off, I wondered why my mom had taken such painstaking steps to finish everything so completely and beautifully – other than the fact that she was a perfectionist when she sewed. There had to be more to it than that – after all, why would anyone labor so intensely on something which is used for such a short amount of time?

Part of me believes that in doing so, she was ensuring that these items would not only survive our two babies, but have enough life left for another generation. I’ll never know if that was her hope, but the fact that it’s happening is awesome. And while I don’t know if an age of 30 years qualifies an item as an heirloom, I have hope that with proper care and storage, my mom’s love and effort may extend to a third generation.

Next: The crib quilt

2 Comments

Filed under kids, Mom

A custom what?

My son made me a keyboard. It’s fabulous. You could almost say it’s beautiful.

He texted me out of the blue one Saturday afternoon last July requesting a Facetime session, opening the conversation by announcing that he had a Word document (yep, that’s my boy!) with questions I needed to answer about my new keyboard – oookay . . . .

For years now, I’ve debated about upgrading my keyboard to one with a number pad but lacked the patience to evaluate all the options at the computer store.

At 12¼”, this keyboard wasn’t the best, but it didn’t take up much space on my desk, which was my reason for using it.

They all looked the same: black plastic rectangular blobs, all of which looked too big for my small desk. Before long, I’d fall into a glassy-eyed stare and head for the exit. It was too much, leading to no decision, which became the decision: no keyboard upgrade.

Enter Ross and the Facetime session with the Word doc. He really wanted to build this keyboard.

We talked about the case: its size, weight, color, and key configuration. I was surprised at the number of color options available but settled on a medium steel gray (looks blueish in the photo, but it’s not) because I worried that a fad color wouldn’t age well, plus it looked good with the blue key caps I wanted.

The six layers of material contained in the case no doubt contribute to its substantial weight of more than 4 pounds, a far cry from the twinky 12.7-ounce keyboard I was currently using.

I had complete confidence in Ross’s recommendations, as he had already built a few keyboards for work and home. I chose the Akko MOD 004, which has since been discontinued – and if you’re a long-time reader of this blog, you know that John and I hold the record for choosing items that are discontinued or become discontinued shortly after purchase. It’s become our benchmark for knowing we’ve chosen the right thing! Add this one to our very long list.

Regarding key caps, Ross explained available colors, color combinations, main key (Shift, Enter, Control, the spacebar, etc.) shape options and positioning within the case.

The key set came packaged in two stackable Styrofoam trays  

Included in the trays were options such as these. It had never occurred to me that there might be five options for just the SHIFT key.

The F and J in the home row came with and without a raised line, the former of which helps your fingers more quickly find the correct position on the board.

Next came the hardest question of all: the degree of tactile feedback desired when pressing the keys. To help make that decision, Ross ordered a 9-key sampler and shipped it to our house.

The sampler sat on the corner of the kitchen counter for about three weeks, available for testing any time I walked by. Eliminating the three or four most obvious, worst-feeling options was quick and easy, but choosing a favorite from the remaining six or seven was nearly impossible because the nuances between them were so subtle.

Last, there was the decision about cordless versus corded. John and Ross prefer corded because there’s never an interruption between the keyboard and monitor and no batteries to mess with. Still, while appealing, I didn’t want a black cord on a white desk. Not to worry – check out this connector:

Once all the details were decided, he ordered all the parts and went to work, including lubricating all the individual switches.

Keyboard assembly in progress.

In late August, he texted this:

So… I may have stayed up until 4:00 a.m. working on your keyboard.

It’s hard to imagine that something as ordinary as a computer keyboard could be a gush-worthy item, but this one is. That my son took so much thought, time, and trouble to make it for me – no prompting, initiated all on his own – melts my heart. And in case you’re wondering what it’s like to use? Think Goldilocks: it’s juuuust right!

On top of that, it’s great to know that the craft gene has passed to the next generation of our family. Thank you, Ross. XXX OOO!

Leave a comment

Filed under kids, miscellaneous

A visitor and a quilt block

I hope you had a nice Thanksgiving. Our younger son flew in last Saturday to spend the holiday with us, and his visit was just the boost I needed to bring me out of my funk. Here he is with John yesterday, checking the roasting chickens on the rotisserie.

We always cook two so we have leftovers and so I can freeze some of the meat for a casserole or chicken pot pie at a later date. Plus, it doesn’t take any longer to decontaminate the kitchen after prepping two chickens as opposed to just one, so may as well go for it.

Here is the November vintage tree block. I’m so glad that there is only one more to make!

Thanks for stopping by!

Leave a comment

Filed under home cookin', kids, piecing

A dog in the house

Last week was the first week since April that didn’t still feel like April because it wasn’t just the two of us in the house like it has been for months on end. Our son Ross came for a visit, his first vacation since he started his job last September after graduating from college. It was sweet of him to drive 1,200 miles to see us old folk even though there wasn’t much to do once he got here. He brought along his not-quite two-year-old Australian Shepherd which made things interesting because we’ve never had a dog.

It’s not that we don’t like dogs. We’re just not up for the time or expense required to care for one, so it was fun to enjoy Ross’s dog without all the responsibility.

This dog is whip smart – all caps, boldface, underlined, italicized – smart. Ross did a good job training him; the dog is obedient, easy to walk and barked one time in seven days. We were left with the impression that any day now, he’d be discussing current events and solving algebra problems.

We had excellent weather while they were here so Ross bathed him in the back yard before they left. Enjoy the photos!

Dog is not liking this much but he tolerates it.


This blower does a great job of drying dog’s thick fur – hair everywhere.

All nice and fluffy clean.

Leave a comment

Filed under kids

Year-end fun

We closed 2019 with two wonderful outings. In November, we enjoyed the Houston Symphony’s performance of the second Star Wars movie, The Empire Strikes Back.

In mid-December we returned to Colorado for the Denver Art Museum’s exhibit Claude Monet: The Truth of Nature, which was FABULOUS. The collection took 3½ years to curate and includes more than 100 paintings. We invited the boys to go with us, and their first response was to decline – more than likely with wrinkled noses, rolling eyes and shaking heads.

My three favorite men in the world.

A couple weeks later while chatting with Eric on the phone, he revealed that he’d changed his mind and would like to go after all. Not long after, Ross conceded and said he would go as well. Great – family outing!

I don’t know about the menfolk, but I was in heaven from start to finish. Check out these beauties:

Monet’s works were grouped according to the various regions where they were painted: Norway, the Netherlands, London, Venice, Paris and numerous towns in the French countryside.

Poplars were a recurring motif in Monet’s paintings.

The Japanese footbridge at Giverny.

Closeup of the water lilies painting above.

One interesting subset of paintings were those of winter scenes, with the intriguing statement that white just might be the most complex color of all.

Leave a comment

Filed under kids, miscellaneous

Bacon boxers

Did you ever see Jim Gaffigan’s 2009 comedy performance King Baby? We watched it with the boys and enjoyed it immensely, especially when he got going on the subject of bacon. Since then, when we see or smell bacon, we think of Gaffigan running on about bacon and smile. So it seemed like a fun thing to do to make boxer shorts for the boys with bacon fabric.

The pattern featured a mock fly and only had two pieces: a front/back and a waistband. Still, construction was a challenge and when the instructions called for sewing through the two overlapped layers in front to create the mock fly, I didn’t like the way it looked or felt when smoothed out. I also wondered why it was necessary, so I ripped out the stitches and instead, reinforced the opening ¾” below the waistband

and again at the bottom of the fly.

The boys were underwhelmed, so it’s not likely that this pattern will be used again, but I’m still glad I made them.

I also managed to finish two beaded Christmas ornaments that I had purchased many moons ago.

I had started the stocking in Colorado, and finished it first,

after which I decided to tackle the Santa sack.

I enjoy these little kits, but sorting the beads for the Santa sack ornament took an hour. I finally pulled a round baking dish from the kitchen to keep those bouncy, roly-poly beads contained.

Maybe 2018 can be a year of finishes…

Merry Christmas, everyone.

1 Comment

Filed under Christmas, kids