Out of the closet

After a much-needed, two-year rest, my vintage tree blocks were pulled out of hibernation so I could start putting the top together.

Before officially starting, I made three ugly-fabric mock ups to work through the cutting and sewing details, determine sashing width, piecing order, and setting triangle size. After a couple weeks of fiddling around and fine-tuning, I was finally ready to cut the good fabric.

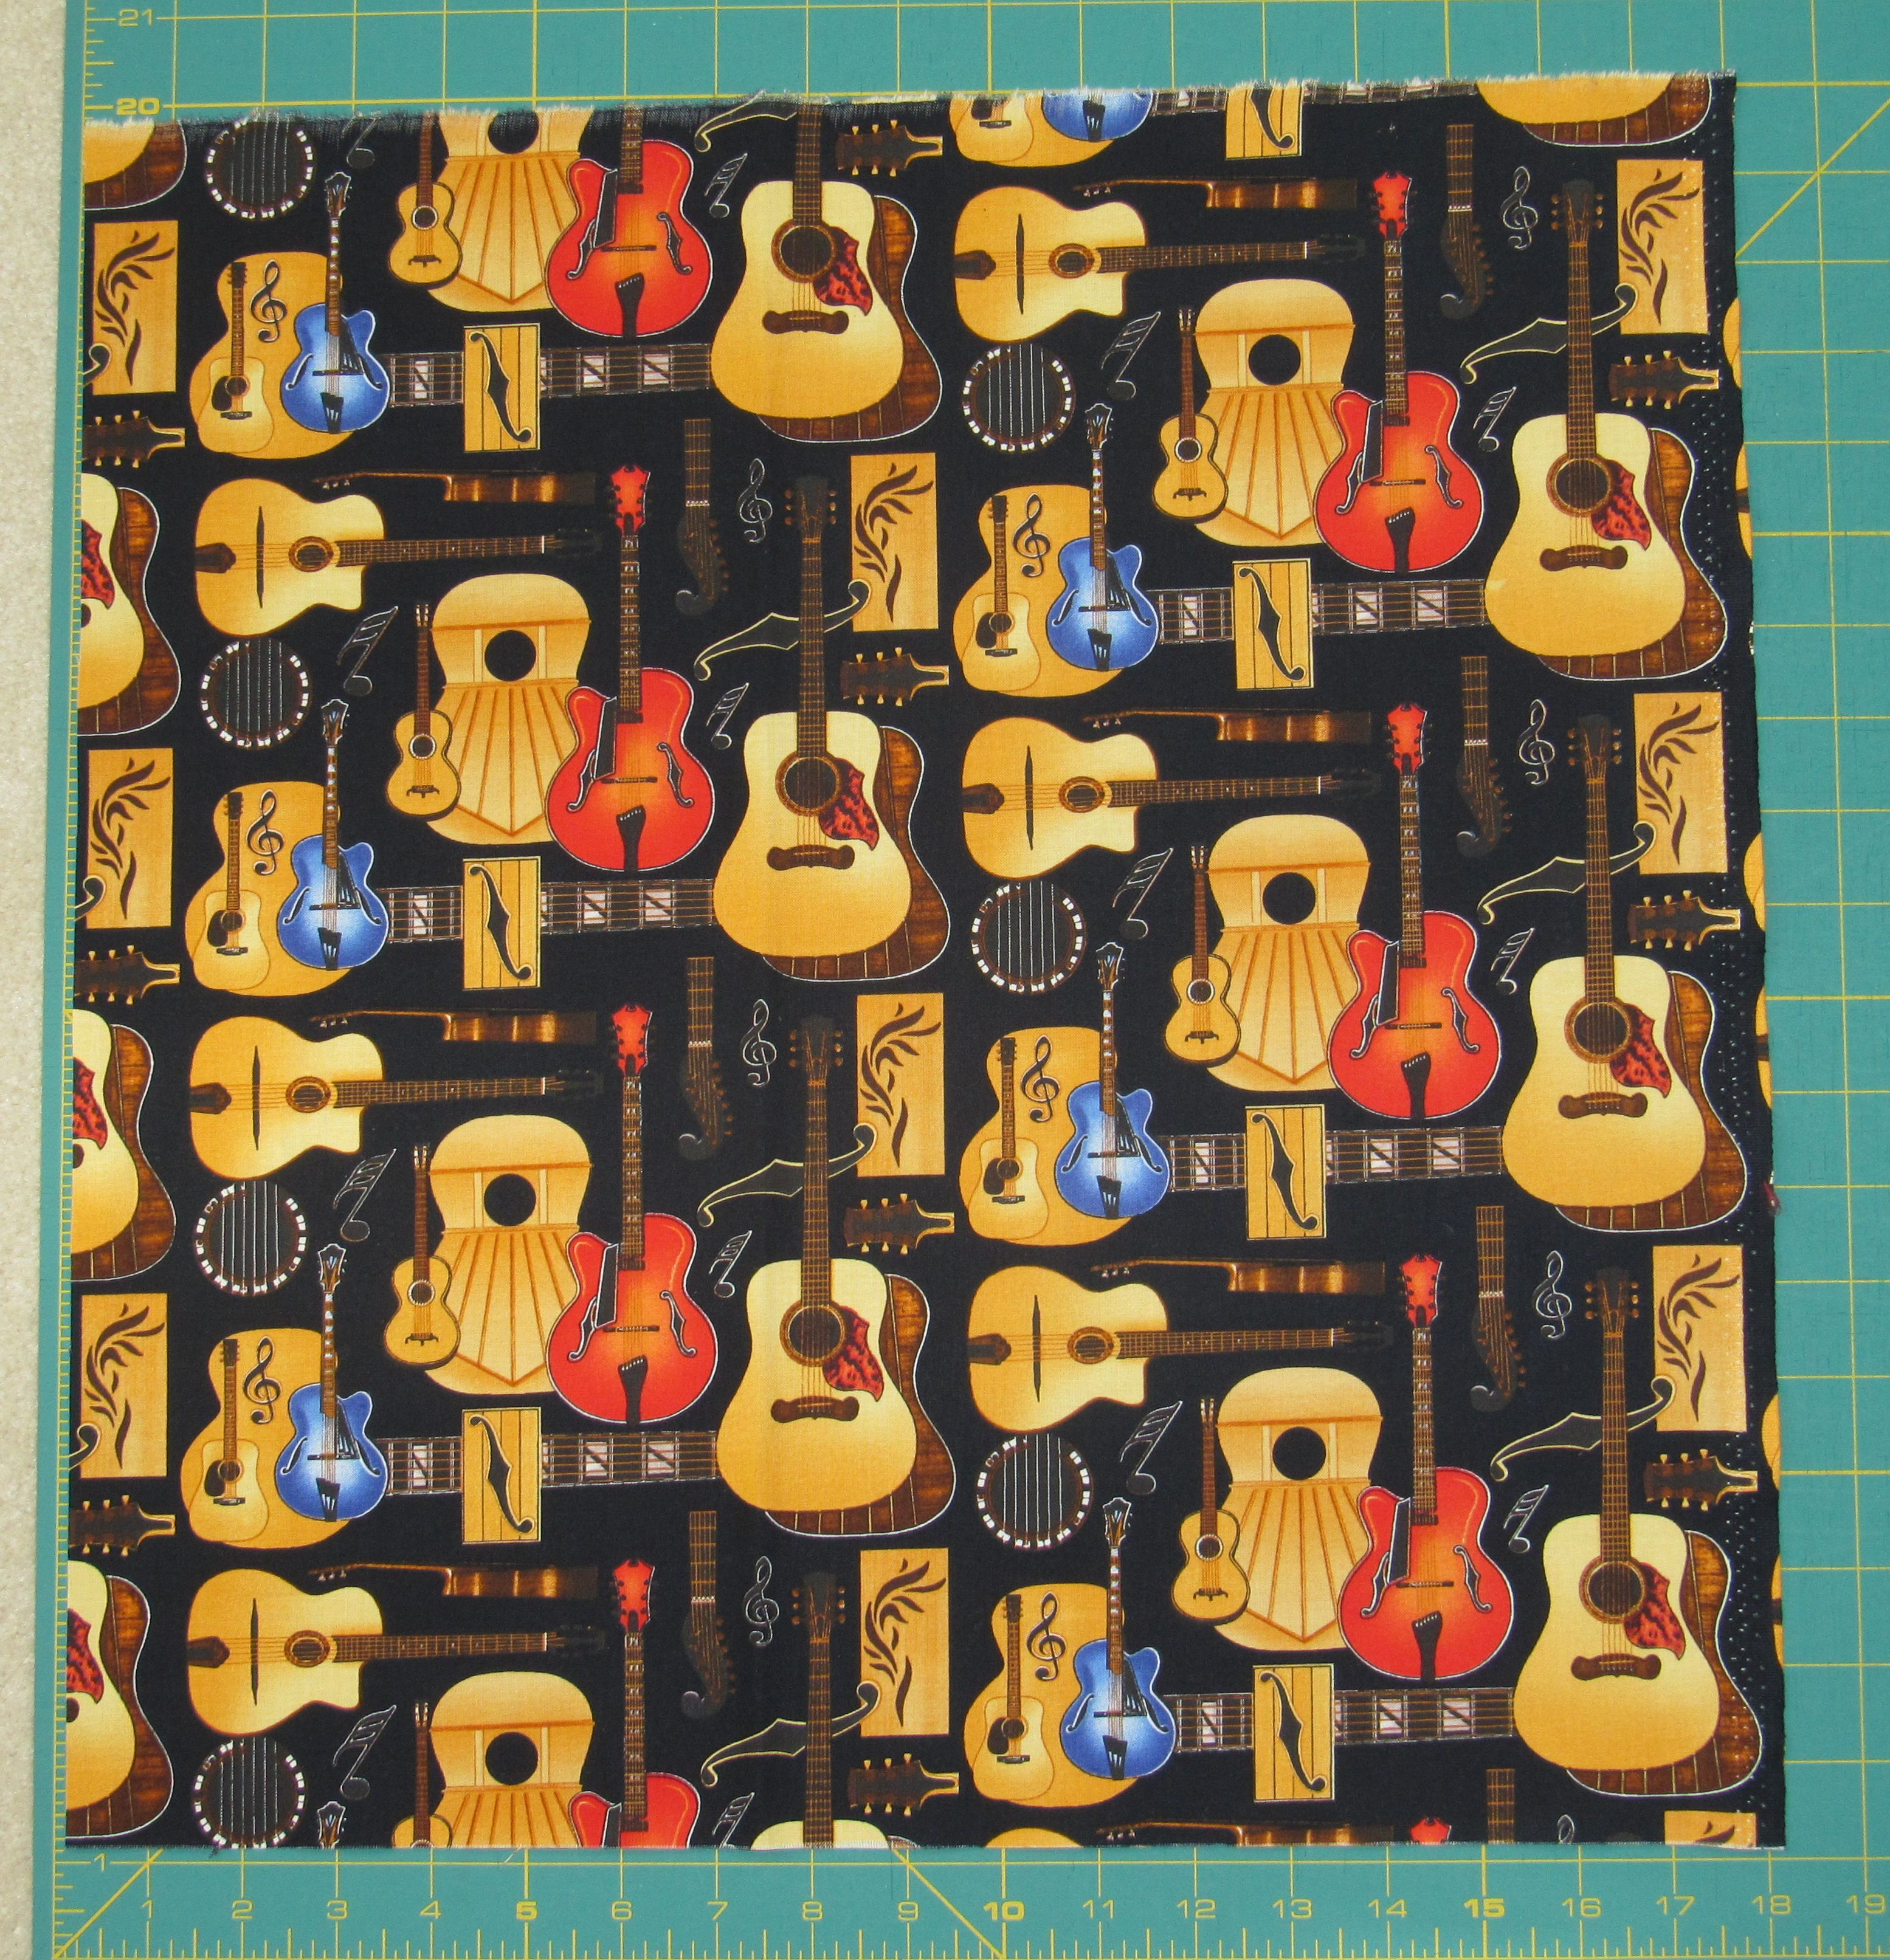
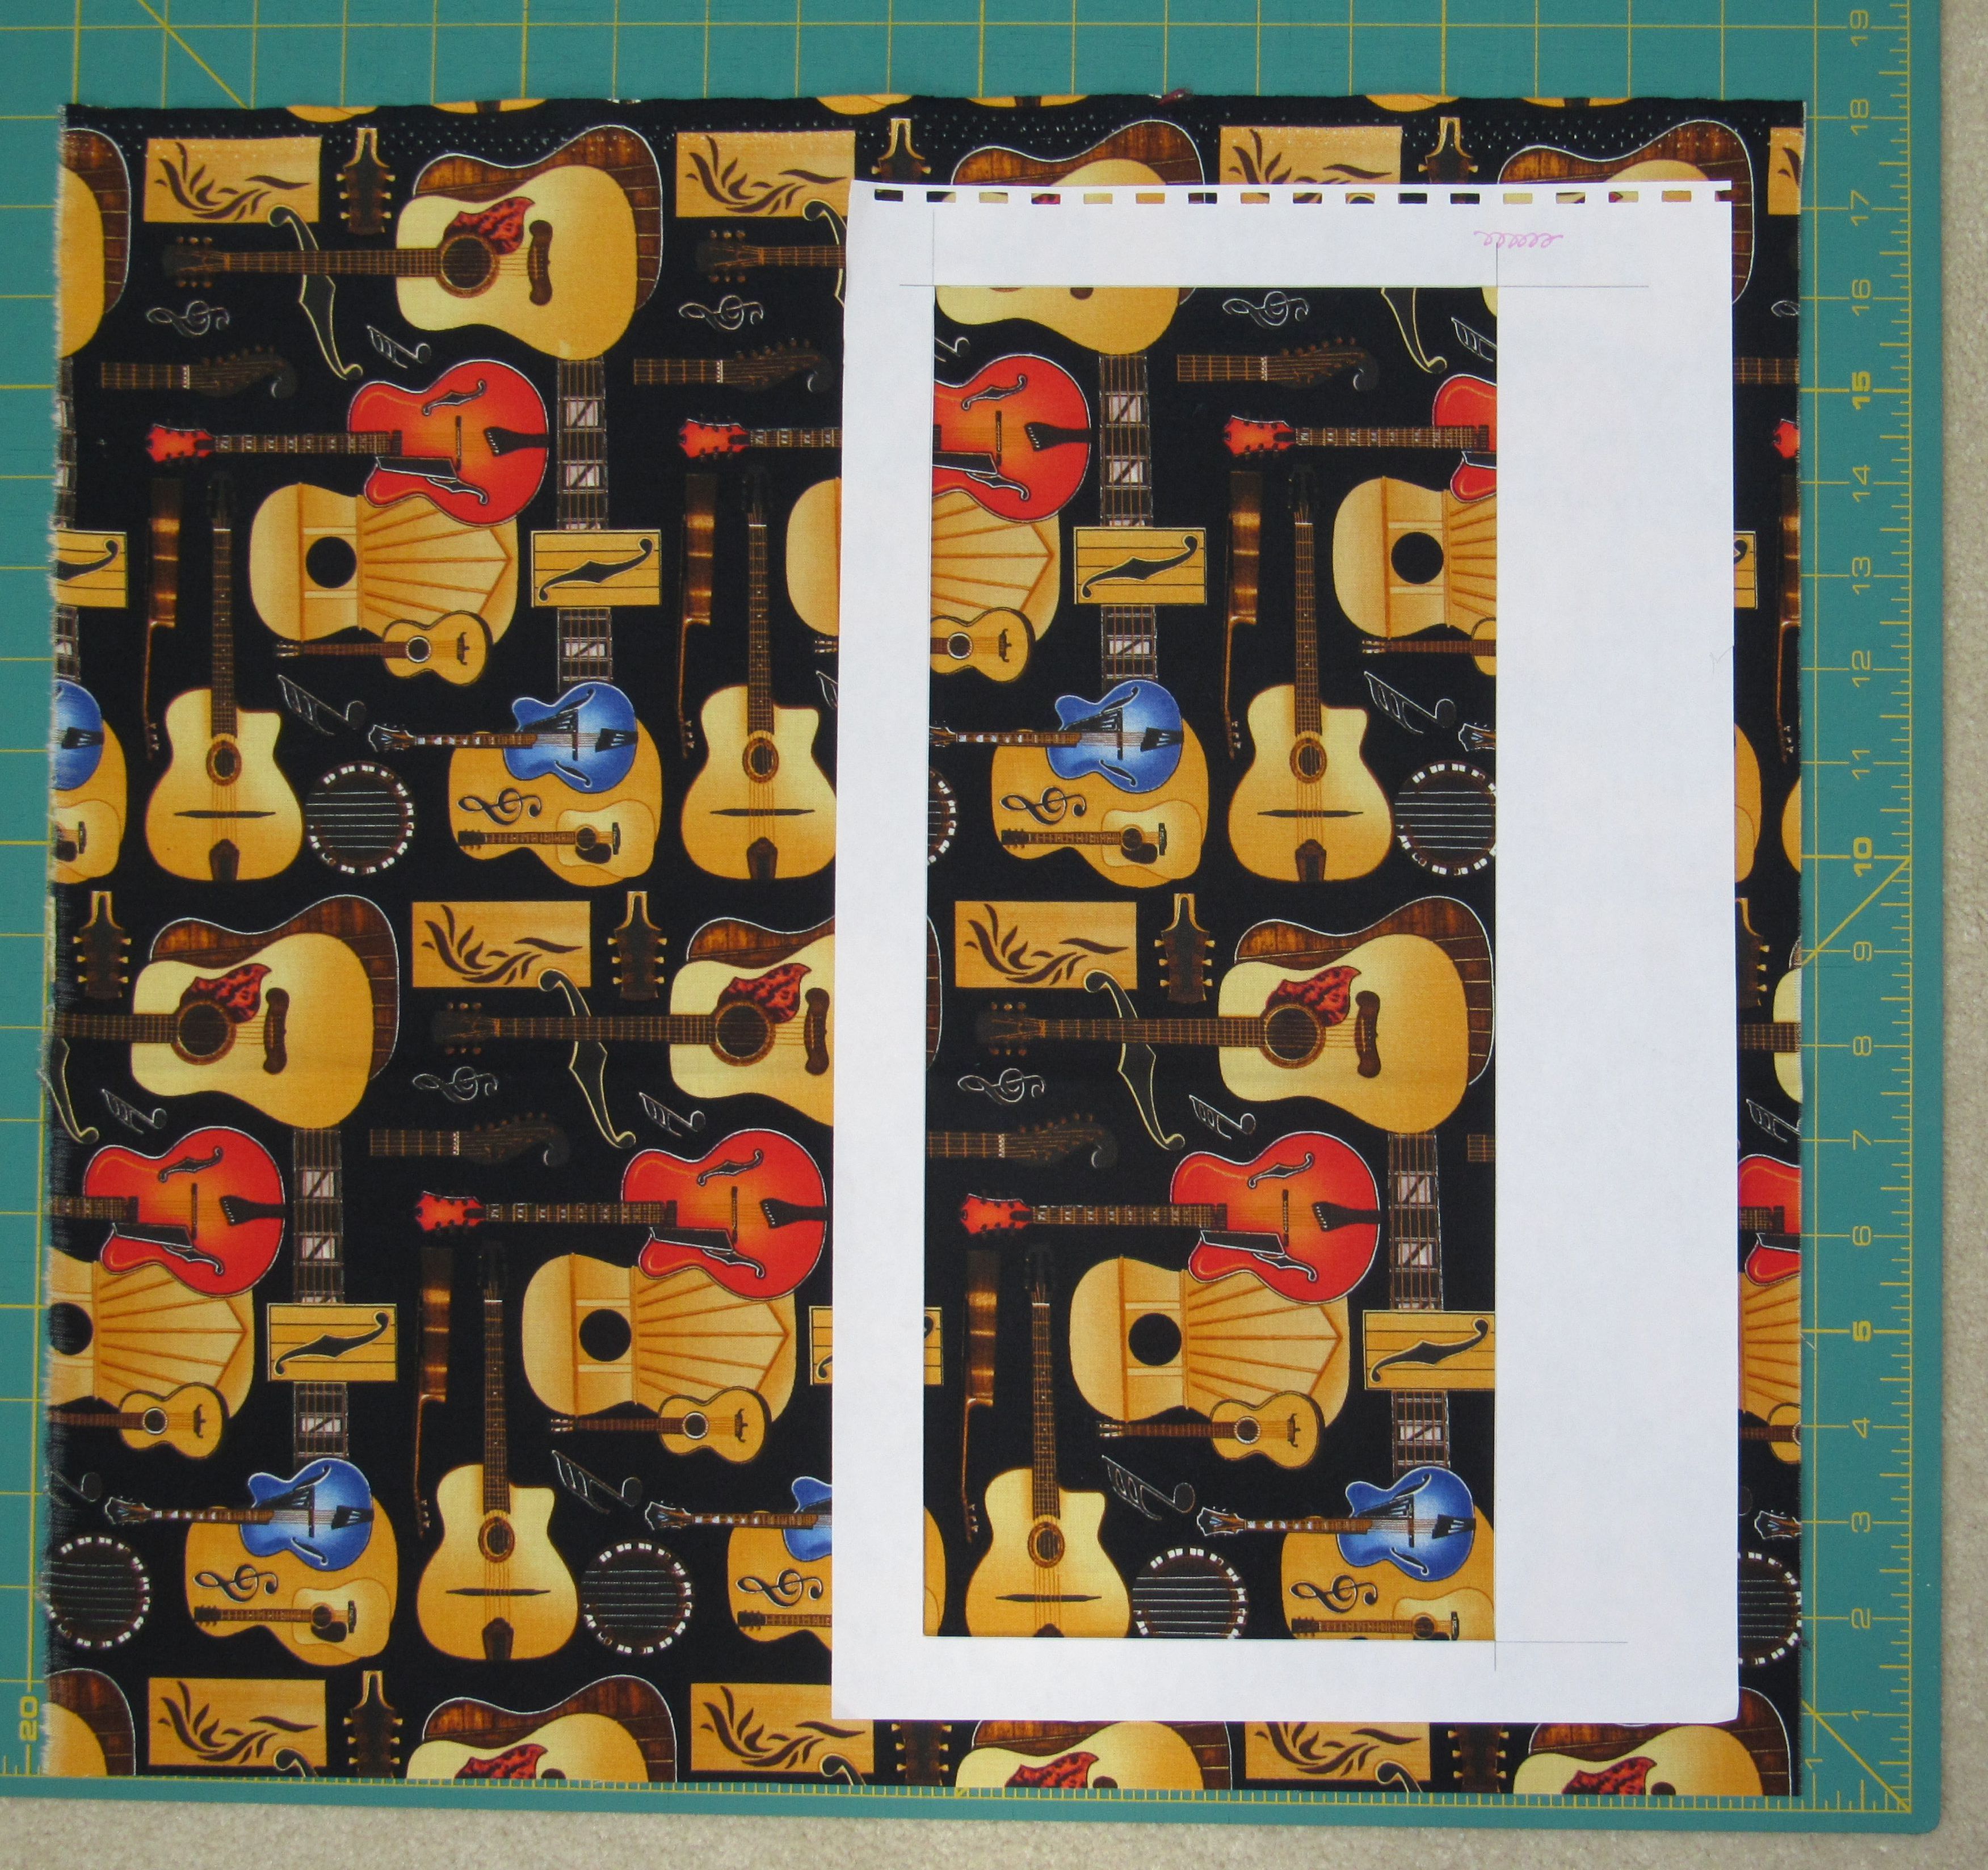
The first step was to make a template, which would be used to help cut the setting squares from this homespun plaid:

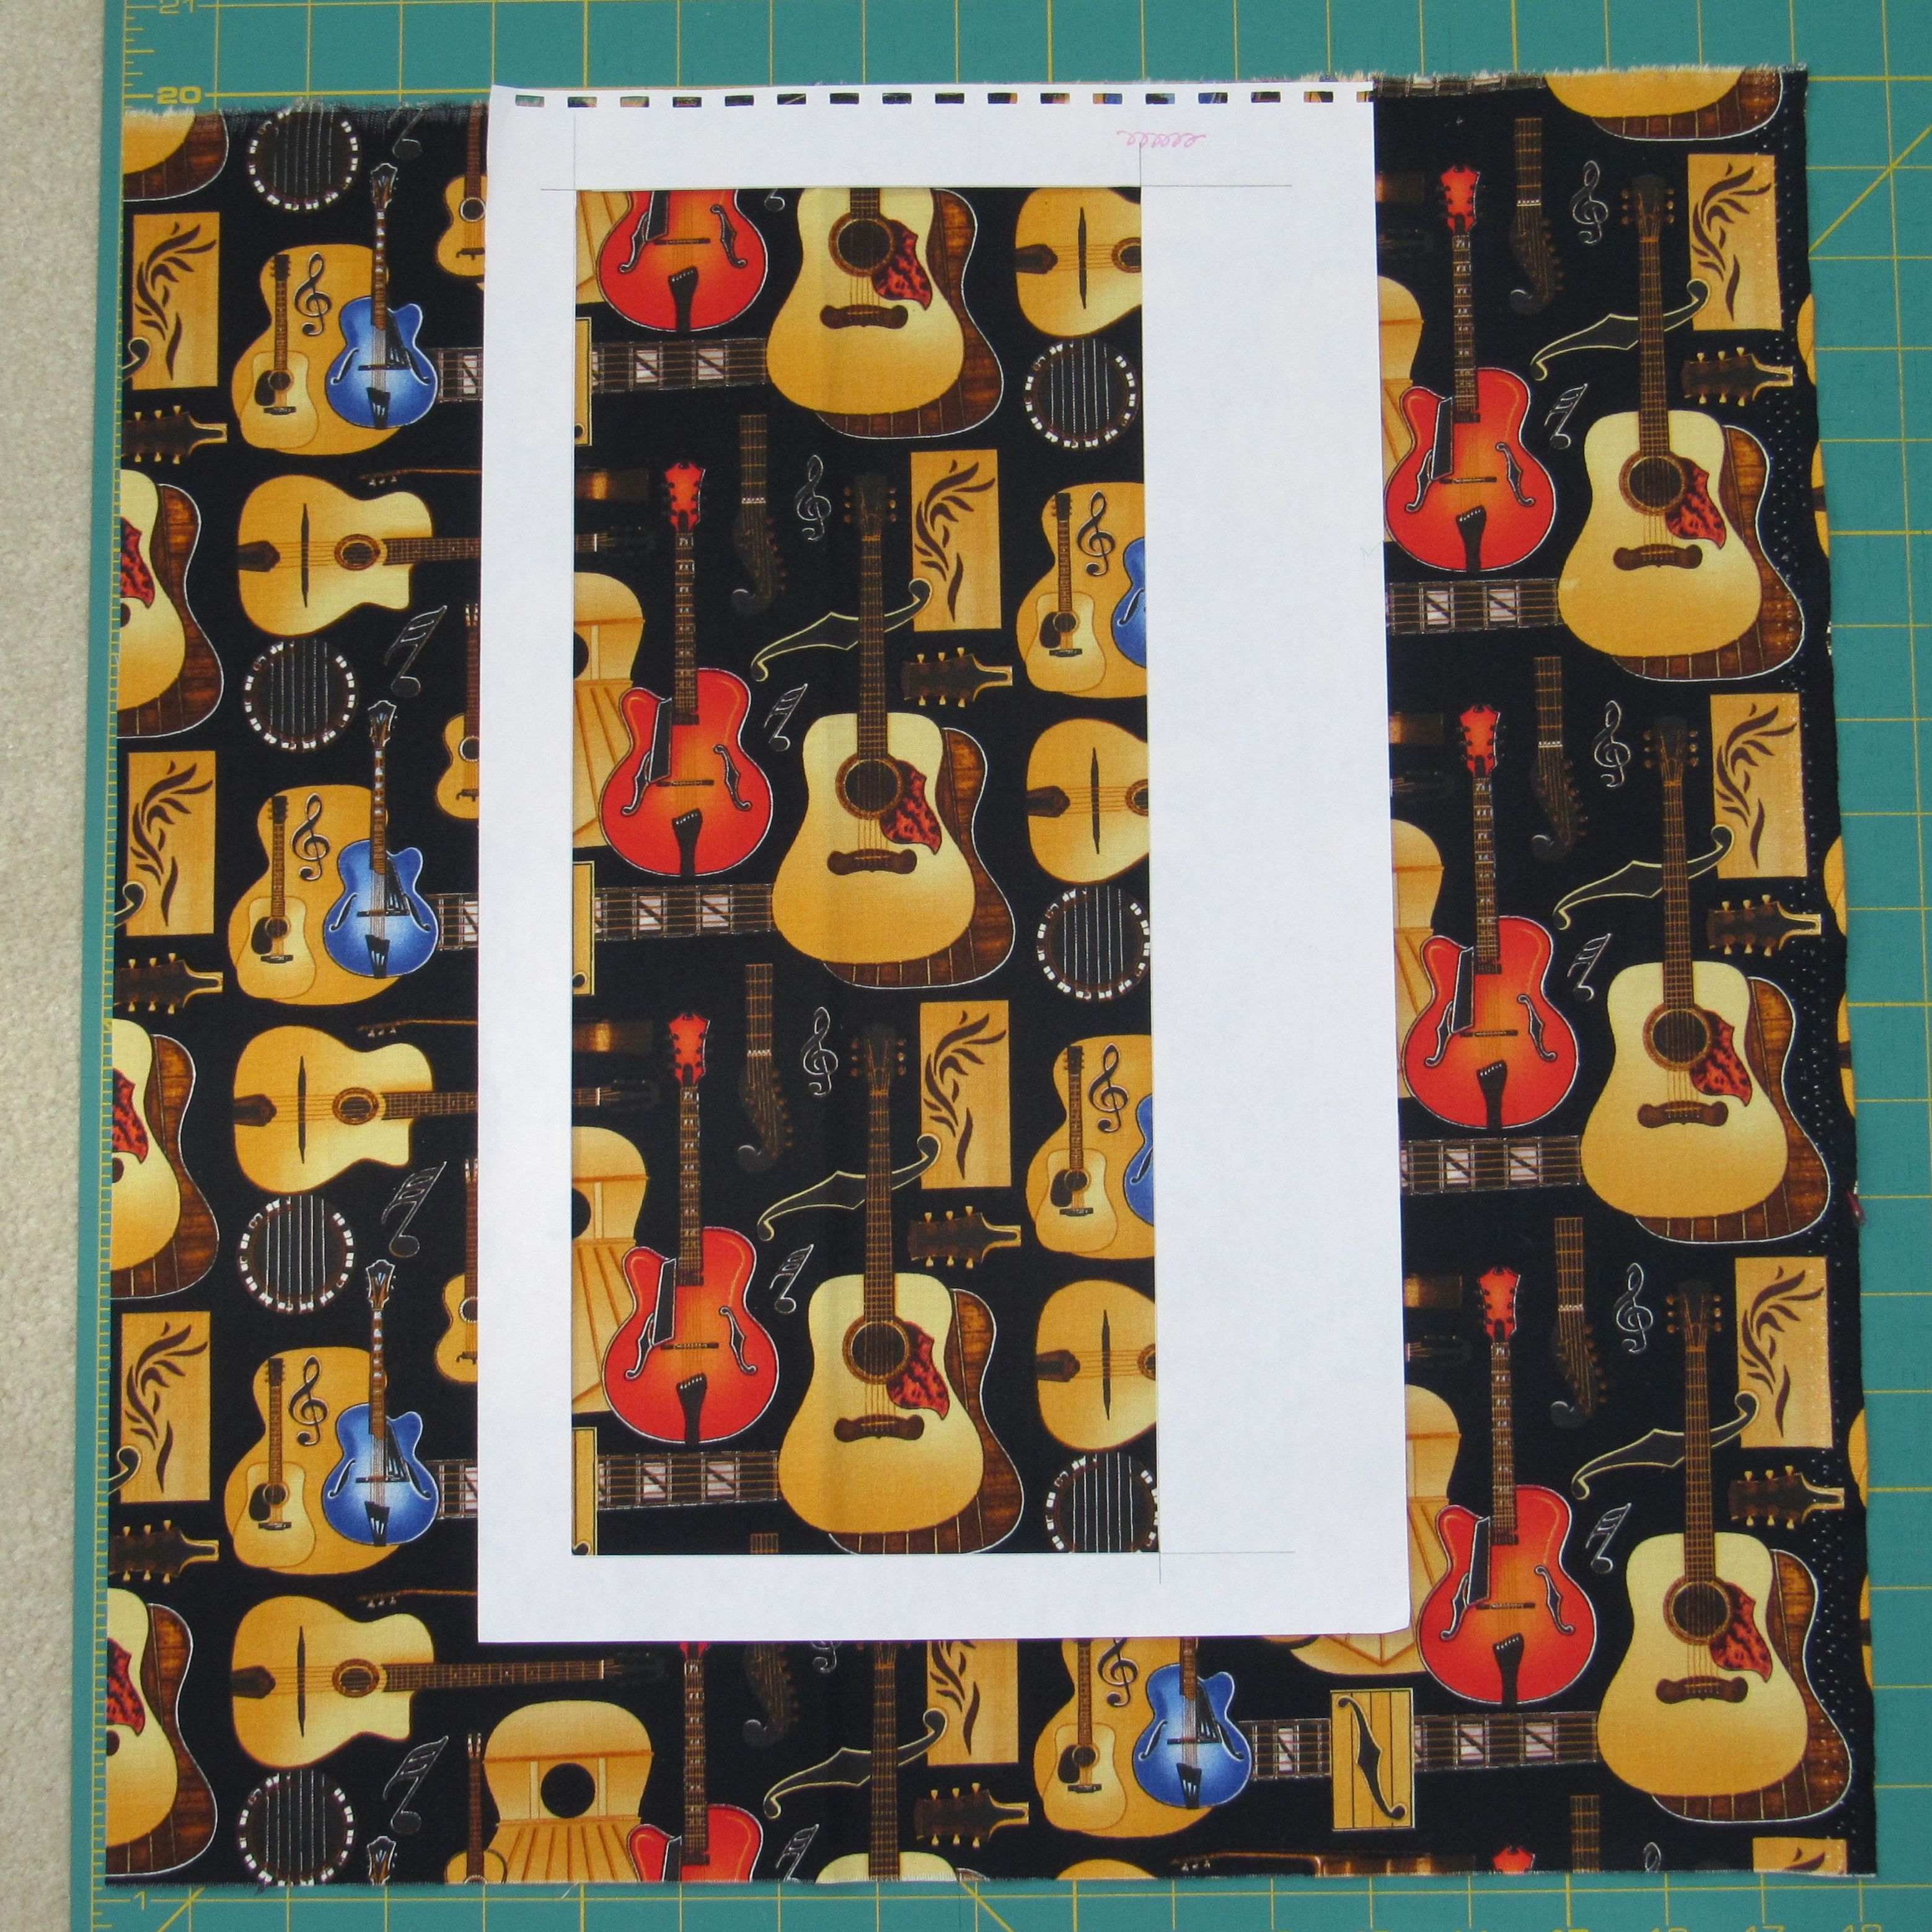
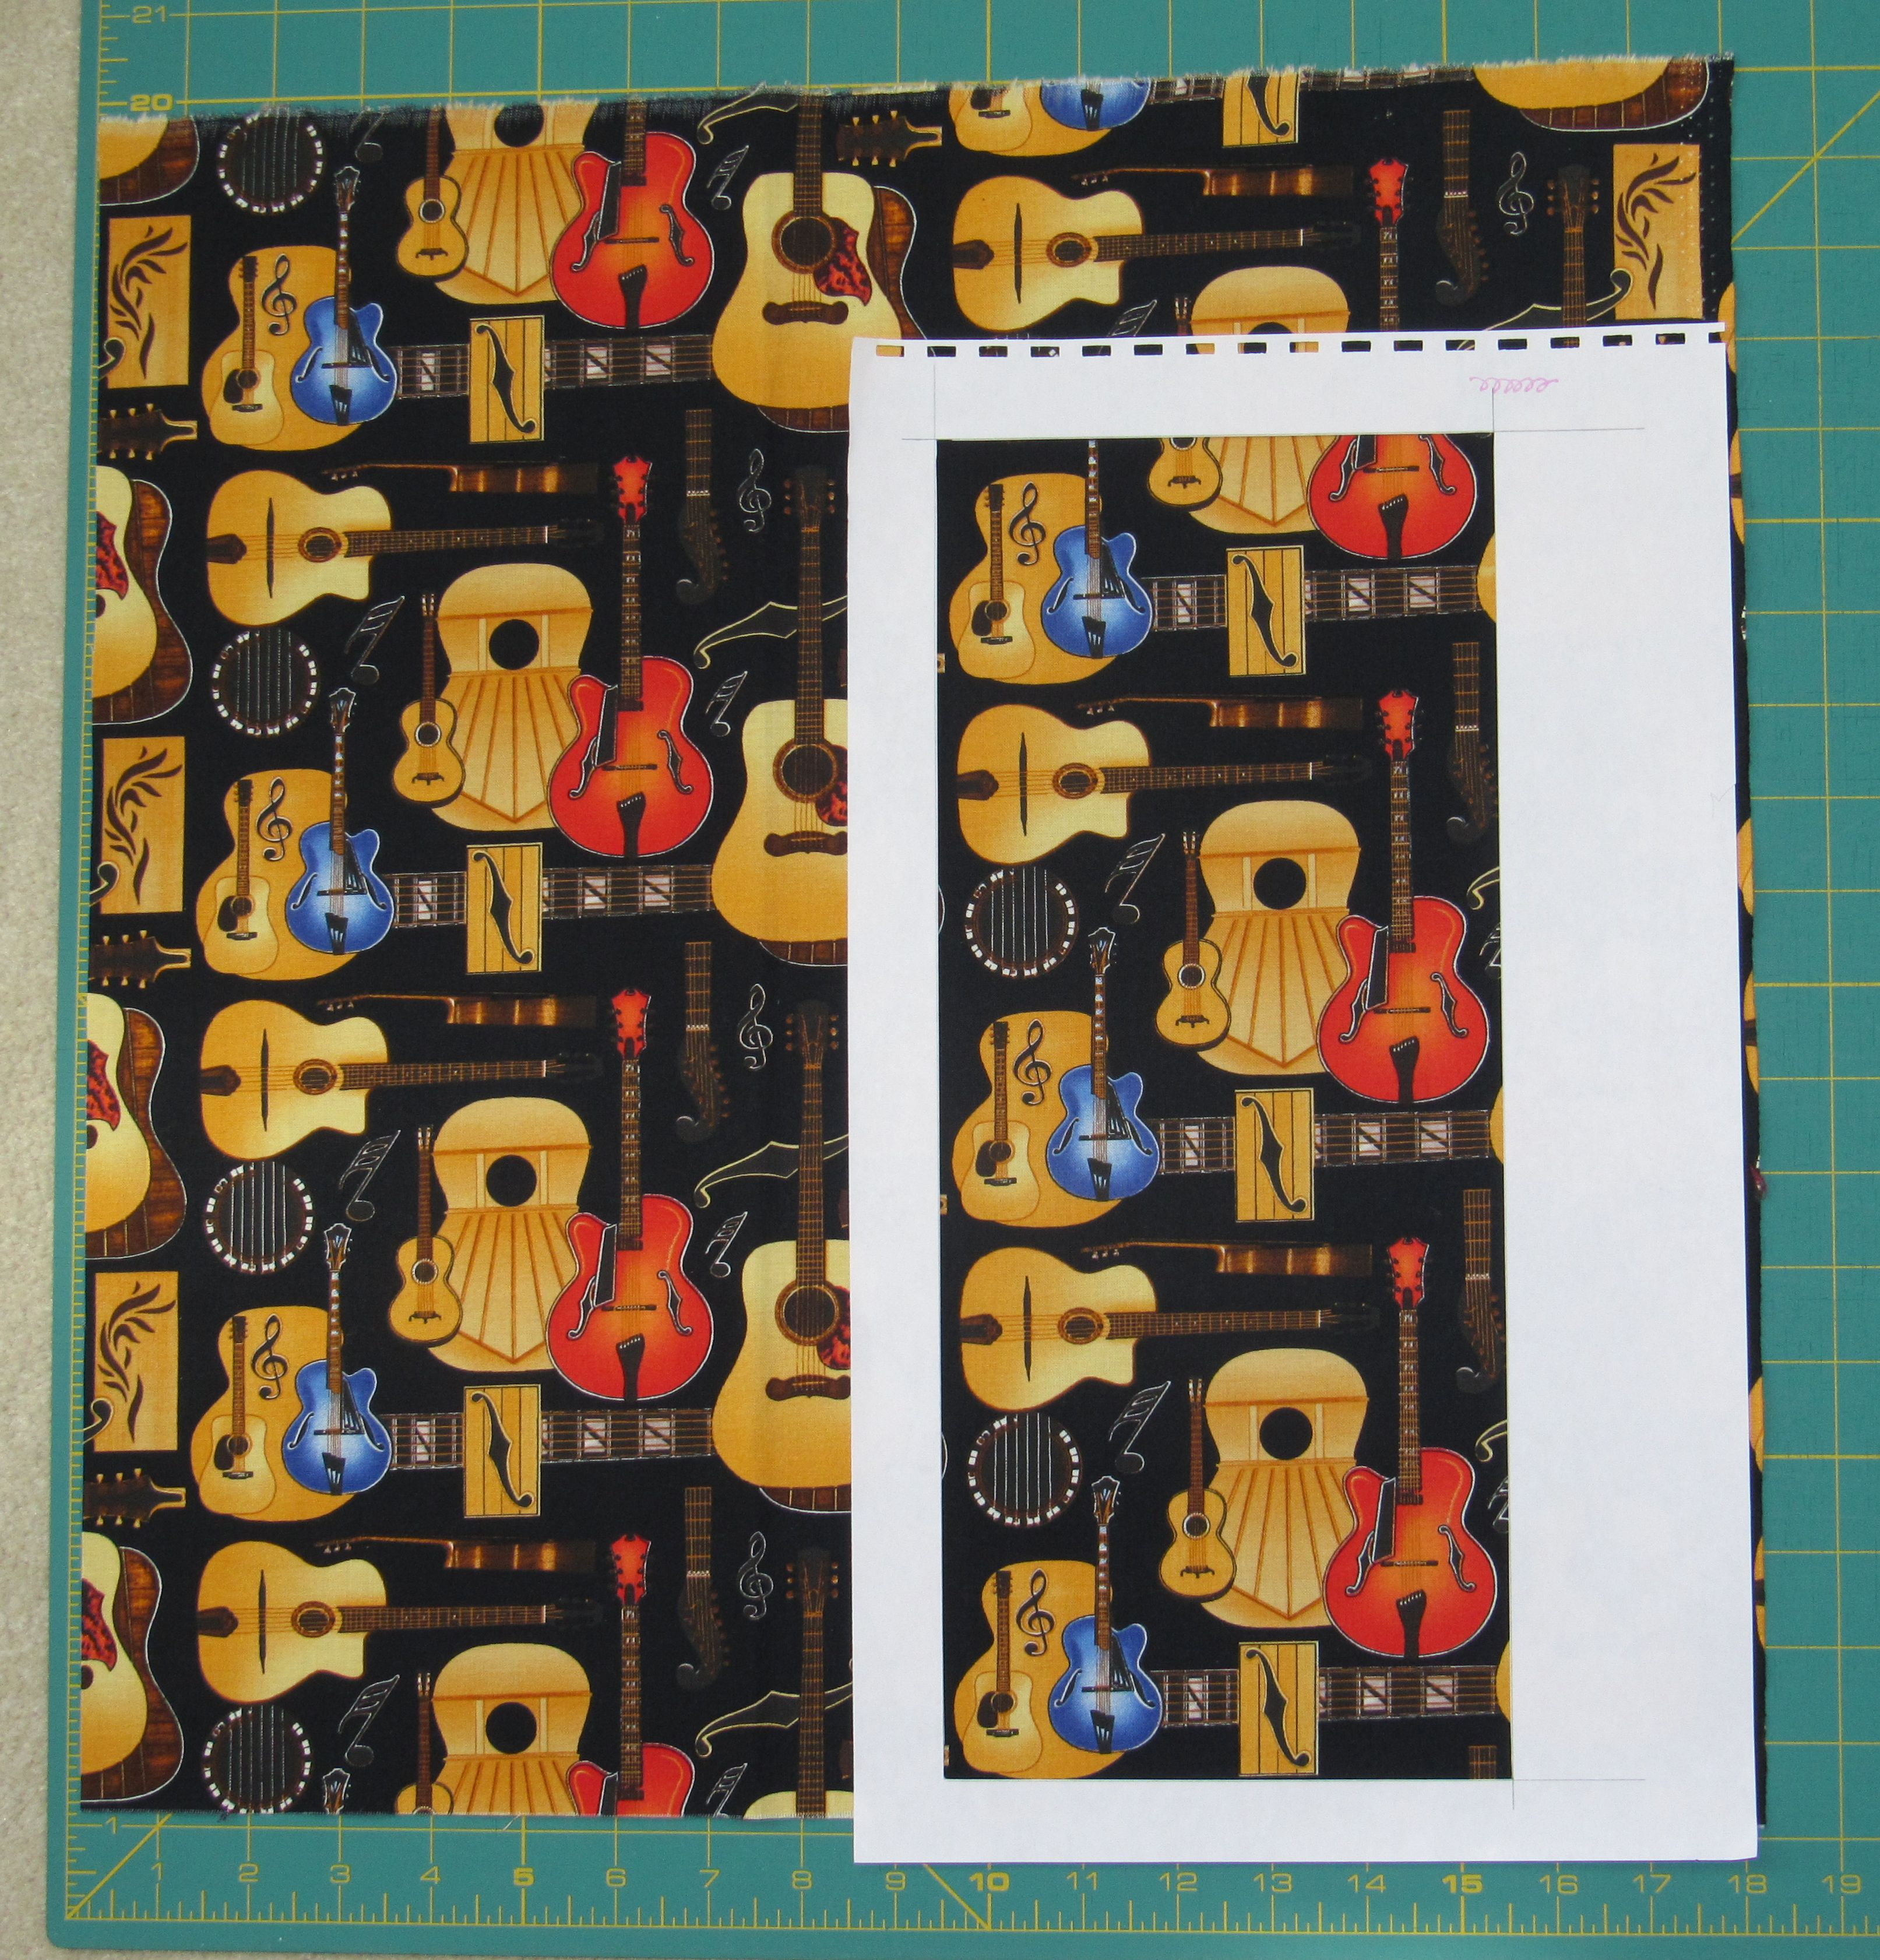
I aligned the straight edges of the template with the lines in the plaid, so the plaid pattern would not appear wonky and crooked. This is sometimes described as cutting off grain, on print, except in the case of a homespun, it would be cutting off grain, on weave – totally worth the effort to maintain balance, calm and order alongside a collection of busy, scrappy, pieced blocks.

I also paid attention to the orientation of the plaid, depending on which side of the vertical center the setting square was located.

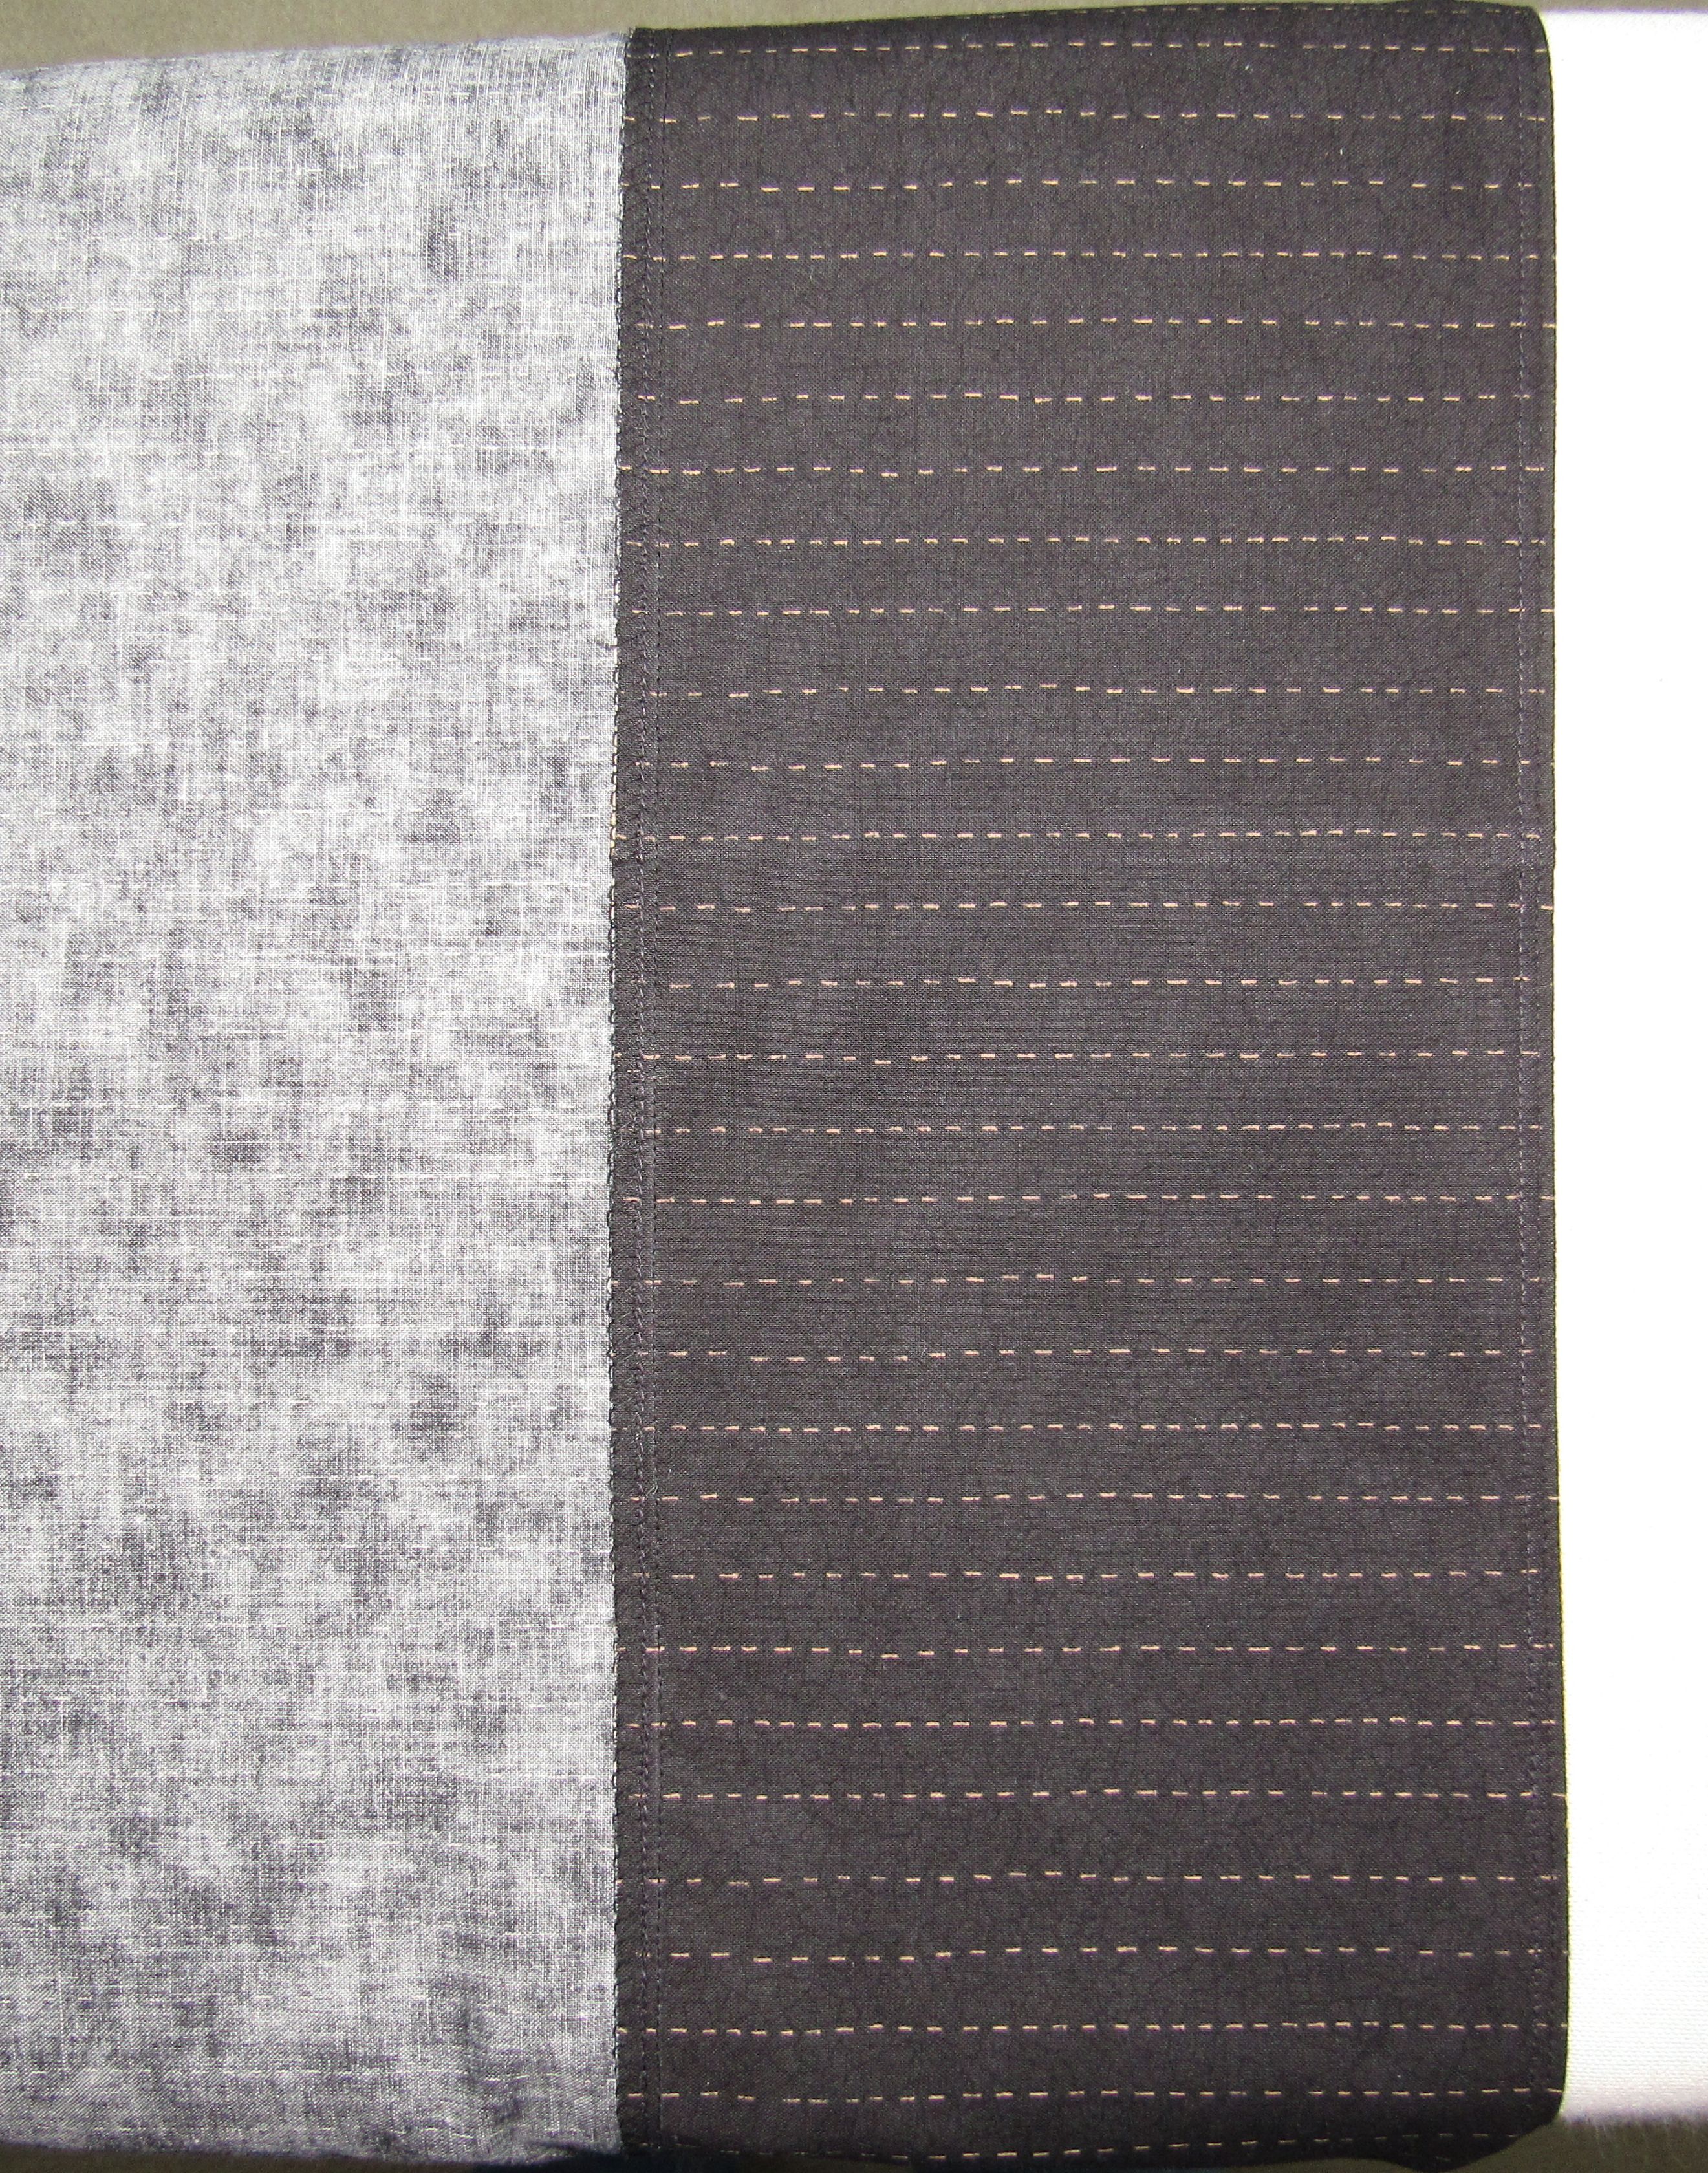
The second step was to cut 60 sashing strips from this rich, rusty red solid.

I purchased the 2¾-plus yards (roughly 100 inches) that remained on the bolt because I needed that much length to avoid piecing the sashing, the longest diagonal measuring more than 80 inches. With the strips finishing at one-quarter inch wide, piecing them was out of the question.

A big advantage to cutting the sashing strips along the lengthwise grain was that they would have the least amount of stretch, good for keeping the top square.

I put my mat on the floor to cut these strips. I stabilized the ruler by putting my left knee directly onto the ruler at the bottom, a 5-pound hand weight at the top, and my left hand between those two positions. Applying that amount of pressure along the entire length of the ruler meant that cutting through all four layers without the ruler slipping was almost guaranteed.

I cut the strips on the fat side of the three-quarter inch ruler line to accommodate the bulk of pressing to one side.

I knotted and buried the thread tails throughout this entire project so it would not come apart as it was being handled.

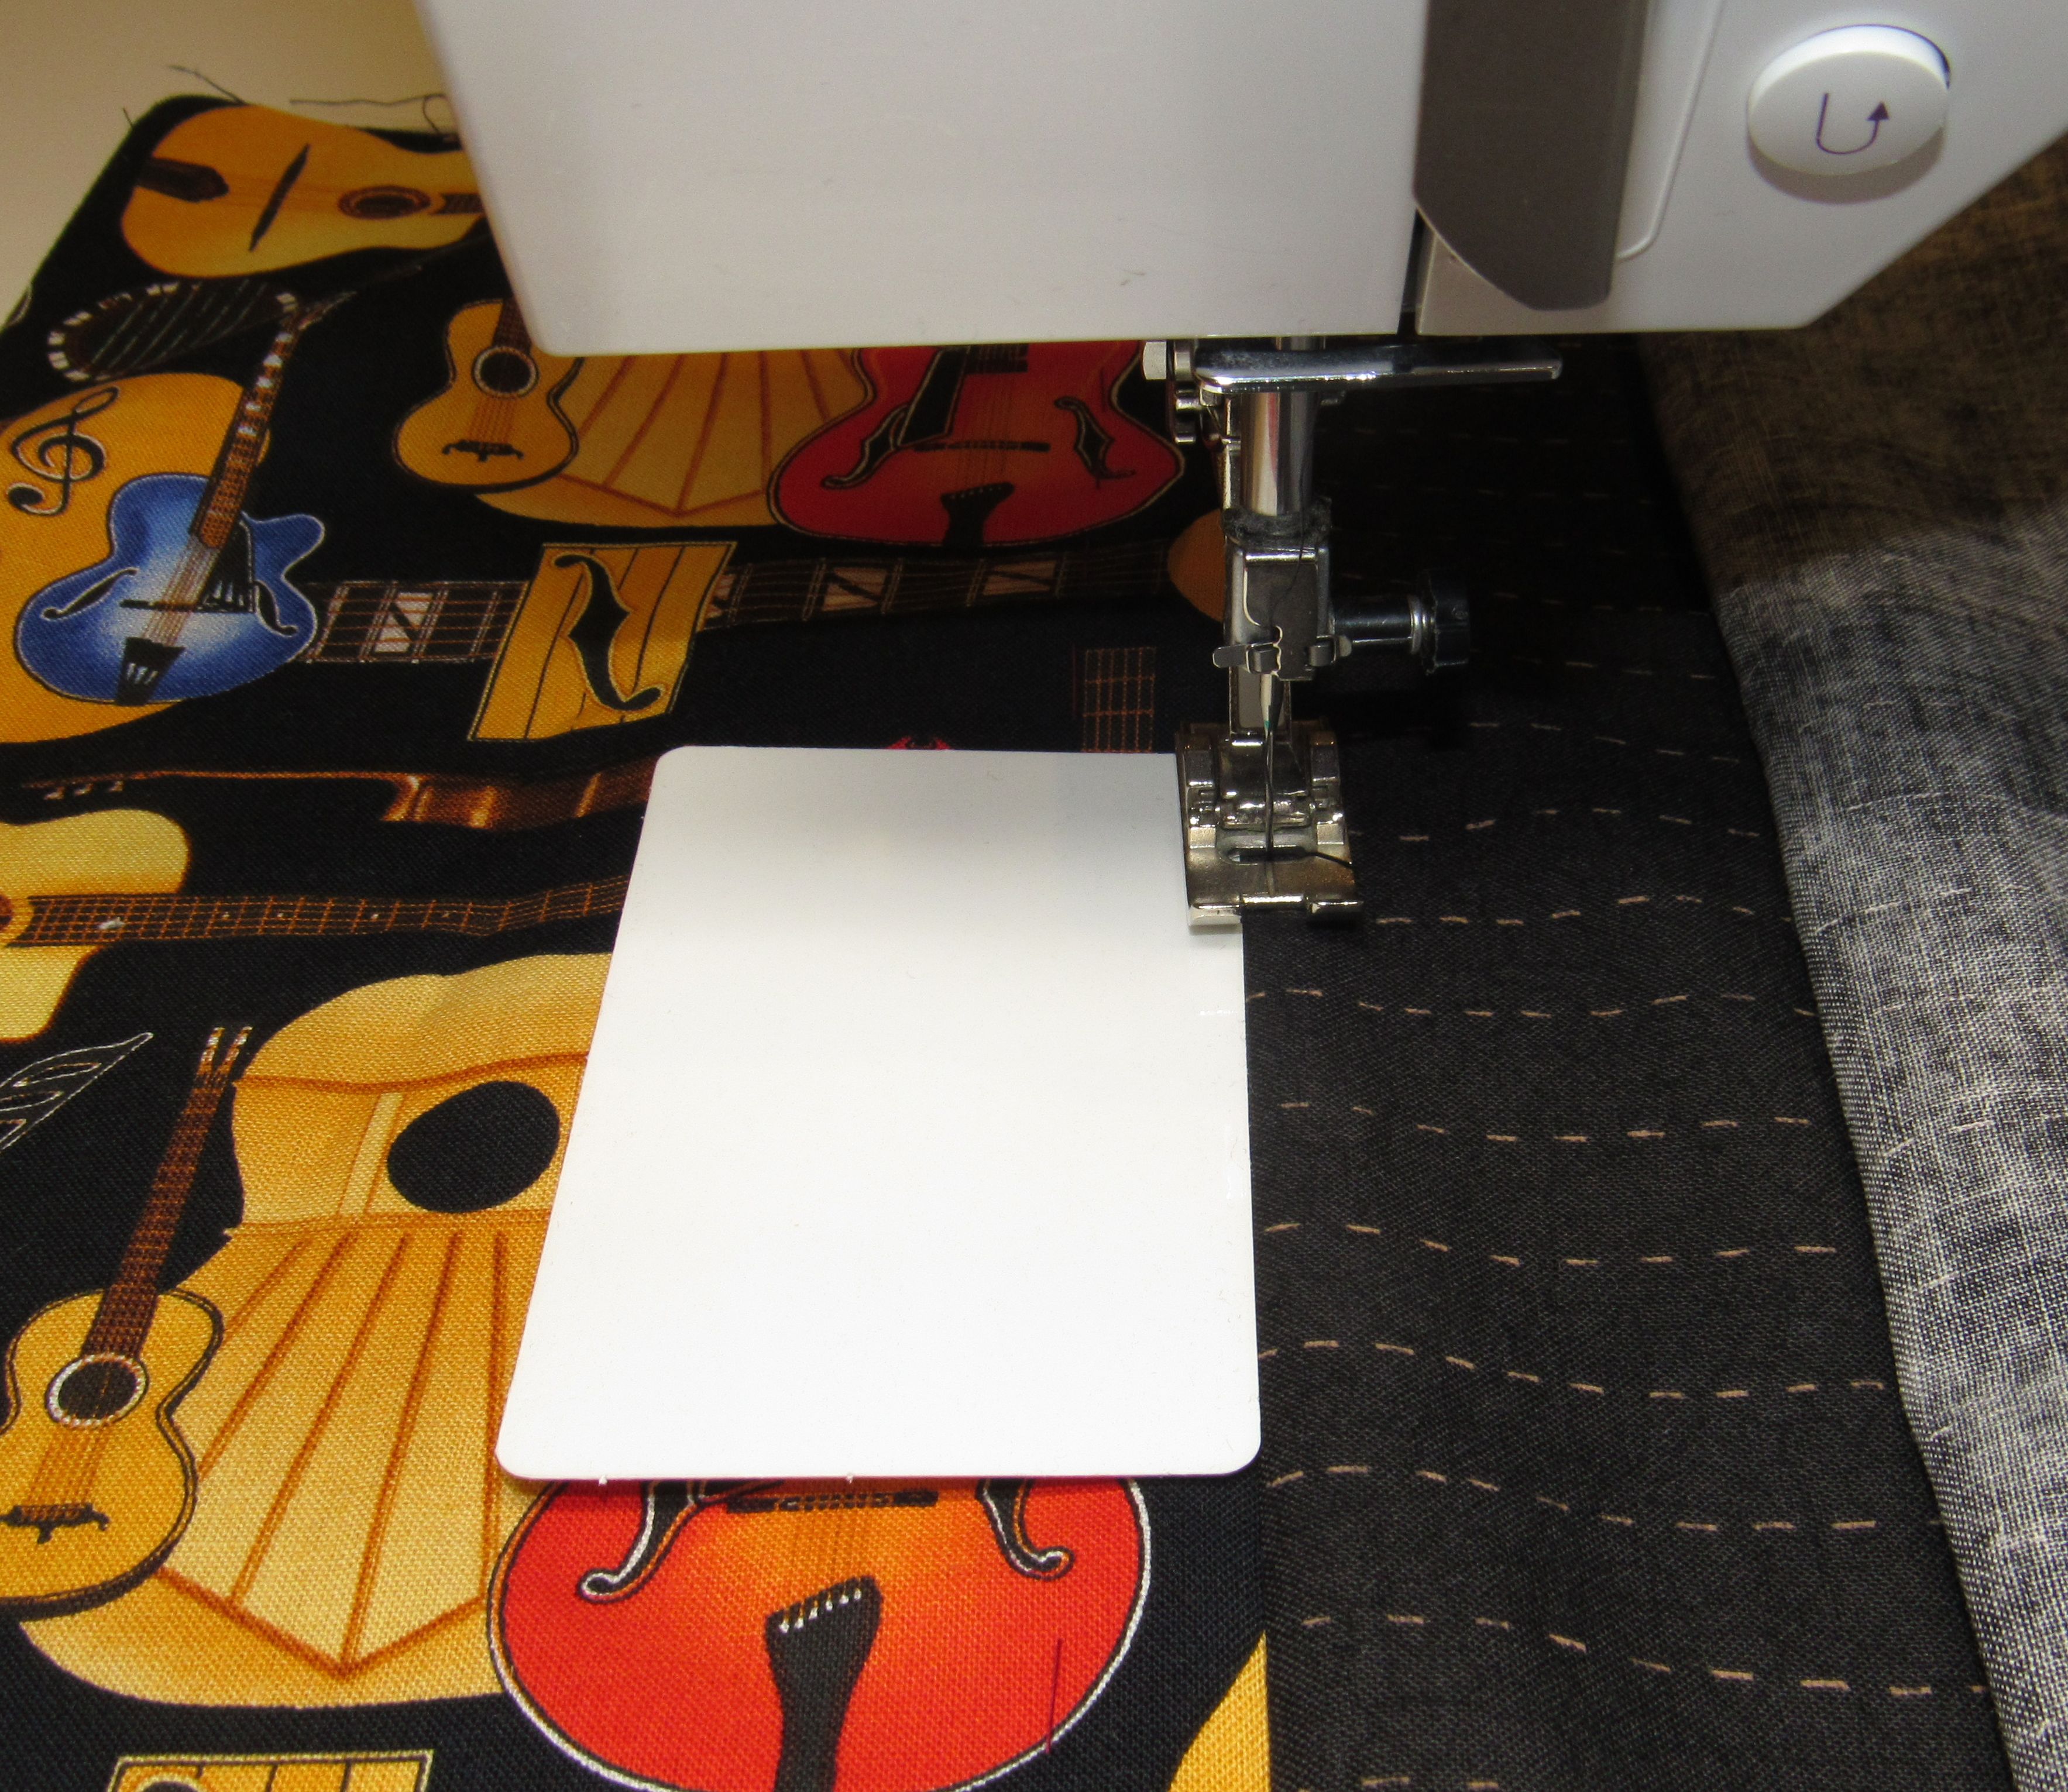
Sewing over all the seam intersections in the tree blocks meant that progress was slow and challenged my ability to sew straight.

Every itty-bitty strip of sashing had to be generously pinned. I used the wedged side of a cuticle stick to flatten the seam allowance ahead of the needle piercing it as it advanced through the machine.

Once the needle made contact with the seam allowance, it was necessary to raise the presser foot to make sure the seam allowance wasn’t pushed forward. On top of that, I often needed to insert the compensating plates tool under the back of the presser foot to ensure even feeding of the layers.

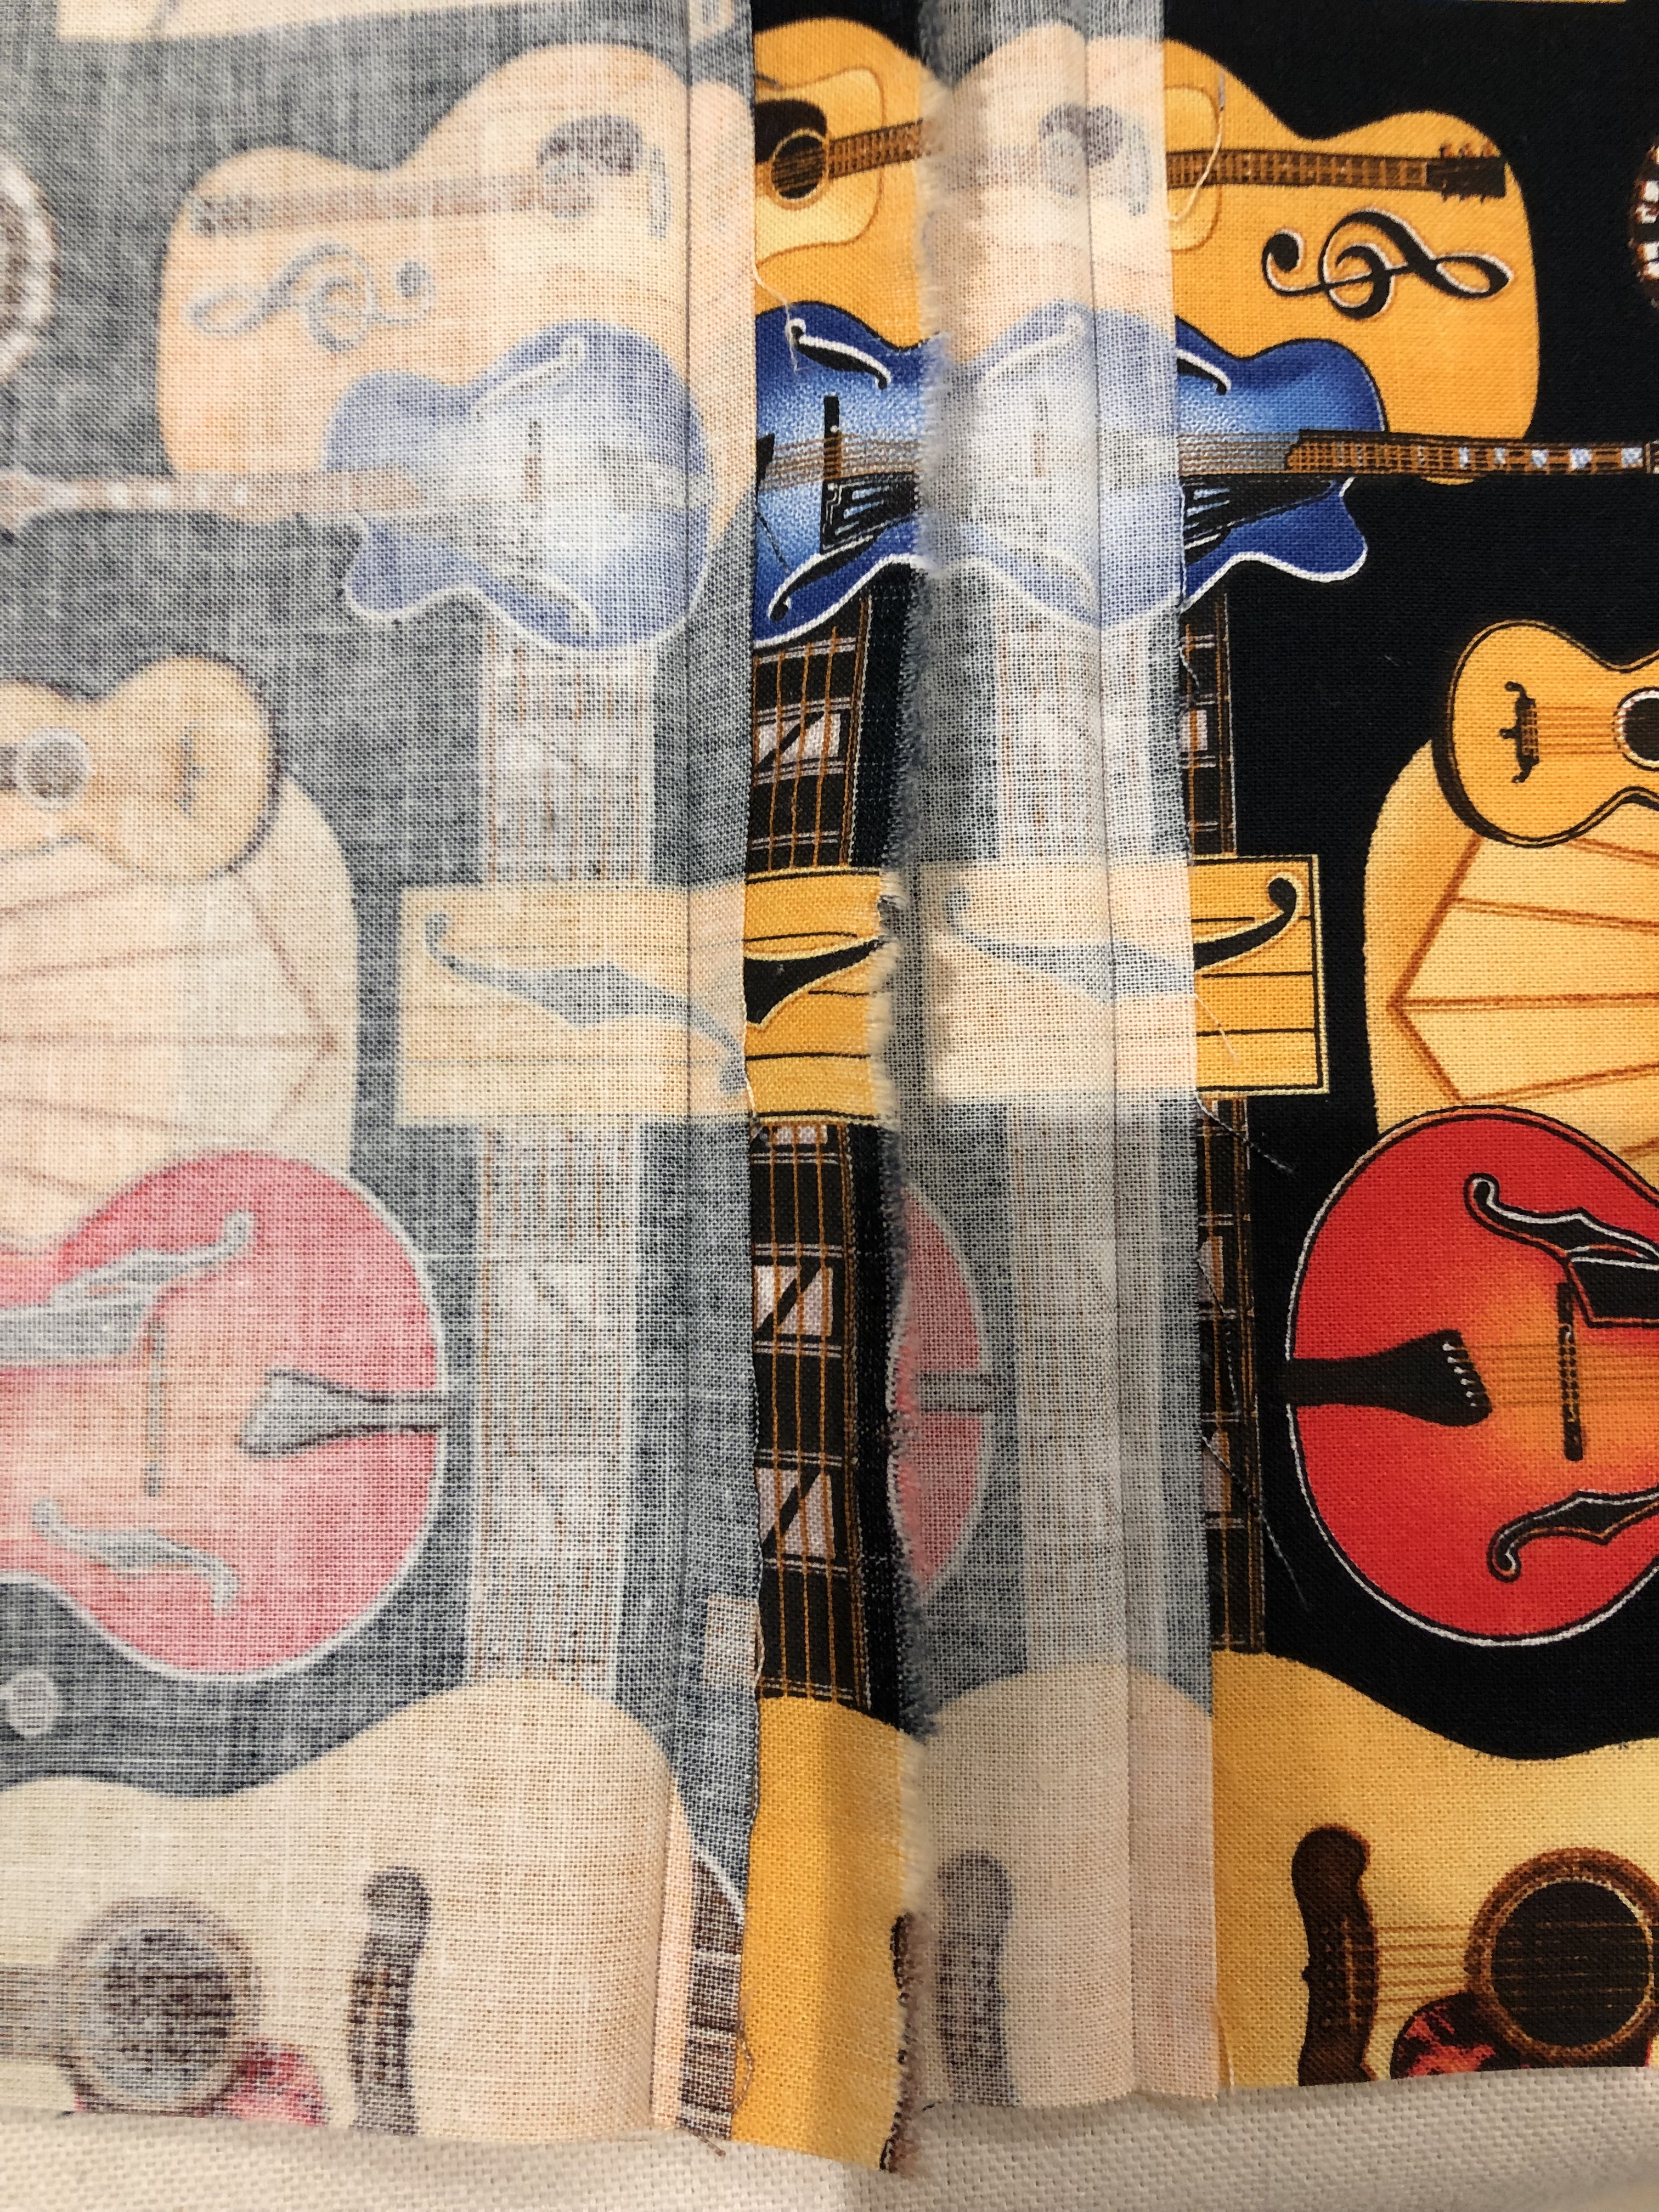
Pressing wasn’t easy, either. My preference is to press away from the sashing strip, easy to do in the direction of the setting squares, but a nightmare when it’s going toward a tree block. I may have to rethink this part . . . .

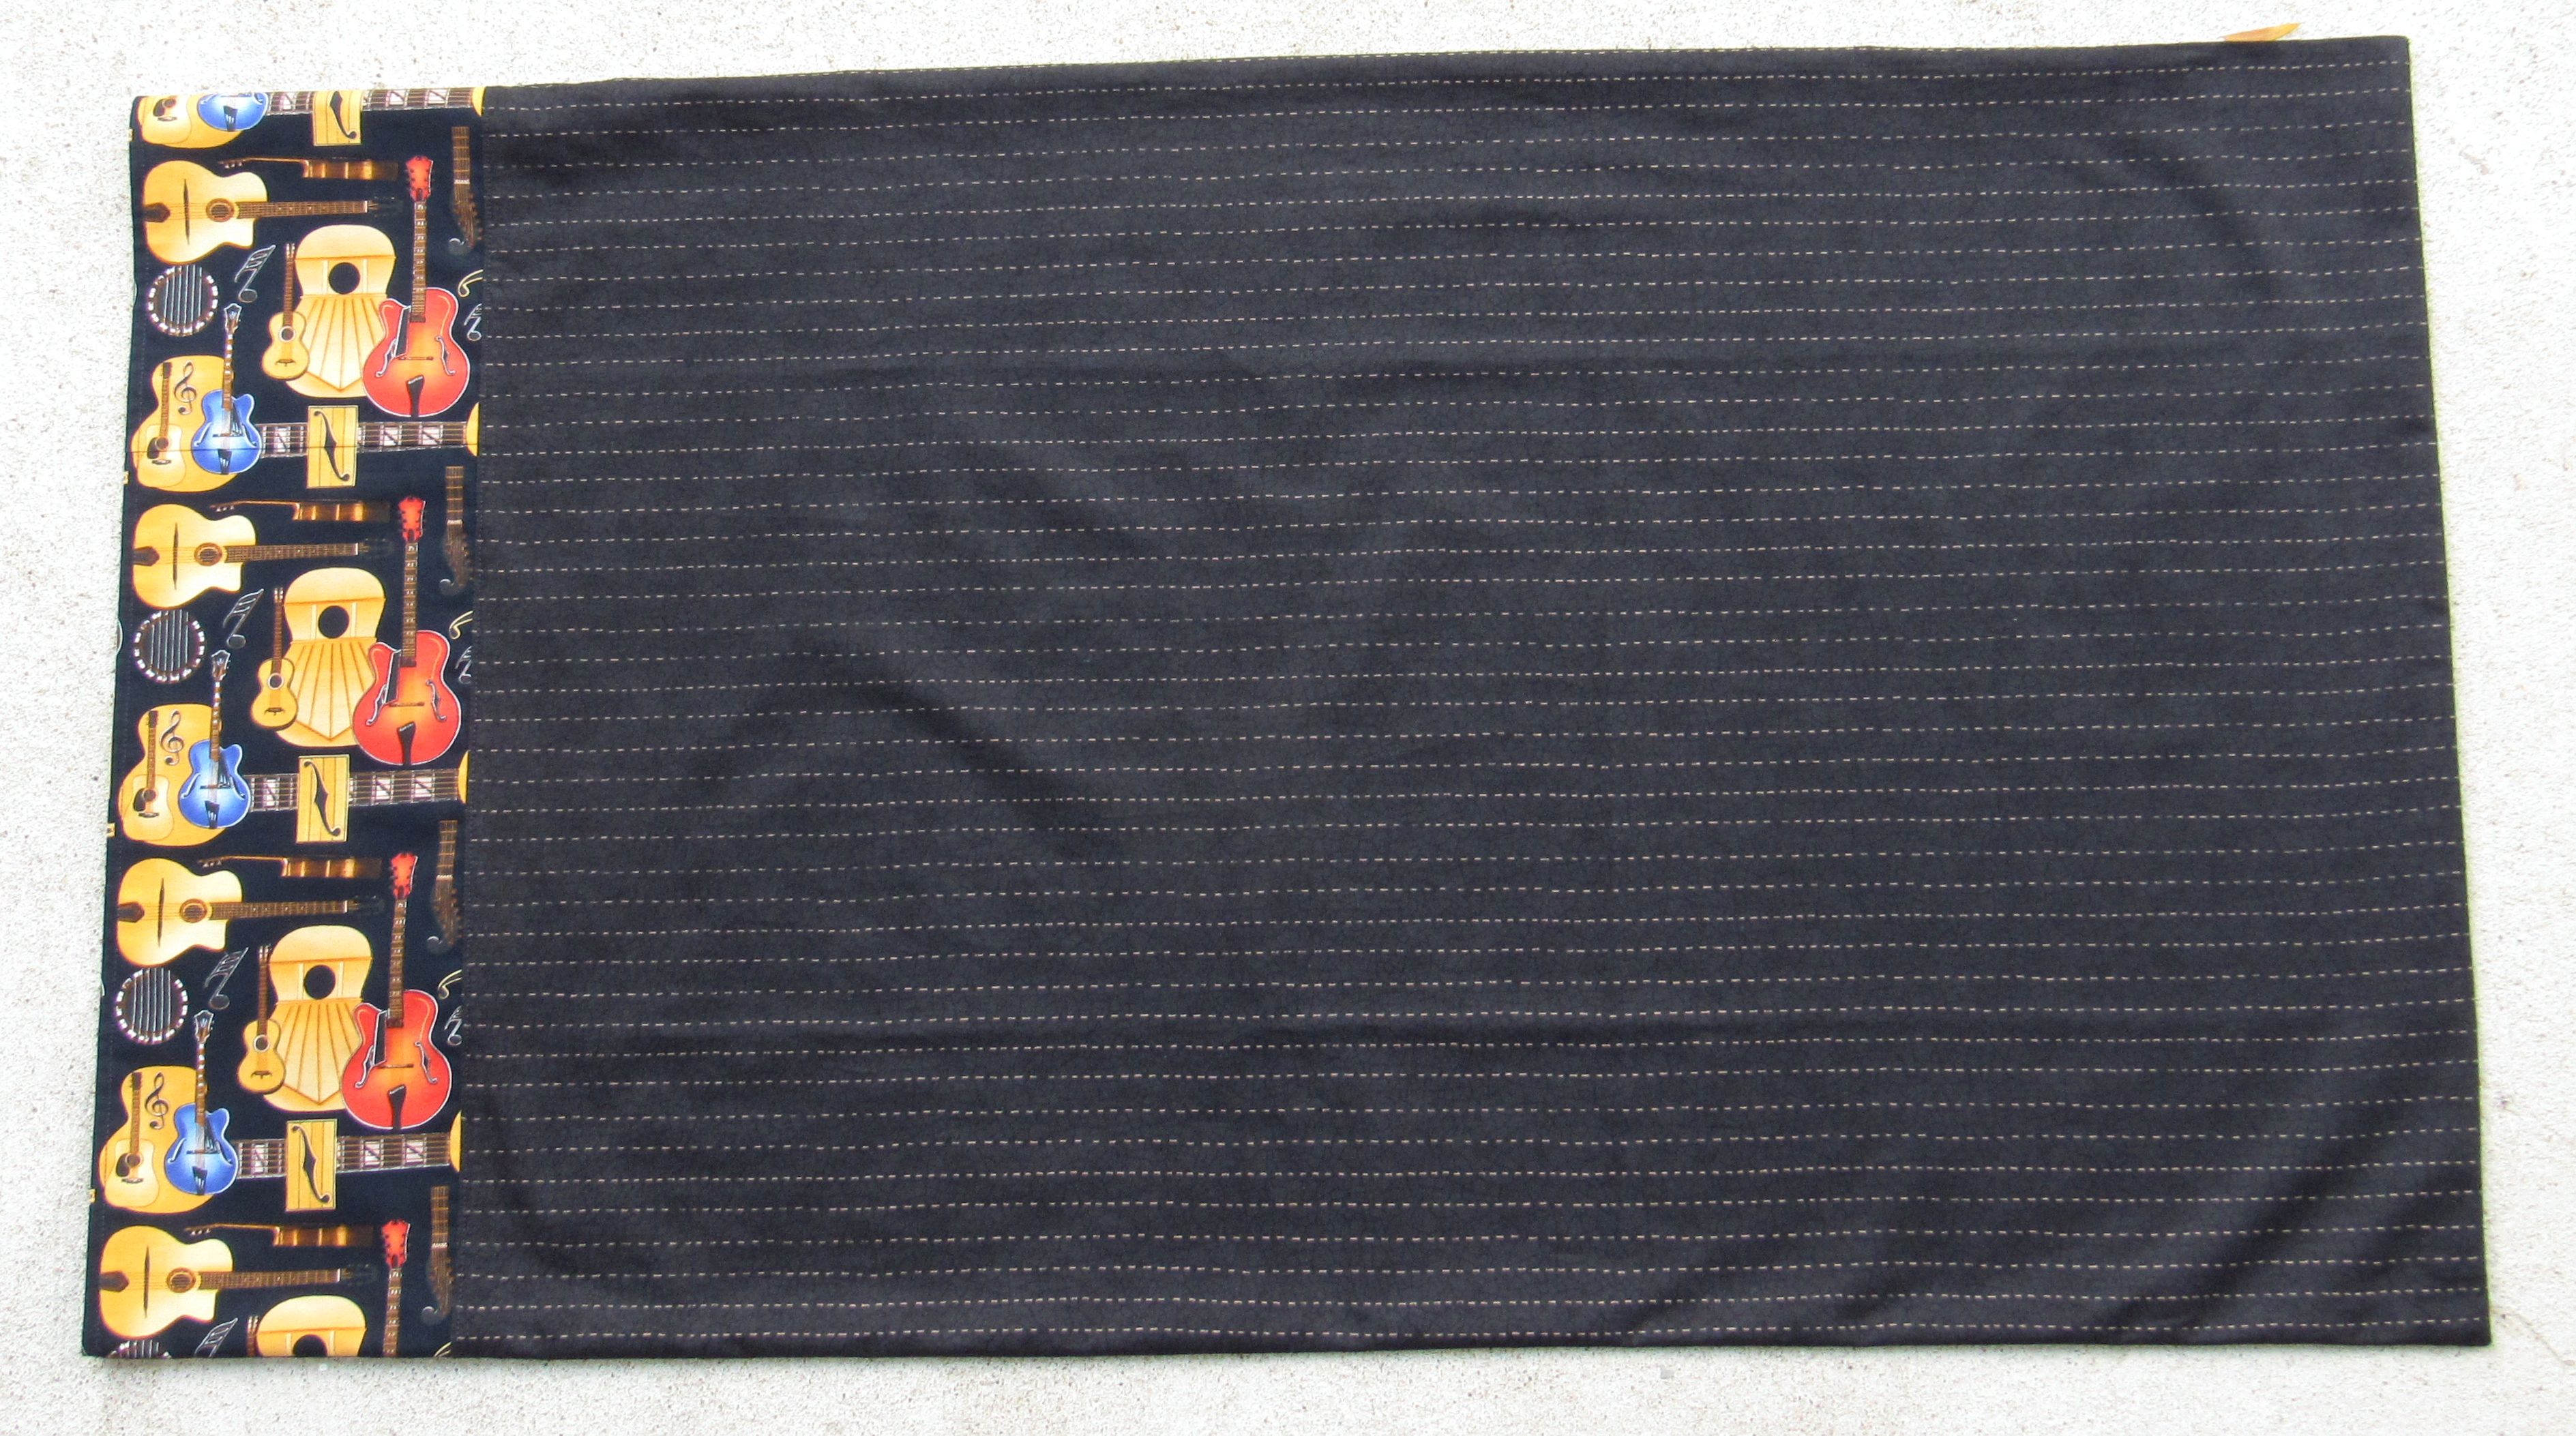
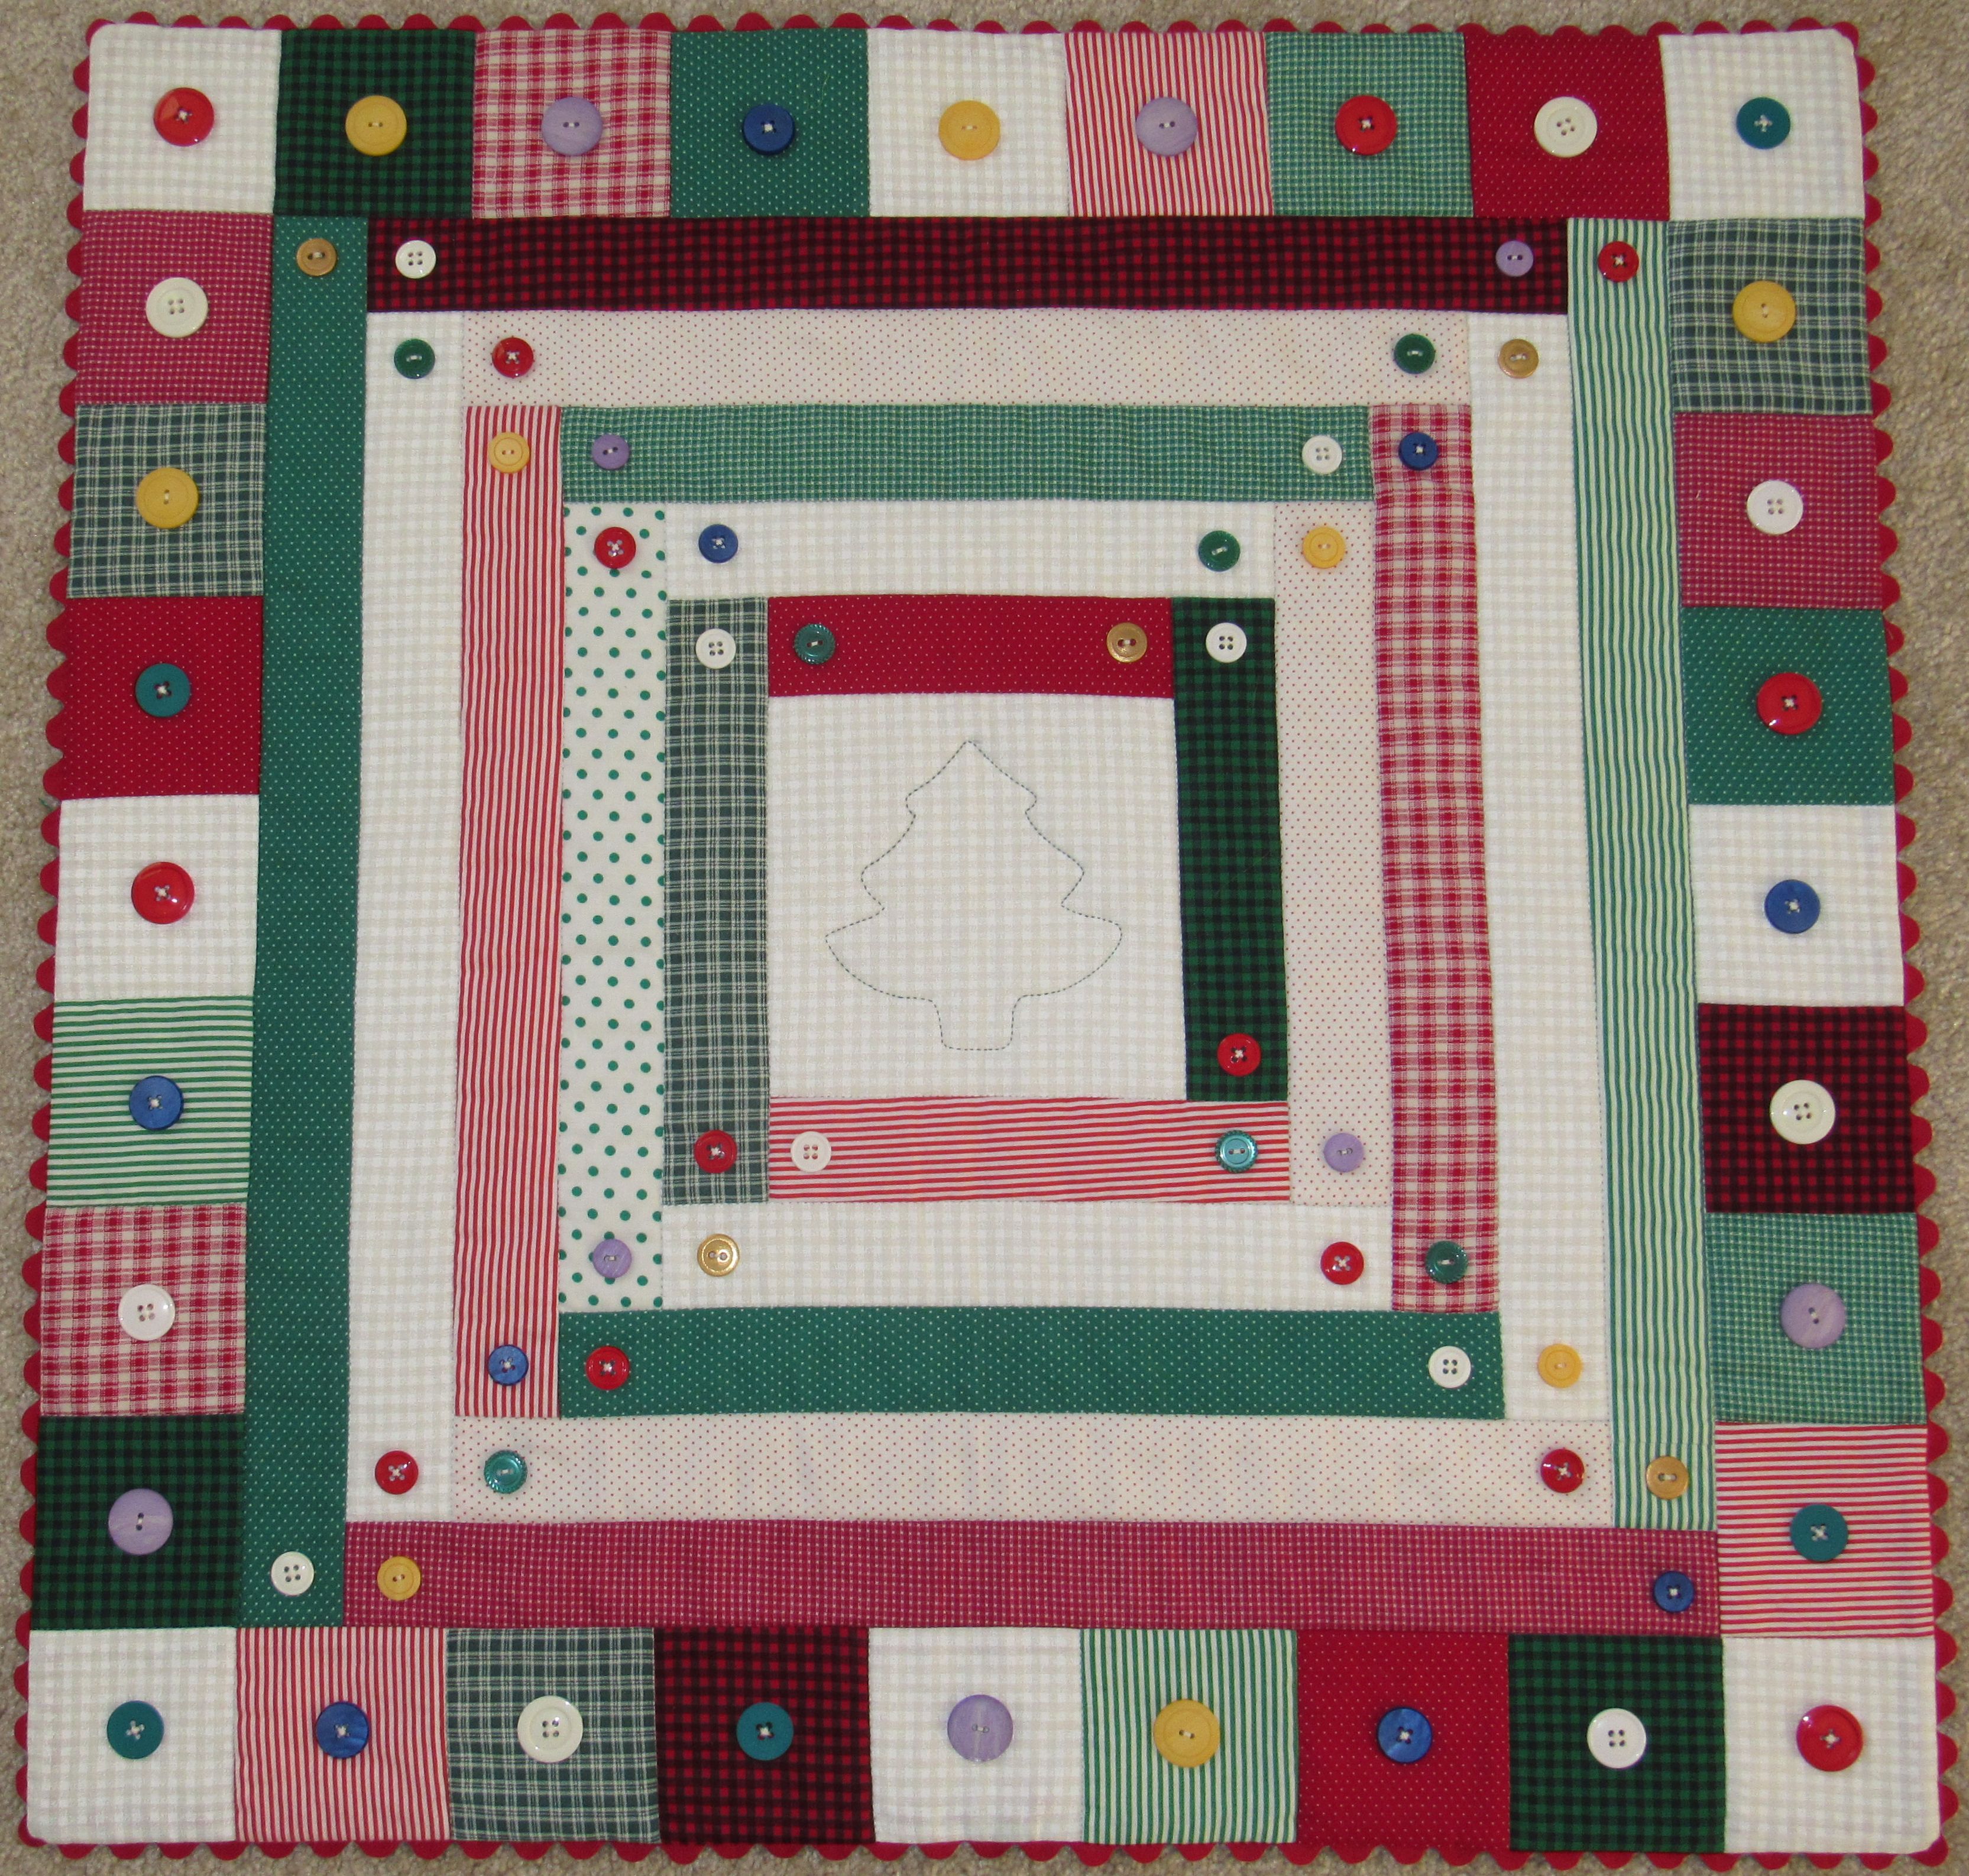
Still, looking at it from the front side gives me hope that everything might be okay in the end.

Getting to this point wasn’t exactly smooth sailing, but I’m pretty pleased with how it’s taking shape. Those tree blocks haven’t lost any of their cool since I made the very first one.

Up next: long diagonal sashing strips.

Leave a comment

Filed under piecing, rotary cutting

A return to calm in my sewing room

What a huge relief that this 84″ x 84″ top is finally done and out of my sewing room.

When a friend showed me 20 applique blocks she found in her mom’s house after she died, I jumped at the chance to figure out how to put them together. My blind enthusiasm and eagerness to help quickly disappeared once I took a closer look and discovered that the blocks were not all the same size and were not square. Uh-oh.

This project languished in my sewing room from late 2022 to early February this year in a one-step-forward-four-steps-back fashion: lots of thinking, lots of marking, lots of pinning, hand basting, sewing, ripping (including my hair), an intolerable number of conversations with John about the math and geometry, and incessant measuring. The brain damage was real.

Complicating progress was the secondary pattern that clearly was intended in the final layout, achieved by arranging the blocks with the green gingham bases facing each other to create a center square-in-a-square.

Unfortunately, the angle of the gingham bases was not a consistent 45 degrees, making it difficult to achieve true square. Close was the best I could do.

The yellow boxes highlight the difference in the width of the seam allowances on two sides.

Establishing a straight sewing line to create an acceptable looking square-in-a-square was a balancing act between having enough seam allowance and matching points.

Marking and basting before sewing didn’t always guarantee that the blocks would lie flat on the first try. Corrections usually created more trouble elsewhere.

Sashing was used to connect the four quadrants, with additional sashing to frame everything in my attempt to produce a finished center square. If I could get to that point, building out of the rest of the top would be easy.

I did my best to align the center of each quadrant with that of its neighbor, but the sashings measured different widths. It didn’t look great, but. . . . The measurement from the center of any given quadrant to the midpoint of any adjacent sashing was the same for all four quadrants. This was key to achieving a center that would be a true square.

One crazy issue cropped up when sewing the blue quadrant together. One of the blocks didn’t have enough fabric for a quarter-inch seam allowance so I had to create it.

Mostly out of fear, I took the precaution not to trim any of the seam allowances to one-quarter inch. To reduce bulk, I pressed open all the seam allowances forming each square-in-a-square. I kept thinking that if my friend didn’t like the finished top, at least I could take it apart and return all the blocks to her intact.

Also, if a seam allowance contained a selvage edge, it remained.

When the center was finally pieced and ready for the green border, there were so many markings on the wrong sides of the blocks and sashings, I ended up hand washing the center section to remove them before building out the rest of the top.

This project took forever because there were so many issues to work through that I would get frustrated and walk away for days, sometimes even weeks. When something you ordinarily love to do becomes more like a dreaded chore, shifting into avoidance mode is inevitable. In the interim, the guilt I felt when not working on it prevented me from sewing or quilting my own projects, so my quilting life has been a little strange these past 16 months.

Here are my three take-aways from this project:

  1. If hell were to freeze over, participation in a block exchange would still never be in my future.
  2. Quilting math is not difficult or mysterious when you can control it from the beginning.
  3. I have a profound regard for people who rescue unfinished quilts and blocks.

Thanks for stopping by!

Leave a comment

Filed under designing, piecing

Guitar pillowcase, version 2

To ease back into a sewing groove for the new year, I made a pillowcase for our son, Ross.

A couple years ago, he brought out the guitar pillowcase I made for him when he was a high school junior to show that it was cratering fast, hinting that a replacement would be nice.

This was the novelty fabric used for the pillowcase, and there was only a half yard of it.

I decided on a six-inch width for the cuff and no trim piece because I didn’t have any coordinating fabric for one. I cut a window in a sheet of copy paper to determine the best way to center and show off the images in the print.

Cutting a width-of-fabric strip would have been the easiest way to go, but then most of the guitars would be oriented horizontally, which looked bad.

I shifted the template 90 degrees and played.

The cropping shown below looked the best. It would have been a mistake not to include the bright blue and orange colors in the design. Those pops of color would offer some needed contrast to an overall dark color scheme.

I cut three eight-inch wide sections from the leftover fabric to give myself plenty of breathing room and turned to the internet for guidance on print matching.

Fortunately, I still had some fabric glue from making The Bias Tape quilt.

Before turning under and pressing a crease into the fabric edge in preparation for gluing it to the other piece, I drew a pencil line one-quarter inch from the edge on the wrong side so I would have a precise, visible sewing line. I’ve never had much confidence sewing on a fabric crease, so this helped a lot.

It was a relief to see that this technique worked as well as it did, particularly since it was my first attempt.

Since there was plenty of it, the main fabric for the pillowcase was used to back the cuff.

I trimmed and finished the seam allowance with an overcast stitch and top stitched on both sides of the cuff.

The lack of contrast between the cuff and case fabrics made it difficult to keep the edge of the presser foot aligned while top stitching. Gently pressing this thin, white plastic card against the ditch of the seam provided the necessary contrast and worked perfectly.

I hope Ross likes it.

Leave a comment

Filed under fabric, kids, piecing

Log cabin Christmas: upgrade

In September, I posted about tending to some odds and ends with respect to my finished quilts. This little Christmas wall hanging is the last one that needed attention.

Made in 1999 with plaids, stripes, checks, dots, buttons and jumbo rick rack, this project was featured in a country craft magazine at a time when I was brand new to quilting.

Because it was small, (26″ x 26″) it looked like something I could manage as a beginner. I used whatever fabric I had on hand but did have fun shopping for the buttons. On a visit to our house that year, my mom showed me how to incorporate the rick rack in the border.

Years later, I realized that the project was insufficiently quilted and would never survive the washing machine. The stitches holding the buttons weren’t enough,

nor was the hand quilting in the center square.

So, for the first task, I turned to my default option and ditch quilted it.

The second task was to add a label.

The last task was upgrading the thread loops that hold the dowel rod used to hang the quilt. This project cannot have a hanging sleeve because it would cover the area across the top where buttons are attached.

If a button ever came off, the hanging sleeve would have to be removed to sew the button back on.

The original loops were a double strand of 50-weight cotton thread and were beginning to show signs of wear. I removed and replaced them with a single strand of Perle cotton #5.

The only task remaining belongs to John. He said he would sand and clear coat the dowel rod so that it would not snag the thread loops on the back.

Happy New Year!

2 Comments

Filed under Christmas, machine quilting

Ribbon ornaments

I dug into my ribbon stash to make this year’s Christmas ornaments. A 7/8-inch, two-toned red ribbon was used to make these pretty poinsettia ornaments.

A decorative button with an antique gold finish from my grandmother was stitched to each center.

Next, I made these origami ornaments, and honestly, they were way more trouble than they were worth, with the fuss factor exceeding 11. I won’t discard them, but they are seriously underwhelming, given the effort.

The instructions for these ornaments were in the book Quick and Easy Ways with Ribbon by Ceci Johnson – well, quick and easy except for the ones on page 44.

I ended up making a paper template to sort out the details and minimize destruction of perfectly good ribbon.

The ornament features a pair of two-inch box pleats (the beginning of all the fussing since most ribbon is polyester and does not hold a crease well). The pleats are secured with a stitching line down the center.

A hanging loop is added, followed by stitching the short ends together. The ornament is then turned right side out and the pleat edges are tacked at the center with two small hand stitches.

The last ornament I made was a woven ribbon wreath. 

This project calls for ribbon that is the same on both sides. Most of the internet demos used ⅛-inch wide ribbon, requiring about two yards. My ribbon was ⅜ inches wide and required four yards for the circle. I like how it turned out, but I’m not sure it’s done. I’m thinking about adding a small bow at the top. More importantly, I might brush some needlework stiffener onto the back so that it holds its shape better.

Thanks for stopping by. Merry Christmas!

Leave a comment

Filed under Christmas

Quilt festival 2023

A day spent at the Houston quilt show is always a treat.

I went on opening day and enjoyed wandering the vendor aisles and gushing over all the beautiful quilts, especially those of the applique variety.

One thing I noticed this year was a much-reduced quantity of fabric for sale, compared to shows in previous years when it was common for vendor booths to burst at the seams with fabric. I would chalk this up to a marketplace realignment with reality. High inflation is stressing budgets, along with the fact that most quilters have healthy stashes and are shopping them first to use up what they have.

I bought two cones of 50-weight cotton thread for machine quilting at the Superior Threads booth. It’s a dependable brand and has always delivered great results when I’ve used it.

Full Line Stencil company had a booth at the show, so I chose a couple of their designs to try.

They offer some great motifs but I’ve shied away from them because so many of the patterns require retracing quilting lines as you advance. Neither of these two require that – just continuous lines without the backtracking.

I came home with far more pictures than can be shown in this space, but these were among my favorite quilts at this year’s show – apologies in advance for a couple which are slightly blurred but still worth a look. Enjoy!

Mosaic by Hope Wilmarth

Into the Sunshine by Patricia Hechler

Floral Symphony No. 2 by Mariya Waters

Arabesque by Yokoi Yuki

Coming Home by Lyn Keogh

Smile for You by Keiko Minami

With God’s Grace by Carol E. Smith

Spring Song by Linda Riesterer

2 Comments

Filed under miscellaneous

Odds and Ends

Part of this week was devoted to repairing two quilts, labeling one, and creating a hanging sleeve for another.

I made this I-spy-ish quilt in 2001 for our younger son,

who, deviously took a pair of scissors to the binding, resulting in this:

My exasperation upon discovering it soared to 11 and resulted in a flood of tears. After 20-plus years, I finally pulled the quilt out of storage to make the repair.

I applied some Fray Check to both sides of the cut on the border and then the back.

Next, I pulled thread to match the border and backing fabrics and set the sewing machine for a zig zag stitch.

The stitch width was set to the maximum allowed while the stitch length was shortened to around .5 – close to settings needed to create a satin stitch, but not quite.

With fingers crossed, I pulled out my box of scraps and found two pieces of leftover binding fabric way down at the bottom.

I trimmed the section of binding that had been damaged by the cut, inserted the new section, joined the ends, and reattached the binding to the quilt.

That tiny cut, which measured just 3/16″ x 3/8″ and took all of one second to do, required the un-sewing and resewing of 21 inches of binding and about three hours of time. Thinking about it in that context probably explains why I’ve avoided repairing it all these years.

I made this quilt 10 years ago

and for whatever reason, never made a label, so I got busy and checked that task off the list.

The little tulip wall hanging I made during Covid needed a hanging sleeve.

It’s basted into place in preparation for stitching it down while watching Casablanca or another Humphrey Bogart movie we have saved on the DVR.

And finally, there’s this lap quilt, Bricks and Blocks, which was my first finished quilt.

Some of the quilting stitches were coming out so I pulled out the walking foot and fixed them. The only task remaining is to cross stitch and attach a label for it, after which I can turn my attention back to creating new quilts. Thanks for stopping by!

Leave a comment

Filed under binding, kids

Family preservation project

The weather this summer has given new meaning to the word hot. Even though this is the time of year people in the south live in air conditioning 24/7, this unrelenting heat has sapped my enthusiasm to sew. Instead, I got to work on a goal I’ve had for several years to organize and digitize all our family photos.

This activity is a natural follow up to formalizing our wills and final health directives after I retired last September. The difference is that pictures, family diaries and other keepsakes are much more fun to handle than your standard (yawn) legal documents.

11 trays of 140 = 1540 slides

Starting with our vacation slides, John and I took several evenings to view and weed out duplicates, the overexposed, the underexposed, and those with boring compositions.

Having the slides housed in trays meant that, thank goodness, I had at least taken the time way back when to organize them in chronological order right after each trip. All I had to do after the weed-out process was pull them out of the tray, number them and bag them in sets of 25.

Then I ordered the kit from the company that will be digitizing them.

Next, I tackled old family slides – pictures taken by both my grandfathers. One of the trays had slides from my paternal grandfather. I also had four boxes of 60-count slide trays from my maternal grandfather. Flashback to those obnoxious flash bulbs!

I had never seen this type of slide tray. Marketed as spill proof, a tension spring on each end of the tray keeps the slides from falling out.

It took a couple days to sort, chronologically organize (thank goodness for hand-written notes and date stamping) and merge the slides from both sides of the family. I bagged two small sets of stray slides, needing more information from other family members before incorporating them into the mix.

My brother left here after his annual visit two weeks ago with a list of items to retrieve from our dad’s house – with his permission, of course. It will be fun to see what phase two of this project has in store.

Leave a comment

Filed under miscellaneous

Crib sheet, pieced version

There were two cuts of the A-B-C blocks fabric left in my nursery collection stash, and I was determined to use them to make one more crib sheet.

Unfortunately, the larger of the two was only 1½ yards (54 inches), so panels would have to be added to each end to get to a working size of 68 inches. Fortunately, the other cut was 36 inches, which meant that there was plenty of extra fabric.

The challenge was to make sure that the corner square cutouts used to create the pockets would not interfere with or be located too close to the seams joining the panels to the main piece of fabric.

Had I followed the math, the addition of 7-inch panels would have been needed for each side to get to the starting length of 68 inches.

Under this scenario, the panel seams would have been compromised when cutting out the 8-inch corner squares, likely creating a lot of bulk and other sewing issues with those two things interfering with each other.

The solution was to reduce the 54-inch piece of fabric to a finished size of 50 inches and add wider, 9-inch panels to each side. This would provide a 1-inch clearance between the panel seam and the seam creating the corner pockets.

It was also important to pay attention to print direction when sewing the panels to each end.

I finished the seams the same way I did for the corner pockets, overcasting the raw edge of the seam allowance

and then securing the seam allowance with an anchor stitch a scant ⅛-inch from the edge.

At one point, I thought I might try print matching the panels to the main length of fabric, but after seeing that a straight seam would in no way be possible, it was a no-brainer to abandon the idea.

The finished pieced sheet turned out fine, with sufficient space between the corner pocket seam and the panel seam.

One other positive is that the position of the two seams needed to lengthen the fabric are close enough to the top and bottom edges of the mattress where they will be covered by the bumper pads.

Sleep well, baby boy.

Leave a comment

Filed under kids, piecing

Crib sheets

1 king-sized sheet set yields 4 crib sheets.

There comes a time in the life span of bed sheets when the hems split

and the elastic on the fitted one craters.

In our case, the timing of their demise was perfect. Voilà! Crib sheets!

I hate to throw away stuff that still has a lot of life left in it, and our recently expired sheets were no exception. I don’t recall when the idea popped into my head to repurpose them into crib sheets, but having followed through on it, I think it was worth the effort – and a comfort knowing that those perfectly good textiles are not rotting in a landfill – yet.

I made two additional sheets out of fabric from the nursery collection, one from this print

and one from this print.

I turned to the internet for guidance on making crib sheets, and it did not disappoint, particularly with respect to what NOT to do. I was amazed at the volume of sources who eyeball every measurement, don’t bother to iron their pre-washed fabric before cutting, don’t try to cut or sew straight, and in general, advance the notion that good enough is the new standard. I’m not asking for perfection here because only my mom could come that close; however, if you are putting yourself forward as an expert on how to do something, for goodness’ sake, have some pride in what you’re demonstrating.

Once my research was over, I extracted all the usable fabric from both sheets by snipping and then tearing off all the elastic and hems.

Then I snipped and tore each sheet in half to get four fabric pieces, each of which was large enough to make one crib sheet.

I tore the fabric to make it easier to find the straight of grain when it was time to rotary cut the pieces to the working / starting size of 68″ x 45″.

I made a couple of sample corner pockets with big box fabric to figure out how I wanted to tackle the sewing and ended up adding a couple steps to the process.

The first step was straight forward: cut an 8-inch square from each of the four corners of the fabric rectangle.

For each corner, match the two cut edges, right sides together and sew a ¼-inch seam from top to bottom.

Most tutorials went from this step to the casing, but I added two steps.

First, I used the overlock foot/stitch on my machine to enclose the raw edge and then pressed the seam allowance in the direction that it naturally wanted to go. In this case the direction was outward, toward the long side of the sheet.

Second, I anchored the seam allowance into place with a line of stitching slightly less than ⅛-inch from the edge.

It helped to use the edge of the presser foot as a guide and also to move the needle position.

I figured that these extra steps would help keep the sheet from falling apart too quickly since it would be washed a lot, although it’ll be a couple of years before I know if my instincts are correct.

The other advantage is that it gives a nice clean, professional finish to the corner pockets.

I experimented with three different types and widths of elastic: ¼-inch braided, ½-inch woven and ⅜-inch knitted. The woven elastic behaved the best, but I wish it had been available in a narrower width.

I made two sheets with the ½-inch elastic. Because it would require a larger casing, I increased the starting rectangle size to 47″ x 70″ and cut a 9-inch square from each corner. I also added an extra row of stitching to reinforce those casings.

Next: Crib sheet, pieced version

Leave a comment

Filed under kids, Mom